Is a reinforcement mesh or screed mesh needed in screed?
By Staenis | | Manual
Is a reinforcement mesh or screed mesh needed in screed?
A screed or screed is a must-have for a solid floor. To prevent cracks in the screed, the screed is often reinforced with mesh reinforcement (also called a chapenet) or fibers. In which cases is a chapenet or fibers used in screed? And is it also a good idea, or is there a better way to reinforce a screed?
Why is a reinforcement mesh used in screed?
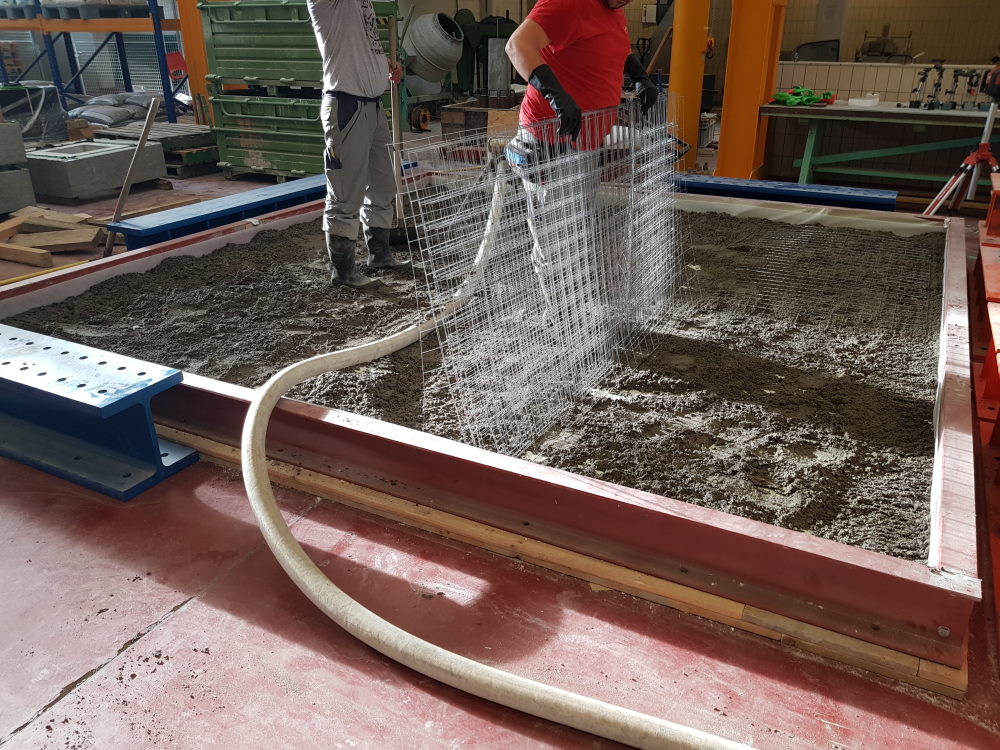
Anyone who wants to install a floor must also provide a screed or subfloor as an intermediate layer. This intermediate layer is placed on the load-bearing floor and serves as a smooth and even base for the floor finish. To reinforce the screed and prevent cracks, reinforcement is often added to the screed. Thanks to the reinforcement, there is less risk of shrinkage cracks and the screed can bear heavier loads, provided that expansion joints are included. The traditional way to reinforce screed is to place a reinforcement mesh (also called screed mesh) in the middle of the screed layer. Just like with reinforced concrete, the reinforcement mesh provides extra strength. Discover here how you can ensure a strong screed yourself, without having to use a screed mesh.
What are the disadvantages of a traditional screed with screed mesh?
A standard reinforcement mesh is designed to reinforce a screed without an insulation layer. Now that we are increasingly using thick insulation layers, this reinforcement causes all kinds of damage (cracks, loose joints, subsidence, etc.). This can be improved. With the handy Staenis grid, you can easily install your sturdy screed yourself, with the grid serving as up-to-date reinforcement. In this way, a reinforcement mesh becomes unnecessary, resulting in a saving of 3 euros per square meter. But there is more. A traditional screed floor with reinforcement mesh or fibers can easily end up as much as 5 mm uneven in the corners, while a screed with Staenis grid remains perfectly level. Thick insulation layers and larger tile formats are also no longer a problem. Discover all the technical advantages of the Staenis grid.

Fiber reinforcement as an alternative to a screed mesh, a good idea?
Can't you reinforce your screed with fibre reinforcement instead of using a screed mesh? That's right, but then you have to opt for fibre reinforcement with additives. With fibre reinforcement with additives, you can leave out the screed mesh, because the technical properties of the screed are adjusted. This makes your screed even harder and increases its load-bearing capacity. In contrast, ordinary fibre reinforcement only ensures a lower risk of cracks and tears for the first 28 days. After that, ordinary fibre reinforcement is no longer useful, not even as reinforcement. With ordinary fibre reinforcement, you still need a reinforcement mesh. Tests by the WTCB (now BuildWise) show that ordinary fibre reinforcement offers no added value in terms of strength or limiting cracks and tears. If you do use fibre reinforcement, you still need a reinforcement mesh. Please note: fibre reinforcement with additives is only supplied and installed by professional screed layers. This is usually for public areas where the loads are very high, or when a thin screed of around 4 cm is sufficient.
Both a reinforcement mesh and fiber reinforcement with additives absorb the thermal stresses caused by underfloor heating and sunlight. Why choose to lay your screed with the Staenis grid? Simple: the Staenis grid divides the stresses into small sections of 0.25 m². As a result, there is never enough stress to create cracks or fissures in the floor finish. A crack- and fissure-free screed is guaranteed! But it doesn’t stop there. With a reinforcement mesh and fiber reinforcement with additives, you always have to take expansion joints into account. However, if you use the Staenis grid, there are shrinkage joints every 50 cm, which together absorb much more shrinkage than traditional expansion joints, which are placed every 6 to 8 meters. Discover your ideal floor build-up and lay your screed with the Staenis grid.
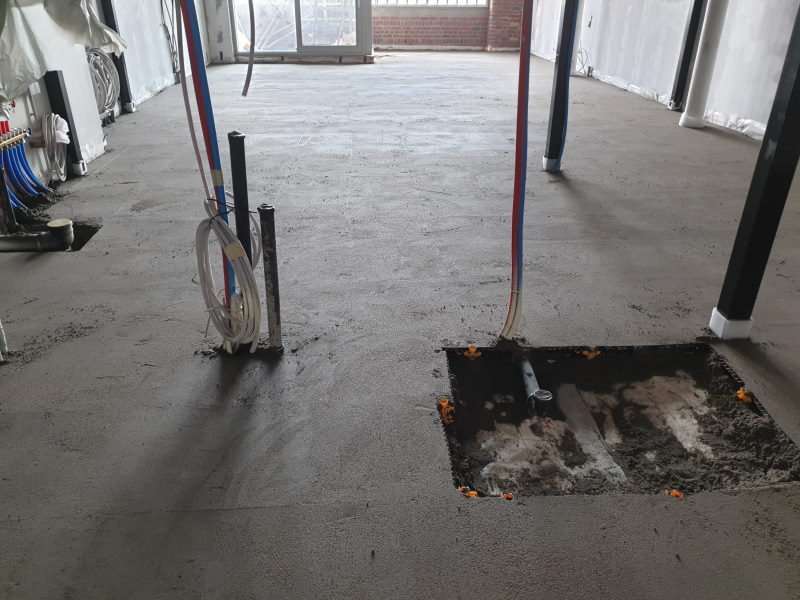
In which cases is reinforcement placed in the screed?
Reinforcement is not necessary for bonded screed, or when a floor covering such as paving stones is placed on your screed/stabilised floor. In all other cases (non-bonded screed, floating screed or a terrace that is tiled) you must provide reinforcement to protect the floor finish against the shrinkage and movements of the screed. Reinforcing screed can be done with screed nets, but both options have their disadvantages. If you want to prevent damage to your floor, then choose a handy self-build system to place your screed: the Staenis grid. Discover how it works.
How do you circumvent the disadvantages of a chapenet?
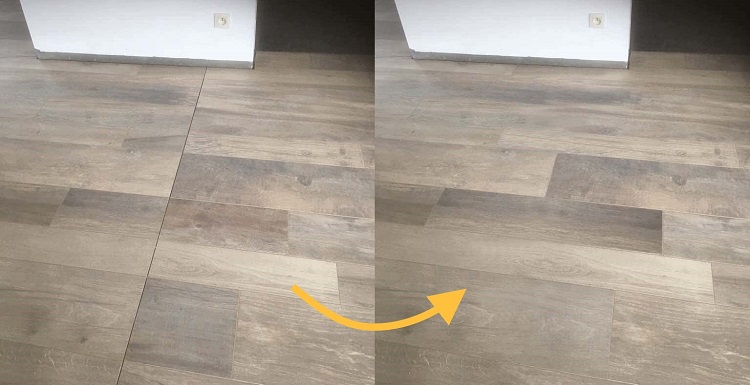
A traditional screed with screed nets will eventually become slightly raised, leading to various types of damage. Think of cracks, subsidence, and loose joints and tiles.
-
Cracks and loose joints appear due to large shrinkage stresses in the screed in combination with the heating and cooling of the floor structure caused by weather conditions and underfloor heating.
-
If you do not provide expansion joints in a normally reinforced screed, the screed will divide itself.
-
When a normally reinforced screed deforms, a depression appears in the insulation layer. The screed becomes domed. This is called the dish-shaped deformation of the screed.
By laying your own screed with the Staenis grid, you prevent these common floor problems. The Staenis grid divides the screed in such a way that the tensions are distributed enormously. The plastic screed grid is built up over the entire floor and remains in the floor. It serves as a reinforcement mesh, levelling system and is an alternative to a decoupling mat. You can place various floor finishes on the screed layer with the Staenis grid. Think of ceramic tiles, natural stone, parquet or a floating floor covering such as laminate. Use the floor build-up overview and discover the ideal floor build-up for your project. You will immediately learn how to place it yourself.
Why provide edge insulation and expansion joints?
Anyone laying screed must always provide edge strips along the walls. The edge insulation allows the screed to expand and shrink without cracks forming. This also prevents cold bridges and sound bridges between the floor and the wall. Even if you lay your screed with the Staenis grid, you must provide edge insulation. Thanks to the Staenis grid, the shrinkage can occur per compartment. Once this is over, after approximately 28 days of drying, the edge insulation ensures that your screed can still move during the heating and cooling of the floor finish and screed, and is not tense between the walls. The fields of the screed can expand and shrink separately, by pushing in the edge insulation. We now also sell edge insulation in our webshop.
How do you achieve a strong screed? Usually, iron reinforcement meshes are used in a screed for strength. But if you lay your screed with the Staenis system, a screed mesh is not necessary. The grid provides a stress-free substrate and a lifelong beautiful and damage-free result. Learn more about your ideal floor build-up and easily order your materials online via the webshop.)