Robot mower edging: make your own with cobblestones
By Staenis | | Manual
Your robot mower keeps the lawn neatly trimmed, but often leaves a strip of grass along the border. A mowing strip that sits flush with the lawn gives the mower room to drive over the edge, allowing its blades to reach the grass at the very outside.
In this garden, we created a curved lawn edge using cobblestones, the Staenis Screed Grid, Cem Classic and white Webercol TB. Below, you can see how the project took shape, from the first line marked in the grass to the finished planted border.
Ready to try it yourself? Order Cem Classic and the screed grid from Staenis. Choose your cobblestones and plan the width, base and bonding method to suit your garden and robot mower before you start.
See the step-by-step photo guide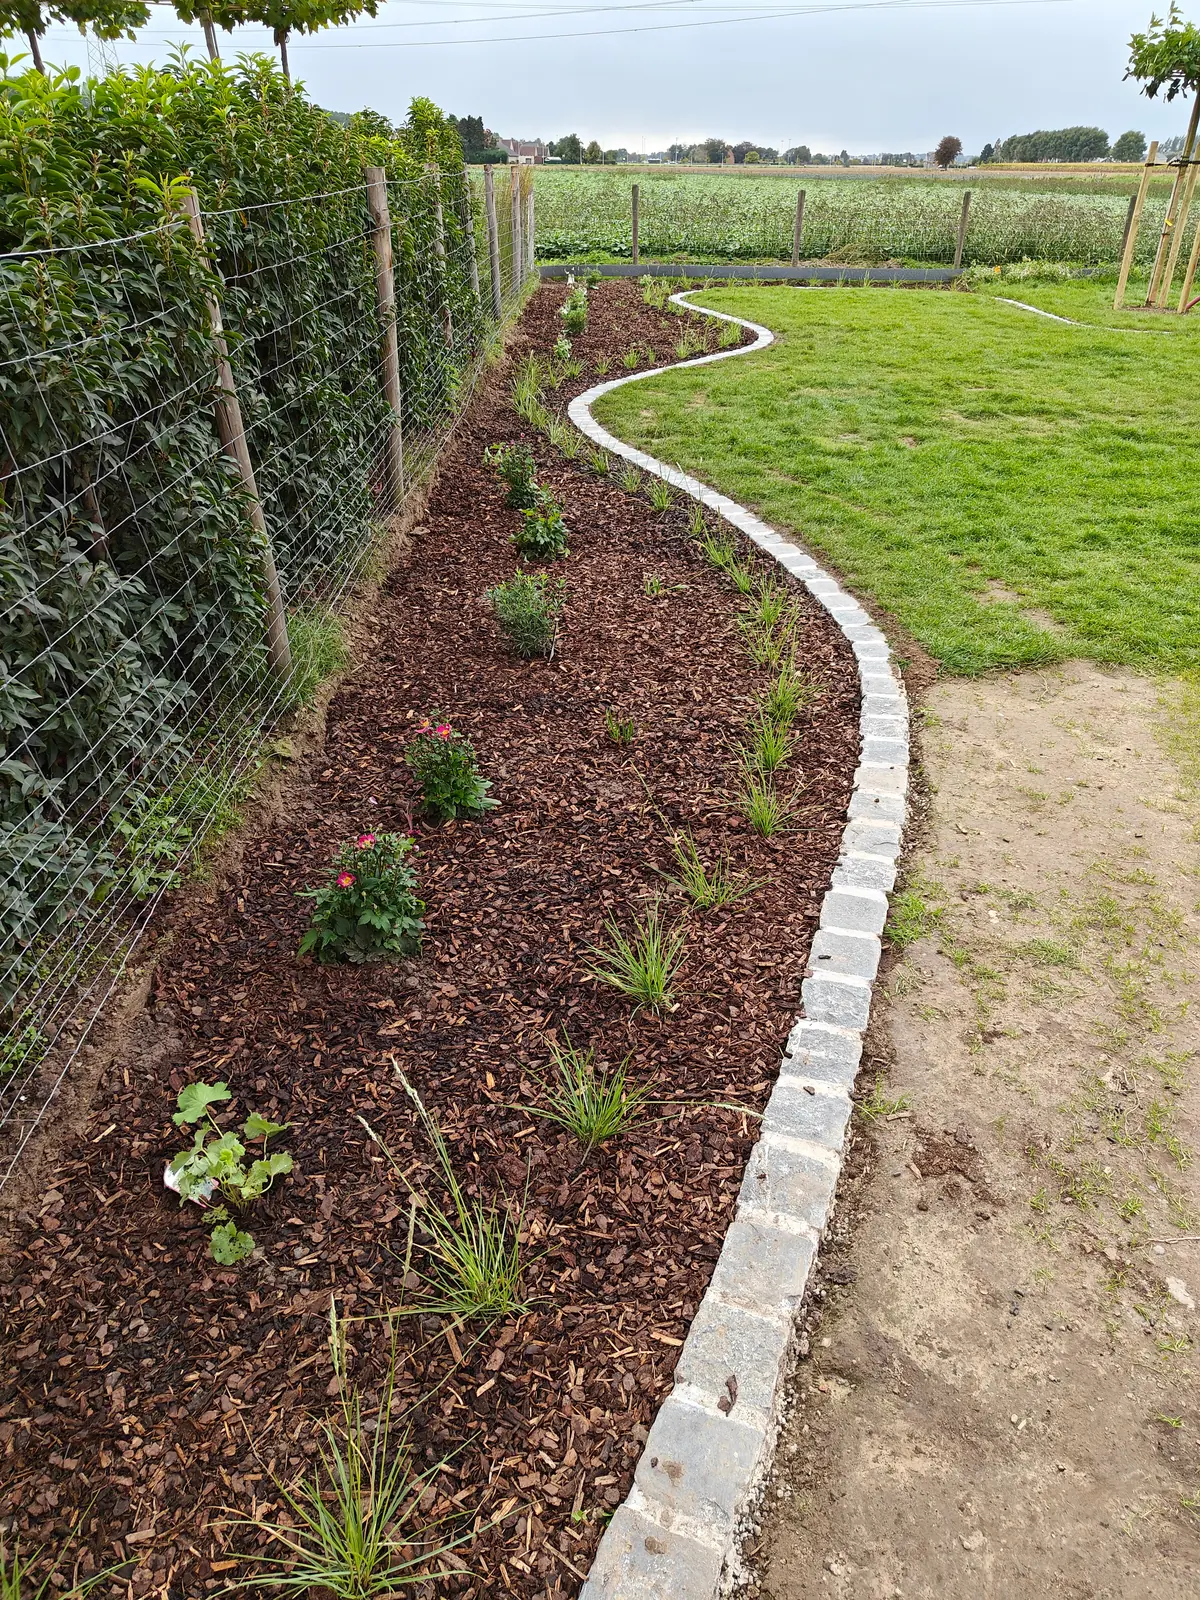
Why add a mowing strip for your robot mower?
A raised edging stone holds soil back, but can prevent your robot mower from getting close enough to the last strip of grass. A mowing strip has its upper surface level with the lawn. The wheels can drive over it while the blades reach the grass edge. It also creates a neat boundary between the lawn and a flower bed, the area around a tree or a patio.
Choose the width to suit your mower
The distance between the blades and the outer edge of the robot mower varies by model. Check your manual for the required drive-over width and the position of the boundary wire or virtual boundary. A single row of cobblestones is not enough for every model. Leave sufficient clearance at curves, beside fences and beneath overhanging plants too.
What do you need for this lawn edging?
- Staenis Screed Grid: the battens and adjustable legs help you maintain the height of the base layer along the route.
- Cem Classic: a lightweight bagged drainage mortar for the draining base layer.
- Cobblestones or suitable natural stone edging with a sufficiently flat upper surface, suitable for outdoor use.
- White Webercol TB: a white thick-bed tile adhesive for laying natural stone outdoors, used with a bonding system suited to the base layer.
- Weberjoint large: the grout we used in this project to finish the joints between the cobblestones.
- A spade, wheelbarrow, mixing tub, suitable mixing equipment, trowel, notched trowel, rubber mallet and spirit level. Wear gloves and the protective equipment specified on the product packaging.
The grid helps you set the height; a stable, load-bearing base is still essential. The foundation, layer thicknesses and bonding layer needed depend on the soil and the stones you choose. Have the build-up checked before you start. The Cem Classic technical data sheet calls for a suitable intermediate layer before the final finish.
View Cem Classic in the webshop · Discover the Staenis Screed Grid
Make your own mowing strip: a step-by-step photo guide
1. Choose the line and cut the turf
Start by deciding on the shape. A garden hose or string makes it easy to try a straight line or a gentle curve. Check that the mower can follow the curves and that the strip is wide enough. Then cut the turf along this line. Before digging, locate any cables, pipes and boundary wire.
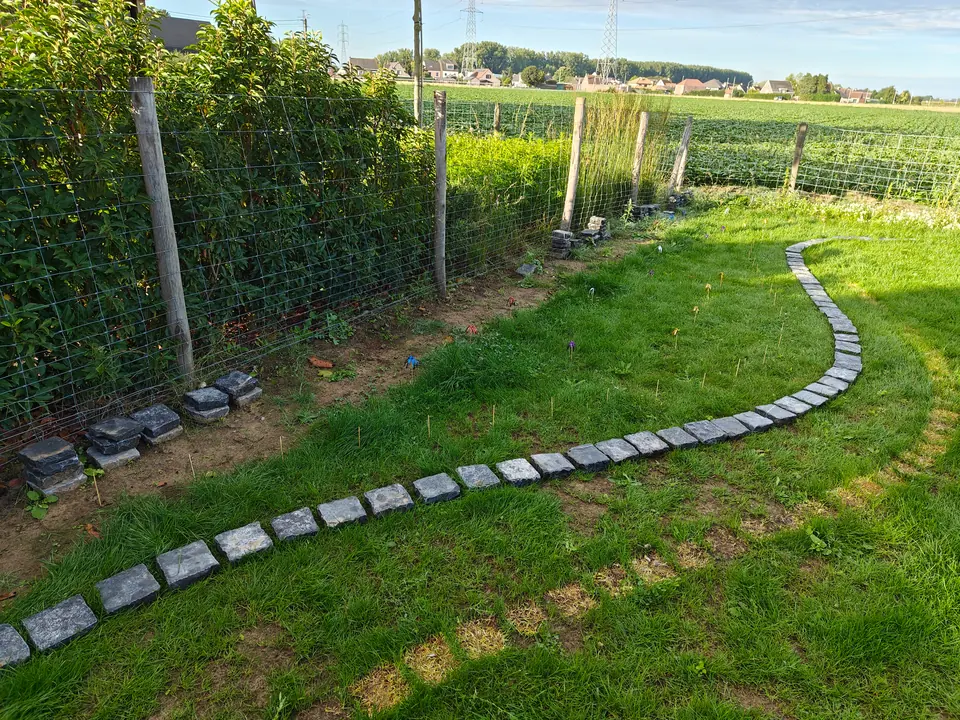
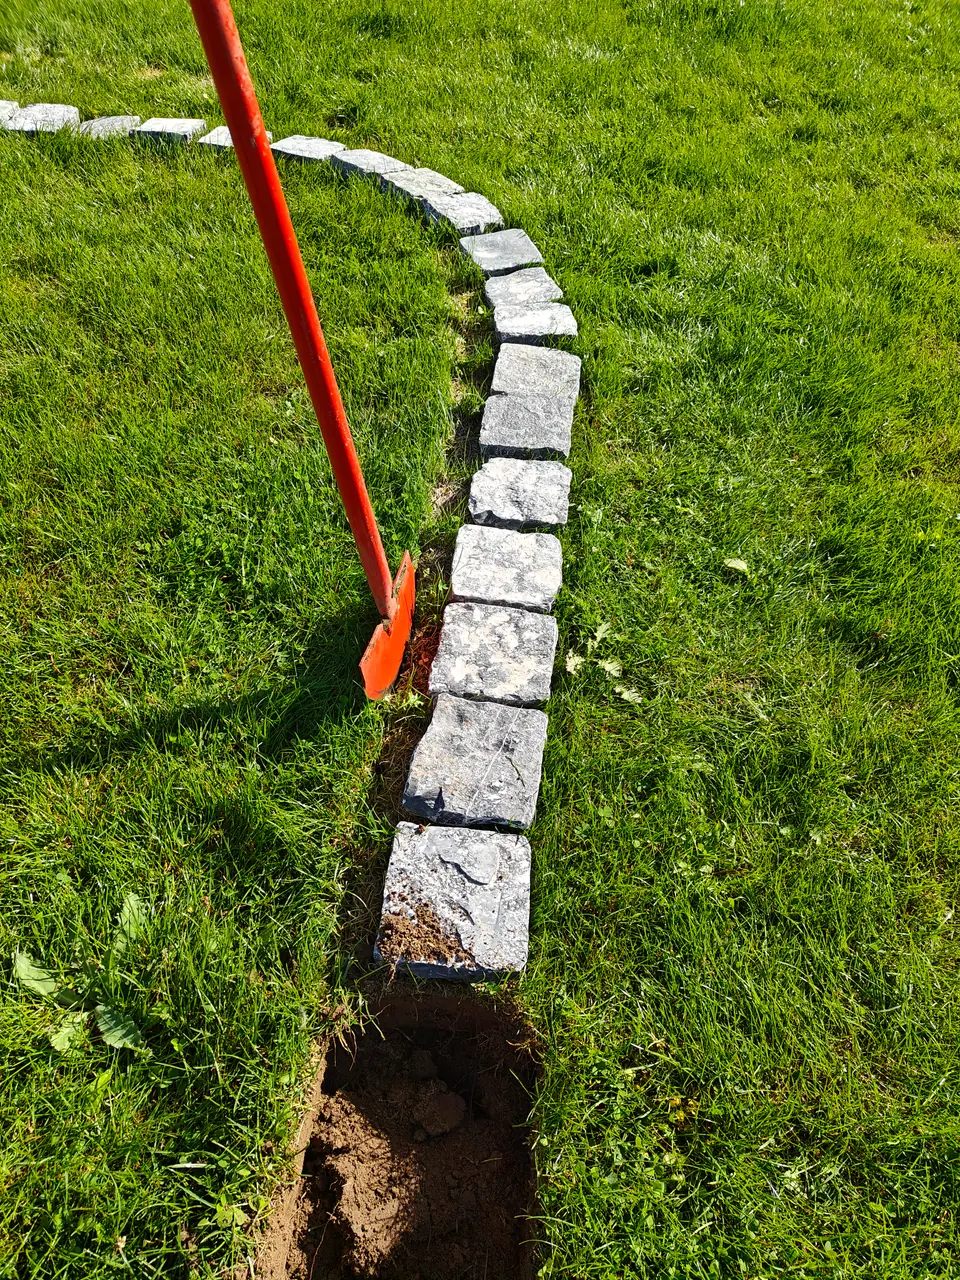
2. Excavate and position the screed grid lengthways
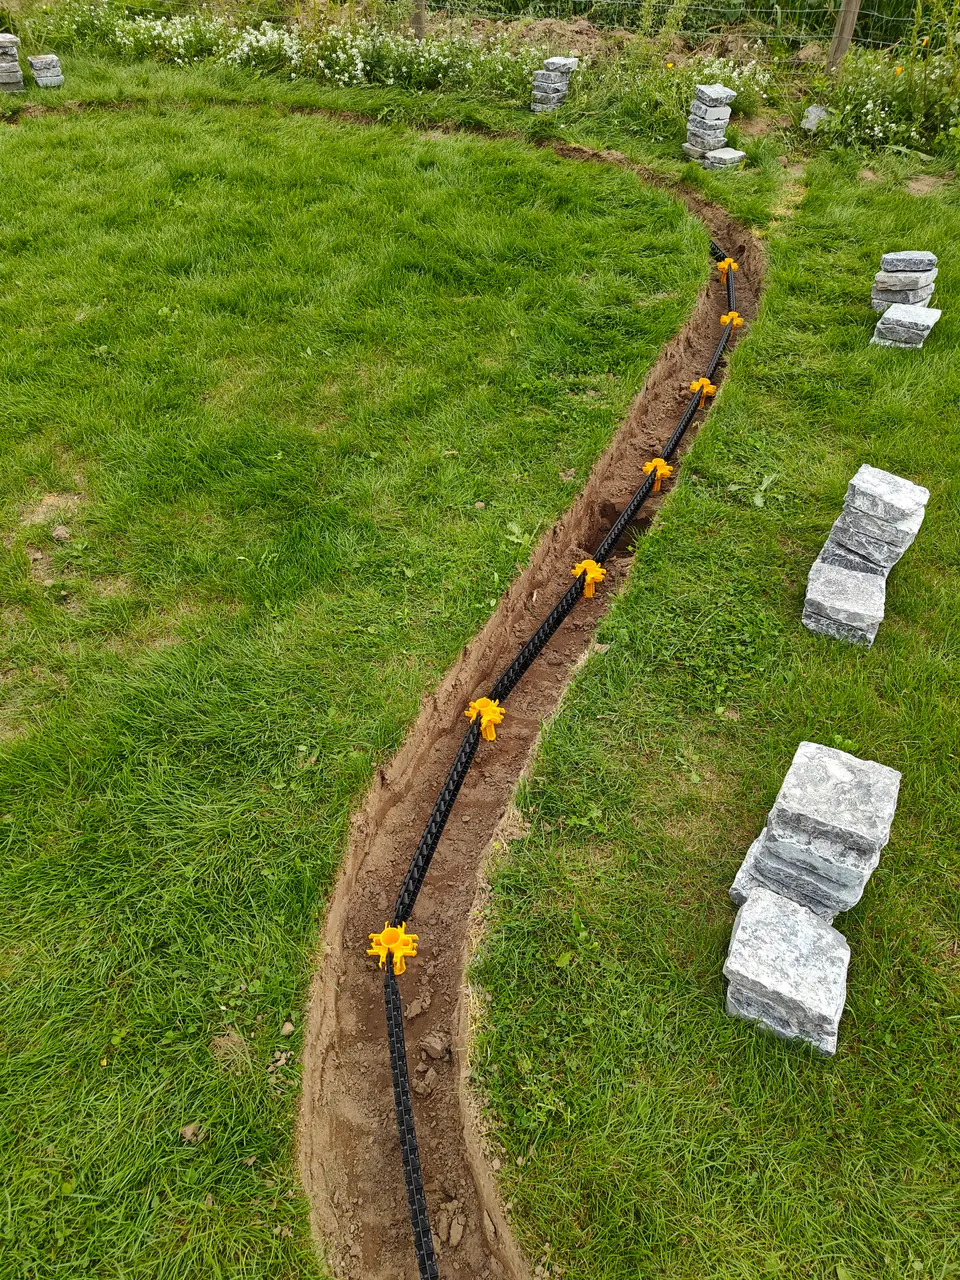
Excavate the strip to allow for the complete build-up: a foundation where needed, drainage mortar, a bonding layer and cobblestones. Remove loose soil and roots and prepare a stable base. In the photo, the screed grid's battens and legs run along the length of the edging. Set their height using the finished top surface of the stones as your reference.
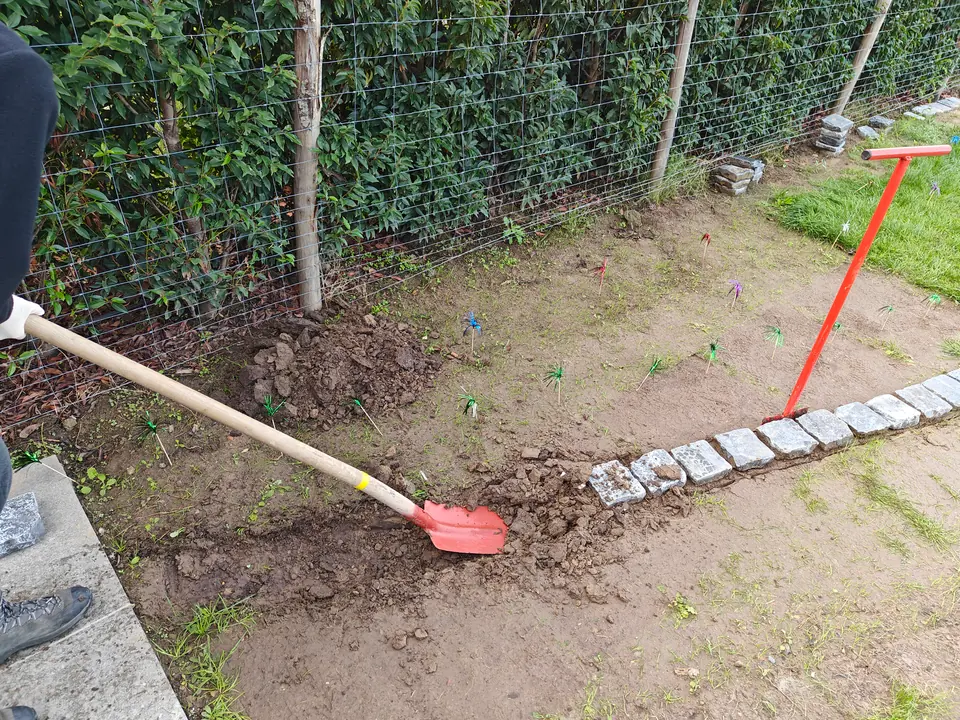
3. Build the draining base layer and bond the cobblestones
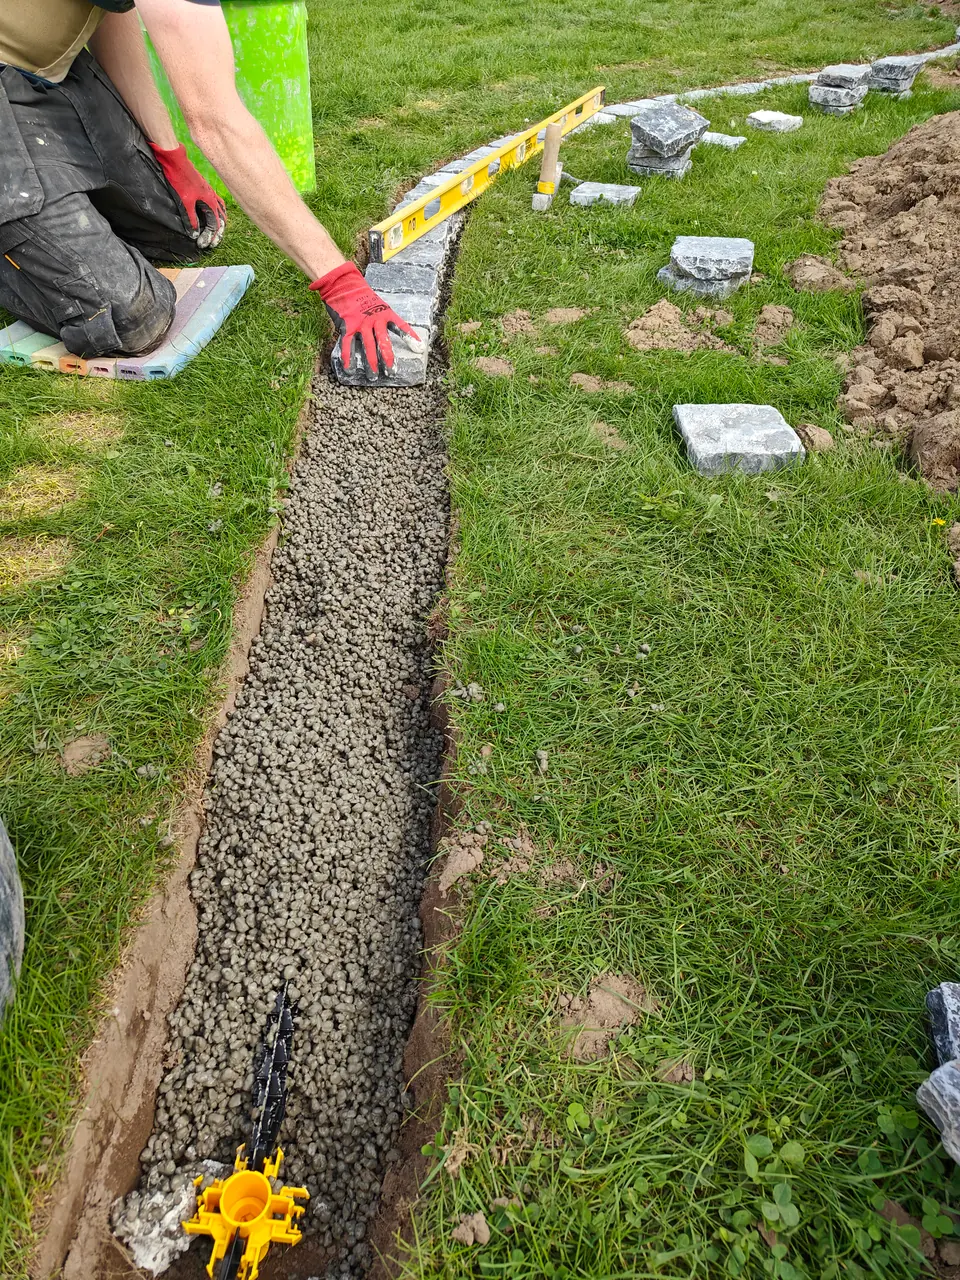
Mix Cem Classic according to the instructions on the bag and work in manageable sections. Bring the drainage mortar around the grid to the required height. Make sure the base layer can drain water to a suitable soakaway or drainage area. A draining material alone will not solve the problem of poorly draining soil.
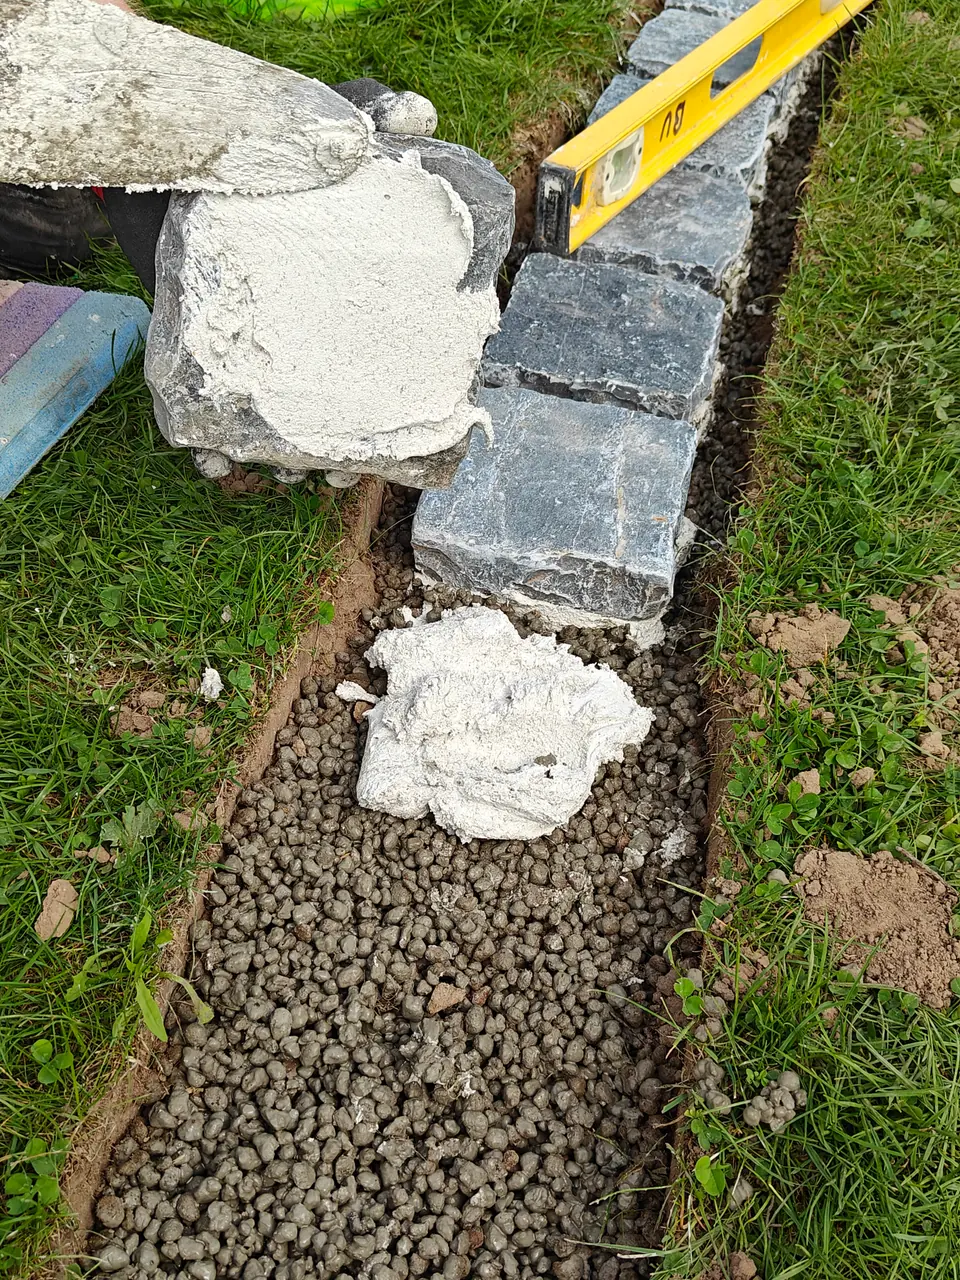
Use the intermediate and bonding layers specified in your plan. In this project, white Webercol TB was applied to both the prepared bed and the underside of the cobblestones. This double-bonding method helps achieve the full adhesive contact required outdoors. Follow the adhesive manufacturer's instructions for suitable substrates, layer thicknesses and working times.
4. Tap the stones to the correct height and check the level
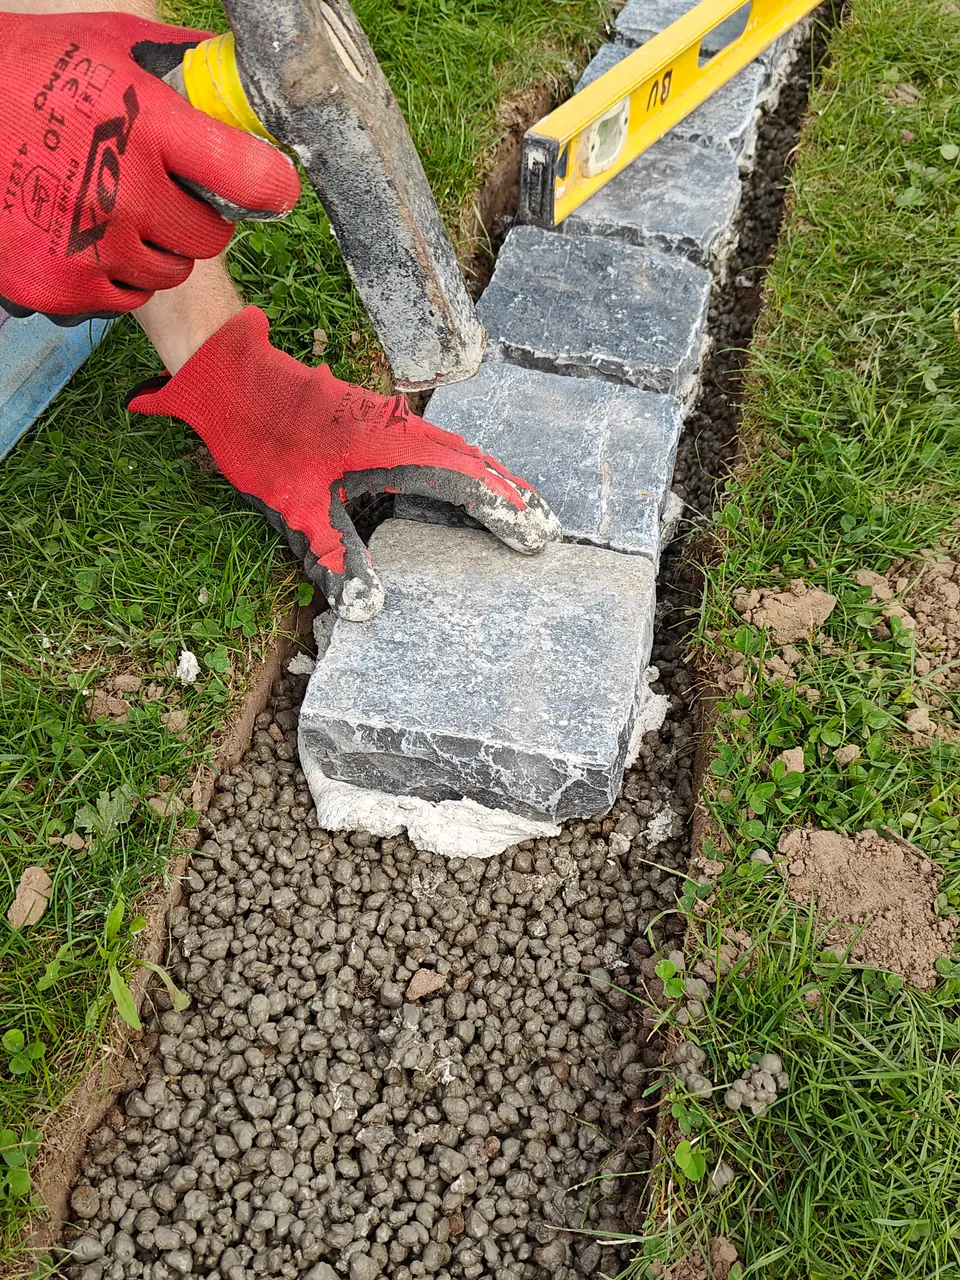
Place each cobblestone in the adhesive bed and gently tap it to the correct height with a rubber mallet. Check regularly with a spirit level or straightedge. Keep the top surface flush with the lawn, without projecting corners or steps. Follow the terrain and the intended drainage direction; a long garden edge does not need to be horizontal along its entire length.
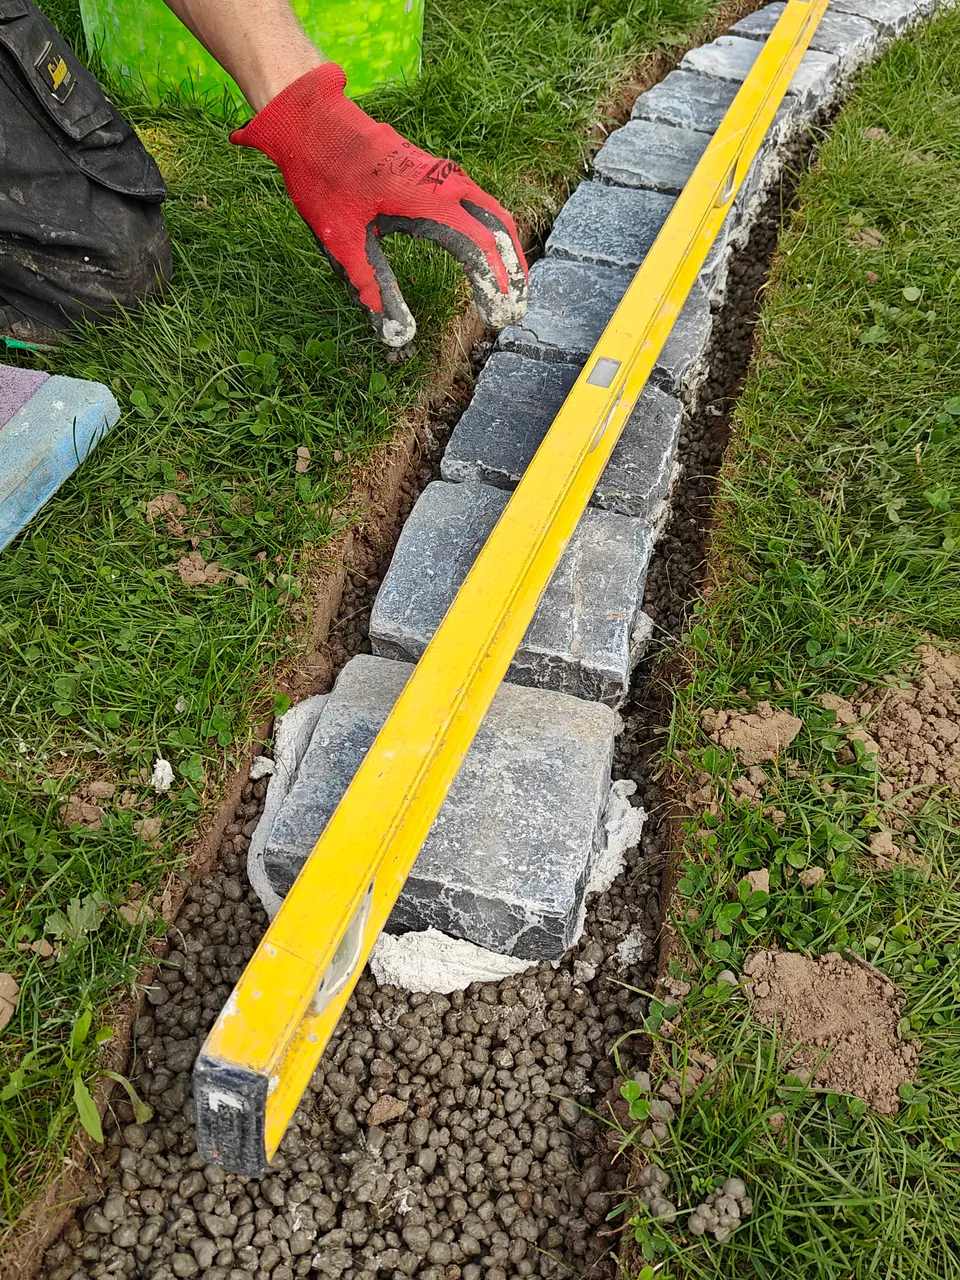
5. Clean the edges and keep the drainage path clear
Remove excess adhesive from the stones and along the edges before it sets. Choose a joint finish suited to the natural stone and the outdoor build-up too. In this garden, the patio drainage connects to the draining strip beneath the edging, allowing water to continue towards the garden. This connection only works if the entire drainage path is suitable.
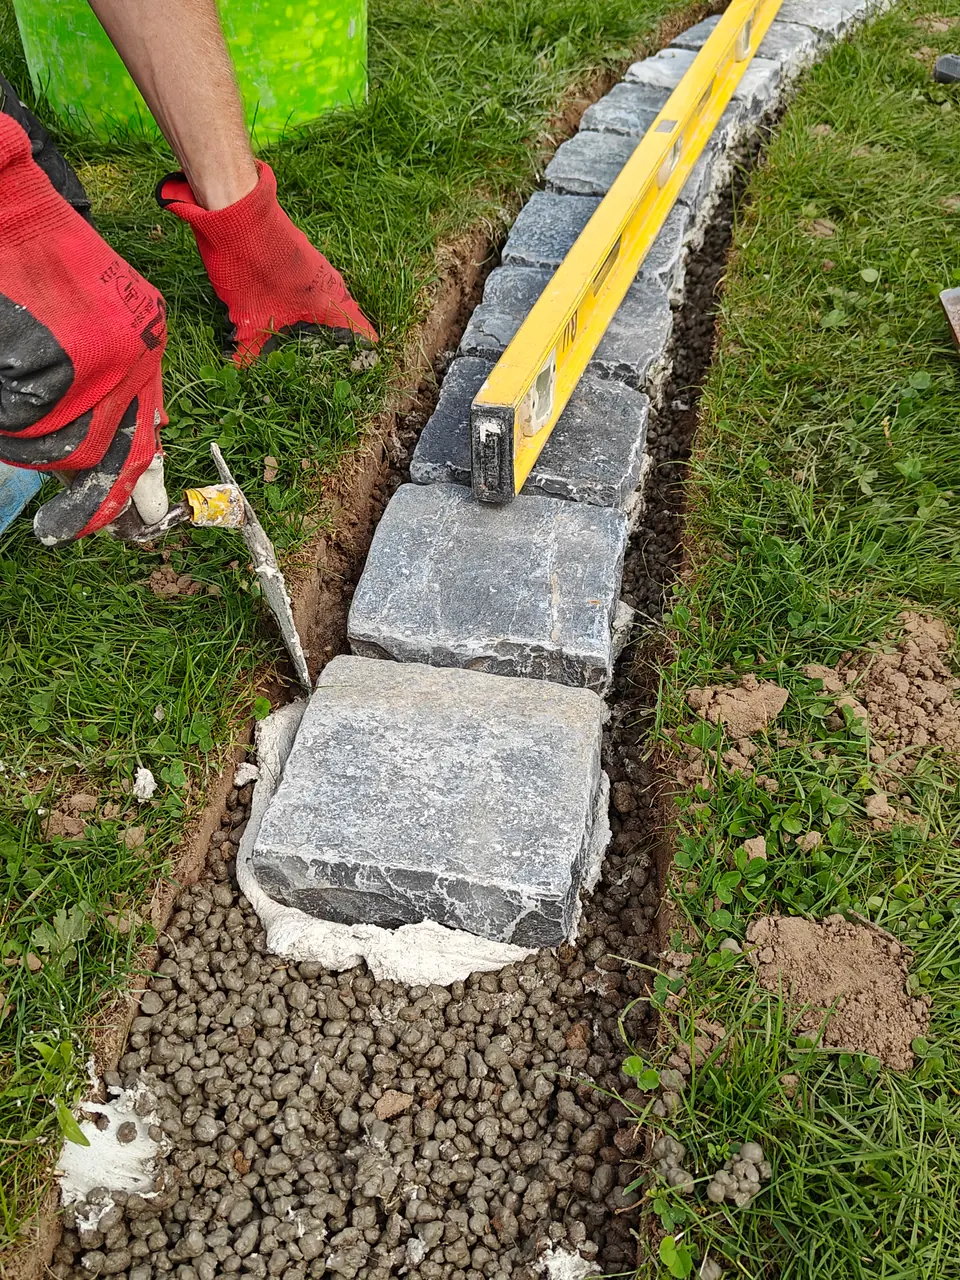
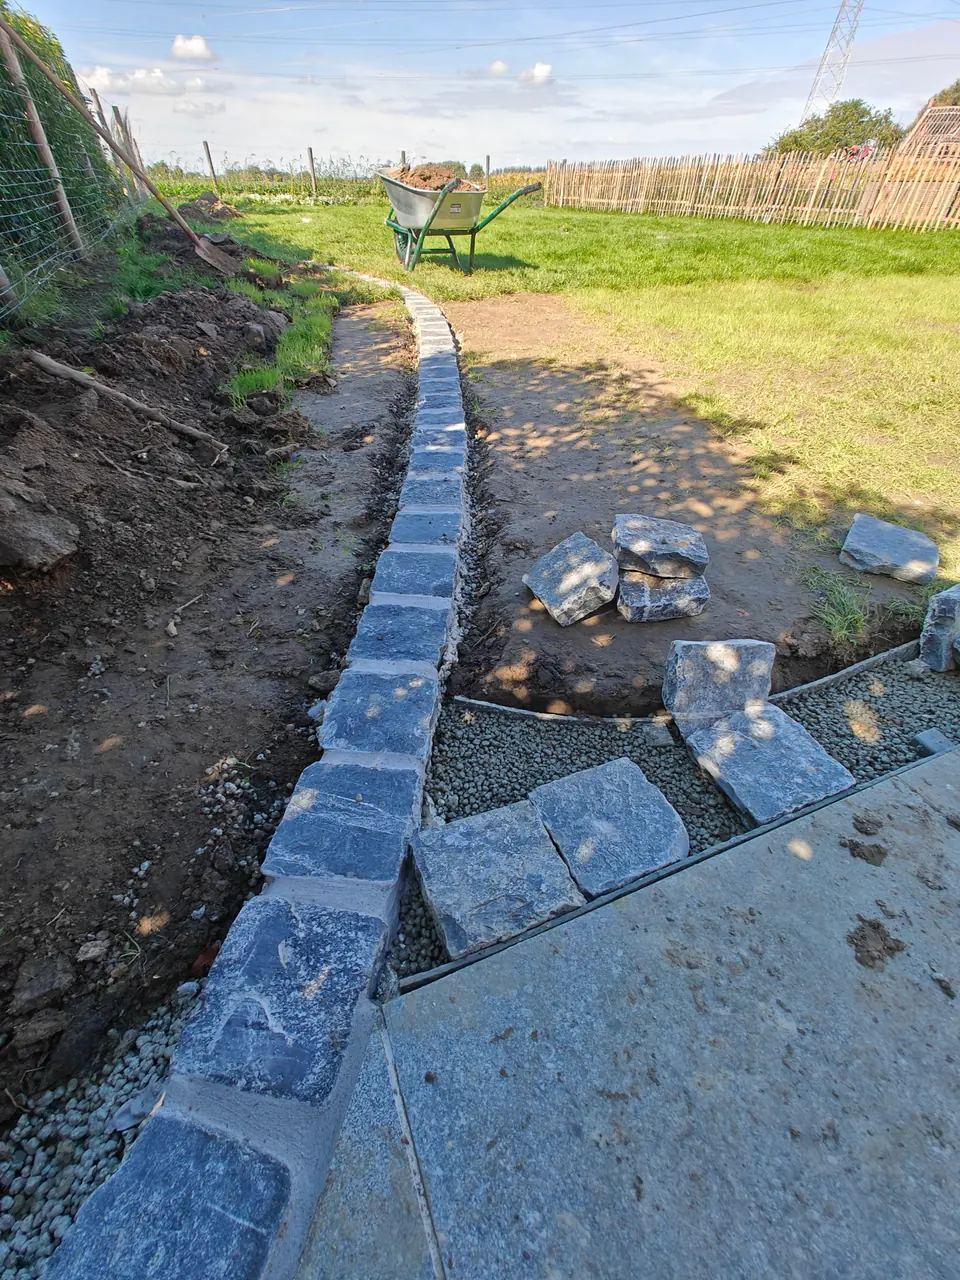
6. Let the adhesive dry, then grout the cobblestones
First let the bonded cobblestones dry and allow the adhesive to harden sufficiently, following the Webercol TB instructions. Only then grout the cobblestones. In this project, we used Weberjoint large. Follow the grout manufacturer’s instructions for mixing, application and cleaning.
7. Finish the border and test the robot mower
Allow the grout to harden sufficiently too before putting any load on the edging. Then bring the lawn and border up to the correct height and finish with planting or mulch. Set your mower’s boundary according to its manual and supervise a test run along the entire edge. Check that the wheels have enough support and that the blades reach the last grass everywhere. Adjust the boundary setting or width if needed.
Frequently asked questions about cobblestone mowing strips
How wide should a mowing strip for a robot mower be?
That depends on the distance between the blades and the outside of your robot mower, its boundary setting and any obstacles beside the lawn. Start with the drive-over strip specified in the manual and test the arrangement before laying the stones permanently.
Can I also make a curved lawn edge?
Yes, individual cobblestones let you follow a gentle curve, as shown in this project. Choose broad curves that your mower can follow and check the available driving width at every change of direction.
Is Cem Classic the same as ordinary screed?
No. Cem Classic is a lightweight drainage mortar made with expanded clay granules. In this application, it forms the draining base layer. The cobblestones provide the visible finish, with suitable intermediate and bonding layers connecting the two.
Create your garden edging with Staenis
Want to make your own mowing strip, lawn edge or edging around a tree? The Staenis Screed Grid and Cem Classic provide the basis for this method. Send us the length, desired width, chosen stones and a few photos of the ground. We can help you plan the build-up and quantities.
Planning a patio too? Read our guide to a draining patio build-up.
Product information and further guidance: Latermix Cem Classic · Webercol TB · GARDENA: robot mowers and lawn edges.