How to lay a wooden OSB board floor in the attic?
By Staenis | | Manual
How to lay a wooden OSB board floor in the attic?
Do you want to use your attic as a storage space or extra living area? Then it’s best to ensure a level and finished attic floor. This is not only practical and aesthetic, but also increases your home’s value. Time for a crash course in laying wooden boards, or more specifically, OSB in the attic. At the same time, you’ll discover a quick method to install and insulate your attic floor.
Laying wooden boards in the attic: how do you go about it?
Laying wooden boards in the attic is usually done as follows: a wooden supporting structure is placed on the attic floor, onto which 18 mm thick wooden OSB boards are screwed. This floor build-up is sufficient if you are going to use your attic as storage space and want a walkable attic floor. If you want to turn your attic into a fully-fledged living space, you can place another floor finish on top of the wooden OSB boards. This is a feasible scenario for an experienced DIYer, at least if the attic floor is already nice and level from the start.
Tip: Is your subfloor not level everywhere, or do you also want to insulate your attic floor? Then the work is more complex. Fortunately, there is a handy DIY system: the Staenis grid. With it, you can easily and quickly create a level attic floor. You don't even need to provide a wooden support structure. If desired, you can insulate your attic floor at the same time. Even if you have no experience, the result is flat and strong. Watch the video and discover how it works.
Laying a wooden OSB floor in the attic: the most common pitfalls
Why install your wooden OSB attic floor with the Staenis levelling grid instead of using a wooden support structure? With the Staenis grid, you save time and energy. Moreover, you are assured of a professional result. Installing a wooden joist structure with beams, on the other hand, is complex and goes much less smoothly. In addition, there are various pitfalls.
Problem 1: you need to get the heavy beams into the attic
It all starts with preparing your materials. For example, you have to drag the heavy wooden beams for your framework up to your attic floor. To prevent damaging your stairs, door, or baseboards in the process, you should protect your entrance, stairs, and hallway with stucloper or tetraboard (floor protection on a roll). In many homes, it is even impossible to get beams of 3 to 4 meters into the attic, and they have to be sawn into two pieces.
Tip: if you choose to install your wooden OSB floor using the Staenis grid, you won't need any wooden beams. You can easily carry your box of supplies (battens and adjustable legs) up the stairs without much effort. So, no lugging heavy materials, and you don't need to cover your stairs.
Problem 2: you lose time by cutting each board to size
Measuring how long your boards need to be, sawing each board to size, adjusting where necessary with a jigsaw... It all takes a lot of time, so you don’t make quick progress. Frustrating! Moreover, not every attic is suitable for sawing boards. In such cases, you have to do this elsewhere (e.g. outside). Not convenient. Another annoyance: planed boards can warp, making it difficult to lay them flat.
Tip: If you install your wooden OSB floor using the Staenis grid, you do not need to provide a wooden supporting structure. The grid system consists of slats and height-adjustable legs, which you can easily click together and adjust in height with a screwdriver. The slats for the edges can be easily shortened with a cutting disc. Visit a Sack Zelfbouw showroom to see the system with your own eyes.
Problem 3: Your wood structure may become crooked
If you use L-brackets to attach the wooden structure to the ground, you will have to drill into the subfloor to secure the brackets with plugs. That makes a lot of noise and takes time. It is also quite possible that the L-brackets end up too low or too high. In that case, you will have to place a block underneath, or cut the bracket down.
Additional problem: if the subfloor is not completely level, you have to adjust the L-brackets and the planks (hammer them at an angle) to be able to place all the beams nicely upright. But afterwards, the height of your supporting structure may no longer be correct. So you keep going, indeed!
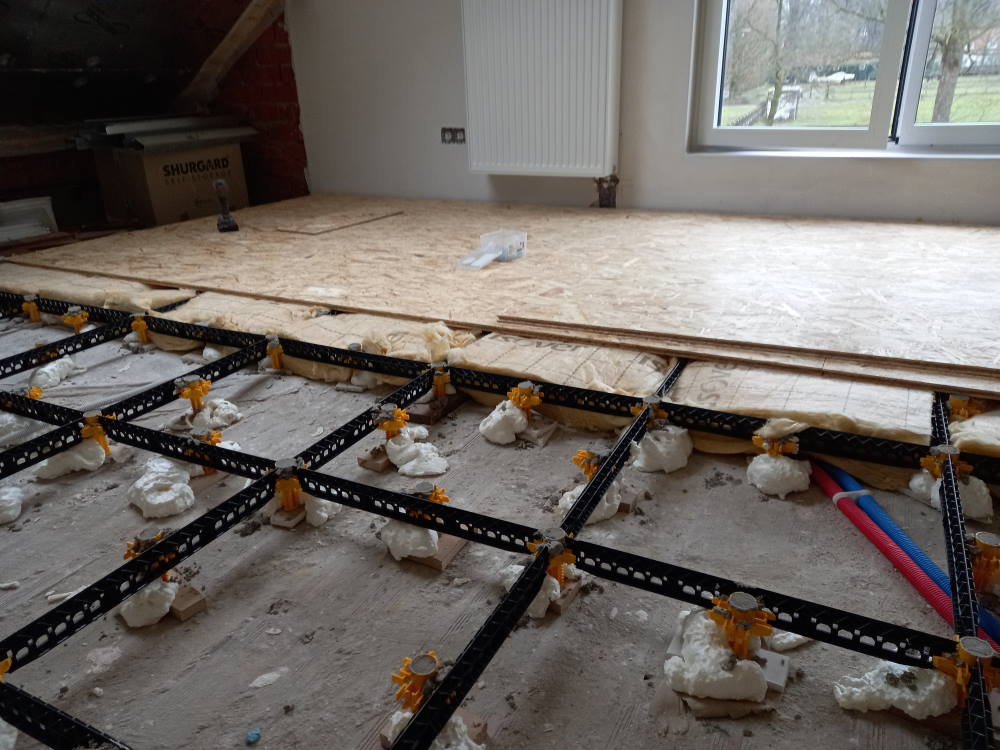
Tip: if you start working with the Staenis grid, you can easily level the legs of this grid. Take your laser and set all the legs to the same height with a screwdriver. Secure them by applying a dab of PU foam, so the height adjustment remains correct. You can also fill the top of the legs with mortar to increase the load-bearing capacity of the floor structure. Learn here how it works and discover the ideal floor build-up for your project (with insulation screed or dry fill materials).
Problem 4: Any utility lines will need to be cut out of the wood
When laying OSB in the attic, you need to cut out any utility lines in the wood. Then you can (finally!) install the wooden OSB boards.
Good to know: if you are going to lay wooden OSB boards in the attic using the Staenis grid, you will need to do less sawing in the plastic to provide space for utility lines.
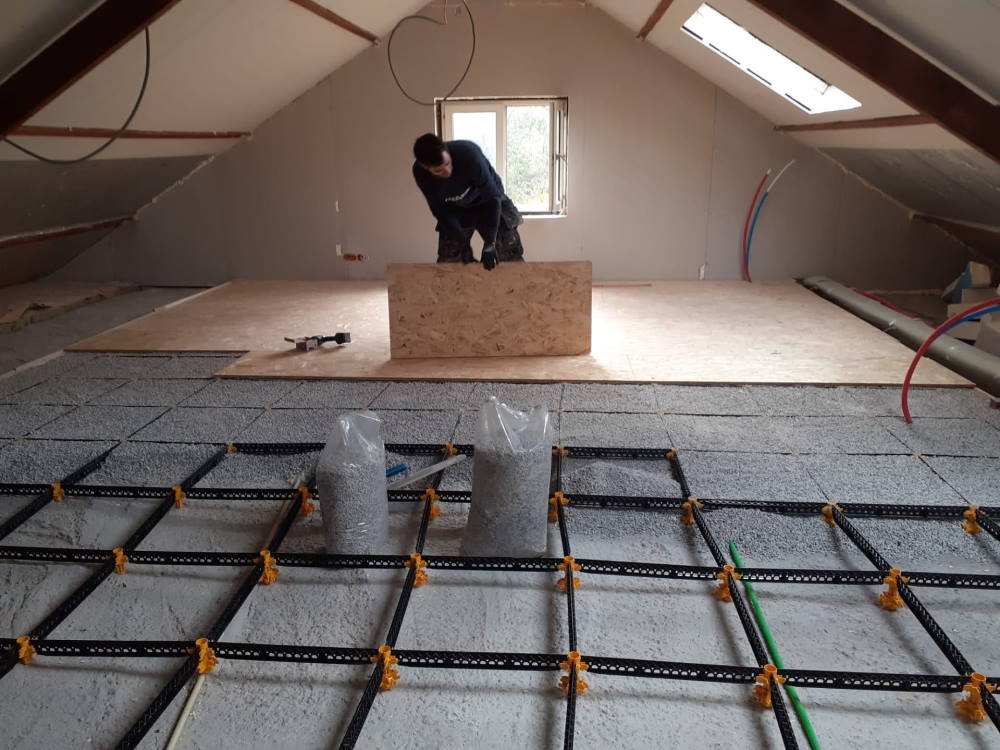
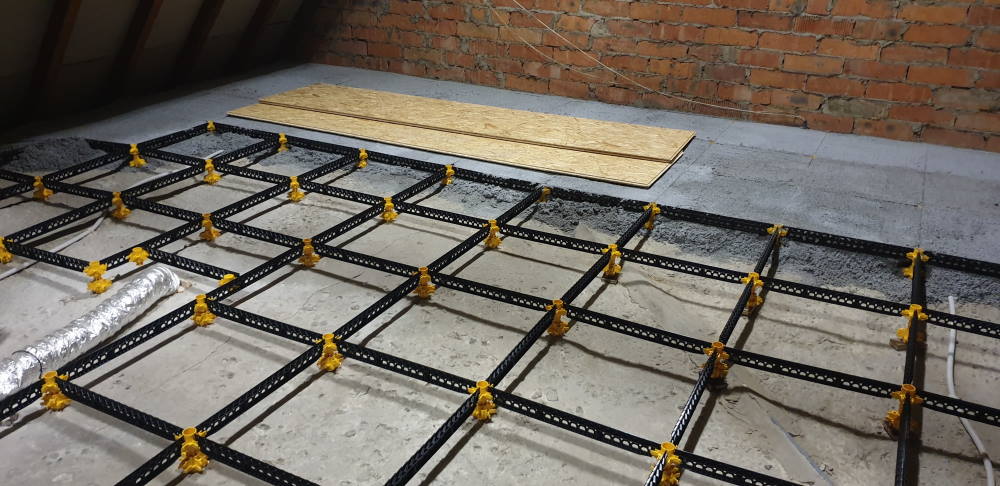
Laying OSB boards in the attic with the Staenis grid
If your attic has a stable, concrete floor, it is definitely possible to use the Staenis grid for a solid and level floor structure. Combinations with a wooden joist system are also possible, provided that the subfloor is stable enough.
We already indicated above how to place the Staenis grid and adjust its height. What happens next? Once the grid is in place, you can optionally fill it with a filler. Discover here which fillers you can use for an application in an attic. It is also possible not to fill the grid. In that case, you use the green fibre-reinforced dry floor grid to increase the load-bearing capacity of your floor. Also if you want to fill the grid with glass wool. Afterwards, you place the wooden OSB panels and, if desired, you can finish your attic floor with, for example, floating laminate, multi-layer parquet or vinyl.
Prefer a floor finish with tiles? That’s possible by filling the Staenis grid with tileable insulation screed. This type of screed is extremely light (about 10 kg/m² for 7 cm thickness), making it easy to bring up to your attic and level out. But don’t be mistaken. Once installed, this screed is definitely strong enough to be tiled. What are you waiting for?
Laying a wooden OSB floor in your attic is easy with the Staenis grid. With this innovative self-build system, you can install your attic floor structure quickly and level, without the risk of cracks. Use the floor structure overview and receive more information about your ideal attic floor structure. You can easily order your Staenis grid, the necessary fillers and the installation tools online via the webshop. Tip: Visit a Sack zelfbouw showroom for a preview and convince yourself.