Self-levelling compound | Price, DIY, Advice and Info
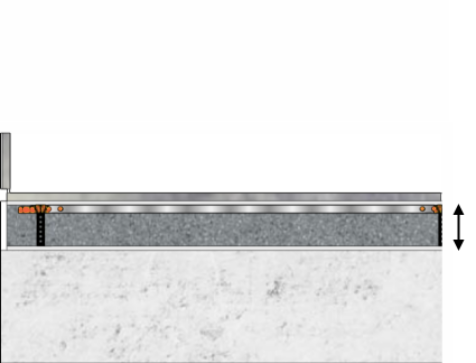
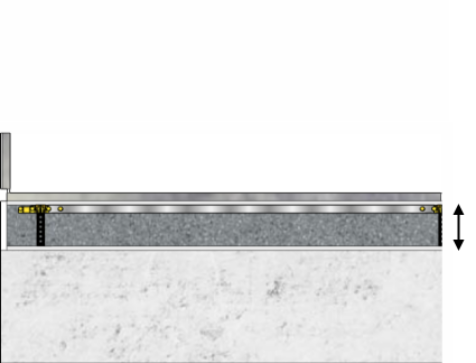
Would you like to install self-levelling compound yourself? It is important to have a good base for a perfect floor finish. With the Staenis levelling grid, you can easily and reliably create a flat subfloor at the correct height.
The grid also reinforces the substrate, making your floor finish better protected against cracks. For heights between 1 mm and 2 cm, we recommend using self-levelling compound in the Staenis levelling grid. However, there are also self-levelling compounds that can be applied up to a height of 5 cm.
For heights between 1 cm and 5 cm, it is more advantageous to install a bonded screed floor. Self-levelling compound is always applied as a bonded layer, so using the correct primers is essential. We are happy to assist you further with this!
Applications

On concrete or screed: Self-levelling compound can be applied to eliminate any irregularities or height differences and to create a smooth and even substrate.
On existing tiling: Self-levelling compound can help to hide any irregularities or cracks in the existing tiling and create a smooth surface for further finishing.
Blogs (guides)
Possible self-levelling floor build-ups
Bonded screed as an alternative to self-levelling compound
What is levelling compound and how do you use it?
Self-levelling compound is a self-levelling material that mainly consists of cement and plastics. It provides a flat and smooth surface on the floor and prevents cracks and fissures. Self-levelling compound is suitable for various substrates, such as existing tiling, concrete, or cement screeds. The thickness of self-levelling compound varies from 1 to 50 mm, depending on the substrate and the type of compound. When preparing the self-levelling compound, it is important to use the correct water ratio and to ensure the substrate is clean, dry, dust- and grease-free. After applying the self-levelling compound, you must wait until it has sufficiently cured, after which it is suitable for further finishing.
Egaline, an effective levelling compound
To level your floor, you need a levelling compound, such as self-levelling compound. Self-levelling compound is a liquid, cement-like material made of synthetic resins. It can be used on sand-cement and anhydrite subfloors. Self-levelling compound is available as a powder that you mix with water. The self-levelling mix is liquid while working, but hardens after application. The mixture adheres quickly to the substrate, so it is important to work carefully right away, as removing this layer is difficult.
Why use self-levelling compound?
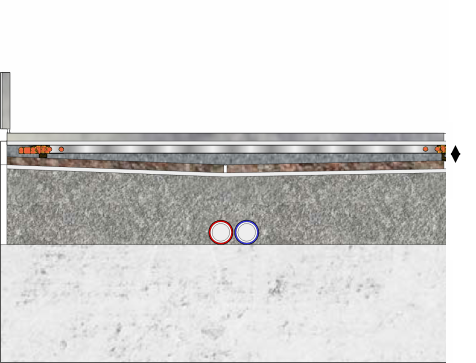
By applying a layer of self-levelling compound, you get a good subfloor without level differences on which you can place a new finishing layer. With self-levelling compound, you can compensate for level differences up to 3 cm. This way, you can even raise part of your underlying floor to the level of the entire floor slab. For floors higher than 30 millimeters, it is better to install a bonded screed with the Staenis levelling grid. For floors in very poor condition, it is better to use another building material than self-levelling compound or levelling mortar. Consult a professional for the right approach. Levelling mortar/smoothing mortar is in fact also self-levelling compound, but usually a type that does not flow open by itself. You therefore have to spread levelling mortar open and flat yourself.
Levelling: don't forget your primer
Before levelling or smoothing a screed subfloor, you should apply the appropriate floor primer. Priming your floor is essential for a durable and even surface. The primer strengthens the top layer, ensures better adhesion of the levelling compound, and prevents the levelling compound from drying too quickly on the absorbent substrate. The primer also ensures that the levelling compound flows out better and can perform optimally during application.
On which substrate do you apply levelling compound?
Self-levelling compound can be applied to many different substrates, such as existing tile work, concrete, or cement screeds. Make sure that the substrate is stable, clean, dry, and free of dust and grease. Also remove substances that could negatively affect adhesion. Always use a suitable primer (bonding primer).
Which self-levelling compound should I buy?
You choose self-levelling compound based on the height difference you want to even out. If you need to level about 1 cm in height, choose a self-levelling compound between 1 mm and 2 cm. This gives you some leeway and the compound will flow nicely at that height. Always read the technical data sheet to check the compatibility between the substrate, self-levelling compound, and floor finish.
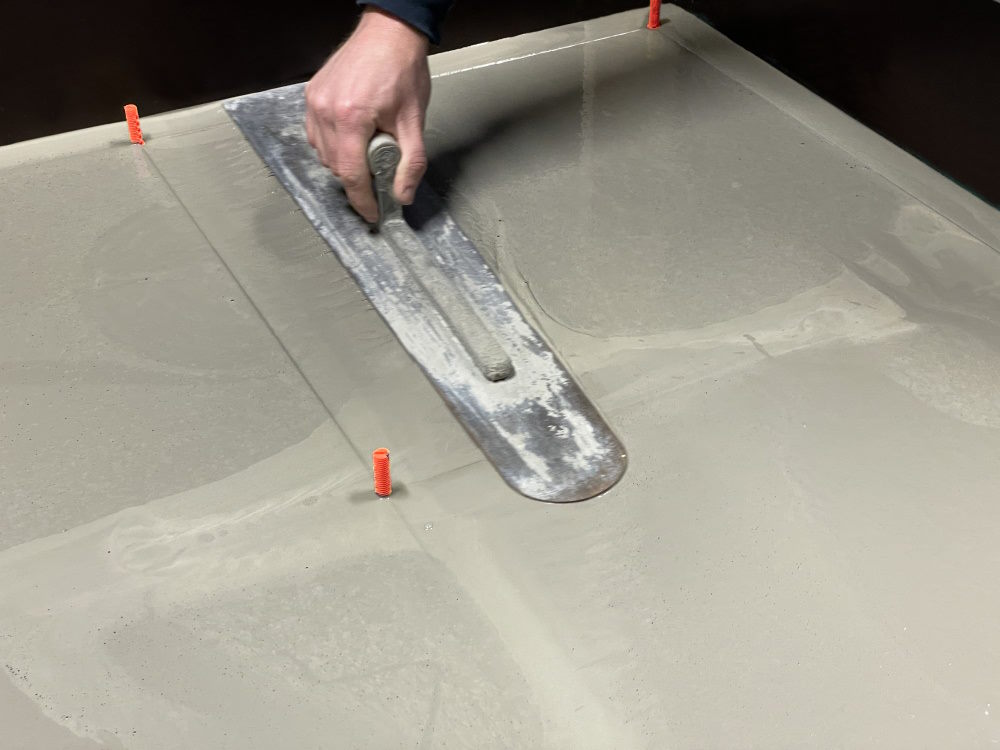
How do you apply levelling compound with the Staenis levelling grid?
Follow these steps to apply levelling compound using the Staenis levelling grid:
- Make the surface clean, dry, dust- and grease-free.
- Apply a suitable bonding primer to the substrate and allow it to dry according to the instructions on the packaging.
- Place the Staenis levelling grid on the floor according to the supplied instructions.
- Mix the levelling compound with water according to the recommended ratios on the packaging.
- Pour the levelling compound mixture onto the floor and within the Staenis levelling grid. Spread it evenly with a trowel or squeegee.
- Let the levelling compound dry and cure according to the recommended time on the packaging.
Frequently asked questions
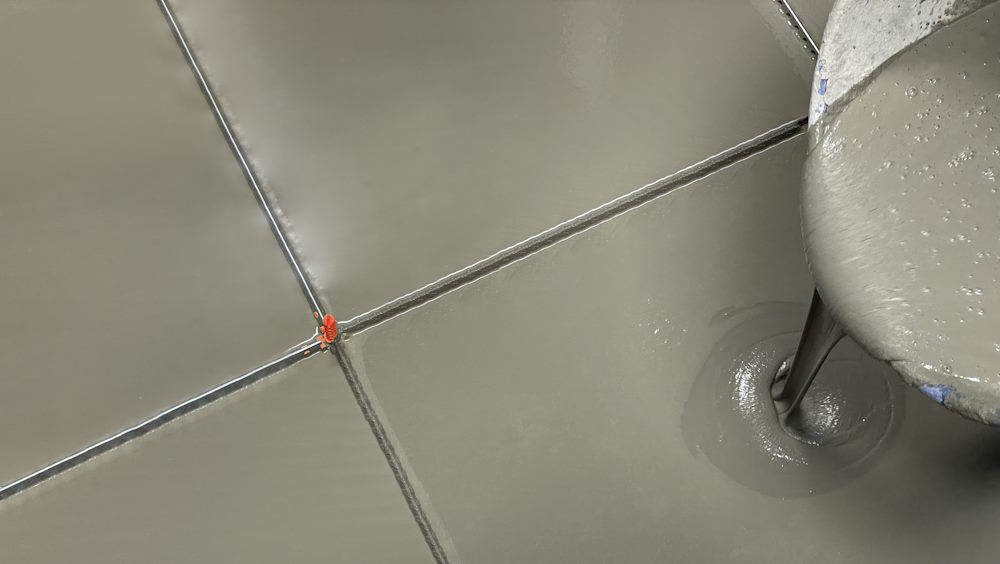
With self-levelling compound, the difficulty lies in pouring the correct amount of compound in the right place. The levelling grid helps enormously to solve exactly that difficulty. You pour the compound level with the top of the grid. If you visually see that the grid is sticking out somewhere, you can pour some more compound there.
The thickness of a standard levelling compound is limited: it usually ranges between 1-50mm. This depends on the substrate and the type of levelling compound.
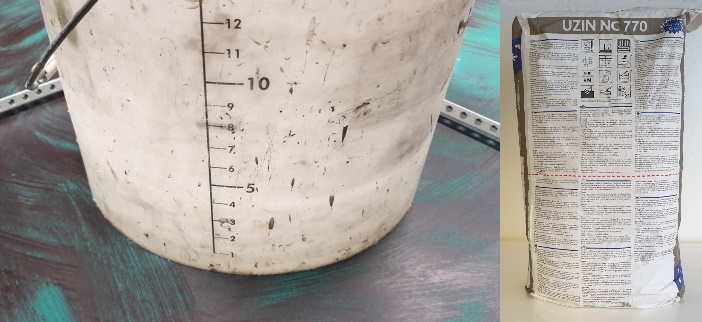
You can find this on the packaging. When preparing the levelling compound, use the correct water ratio, as this is essential. Too much or too little water will reduce the product properties.
Yes and no! With the Staenis grid levelling grid in combination with tiles and floating floor coverings, you do not need to vent the levelling compound. In all other situations, it is recommended to use a spiked roller, as this benefits the flow of the levelling compound.
The price of levelling compound varies depending on the brand, quality, and quantity.

The average drying time of levelling compound before it has cured enough for the finishing floor is between 12 and 48 hours. Most floors are walkable after about four hours. The drying time depends on the type of levelling compound, the subfloor, ventilation, and the thickness of the levelling compound floor.
Can't manage to apply the desired layer thickness in one go? Then consider levelling twice. Before applying the second layer of levelling compound, make sure the first layer has dried. Apply a primer between the two layers of levelling compound. Always read the packaging for this, as it may vary by manufacturer.
The drying of levelling compound can vary depending on the product, the thickness of the layer, and the environmental conditions. In general, it takes at least 24 hours for levelling compound to be sufficiently dry to continue working. Always consult the product packaging for the specific drying time.
It is possible to apply levelling compound on a wooden floor, but you need to take special precautions to ensure good adhesion and to accommodate movement in the wooden floor. For this, use a special levelling compound for wooden floors and a suitable bonding primer.
The required amount of levelling compound depends on the surface area and the thickness of the layer you want to apply. To calculate this, first measure the length and width of the room. Multiply these two values to obtain the total surface area in square meters. Then determine the desired thickness of the levelling compound in millimeters. Consult the packaging of the levelling product for the consumption per square meter per millimeter thickness. Multiply the surface area by the consumption and the desired thickness to calculate the total required amount of levelling compound in kilograms. Or use our handy calculator on our website.
Yes, self-levelling compound is suitable for underfloor heating. It offers excellent thermal conductivity and ensures an even heat distribution across the floor. Make sure to choose a self-levelling product that is compatible with underfloor heating and take the proper preparations, such as applying a suitable primer and checking the heating pipes for leaks before applying the self-levelling compound.
Removing self-levelling compound can be difficult because it is a hard and strongly adhesive material. Depending on the thickness and adhesion of the self-levelling compound, you can use different methods to remove it:
Manual removal: Use a hammer and chisel or a putty knife to carefully pry and remove the levelling compound. This can be labor-intensive and time-consuming, but it is an option for small surfaces or thin layers of levelling compound.
Use a floor scraper: A floor scraper is an electric tool specifically designed to remove hard materials such as self-levelling compound, tile adhesive, and concrete from floors. This is a faster and more efficient method, especially for larger surfaces and thicker layers of self-levelling compound.
Grinding: In some cases, it may be necessary to use a concrete grinder or floor grinding machine to remove the levelling compound. This is an effective method, but it can create dust and noise and may damage the underlying floor if you are not careful.
When removing levelling compound, it is important to always take the necessary safety precautions, such as wearing eye and hearing protection, gloves, and dust masks.
Calculator and prices