Screed with insulation boards
Screed floor build-up 6 & 7 - Choose a different floor structure
+12.5 cm - ground floor, basement, etc. - with concrete slab, PUR boards as substrate - tiles, multilayer parquet, laminate, cork, carpet, and vinyl - underfloor heating possible
Information
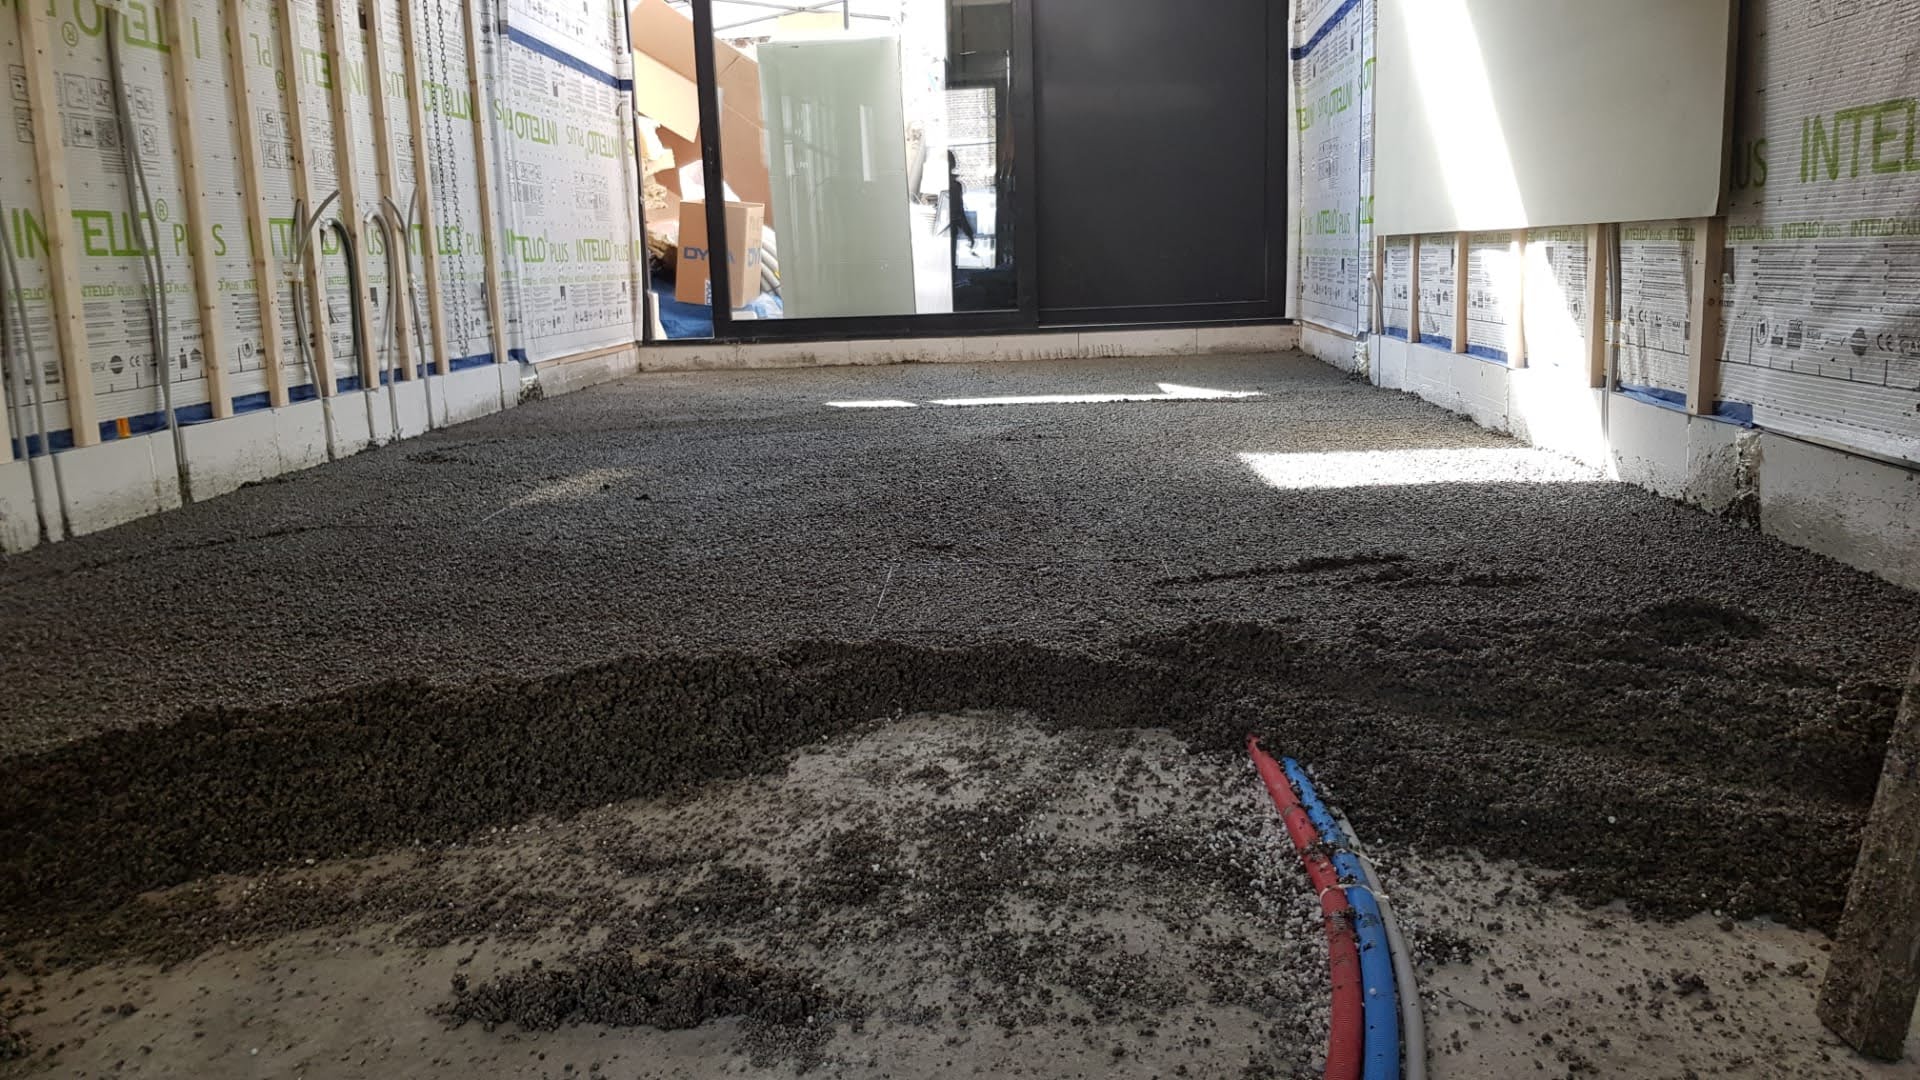
First, the unevenness of the substrate and the pipes is leveled with insulation screed, on which the insulation boards and screed are placed.
Advantages
- Achieve a perfect end result without experience
- Compartmentalization of the screed = crack-free screed
- Replaces a decoupling mat = saves an average of 30 euros/m²
- Replaces the steel reinforcement mesh = saving an average of 3 euros/m²
- No expansion joints required in the screed = saving an average of 3 euros/LM
- Spreading screed work over several days (no stress during placement)
- Much faster start-up of underfloor heating possible = faster construction process
- No dish formation of the screed floor = perfectly level screed
Floor construction manual
Side view of floor structure
View this floor structure in real life via Sack Zelfbouw
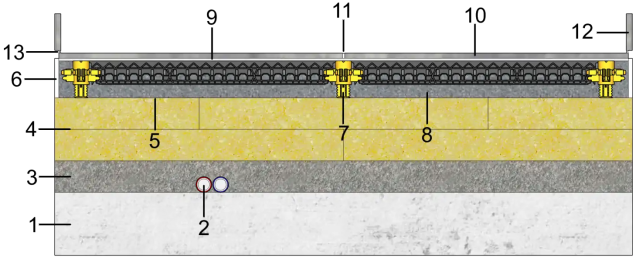
Legend
- Concrete
- Pipes (heating, electricity, drainage, etc.)
- Insulating screed fill layer
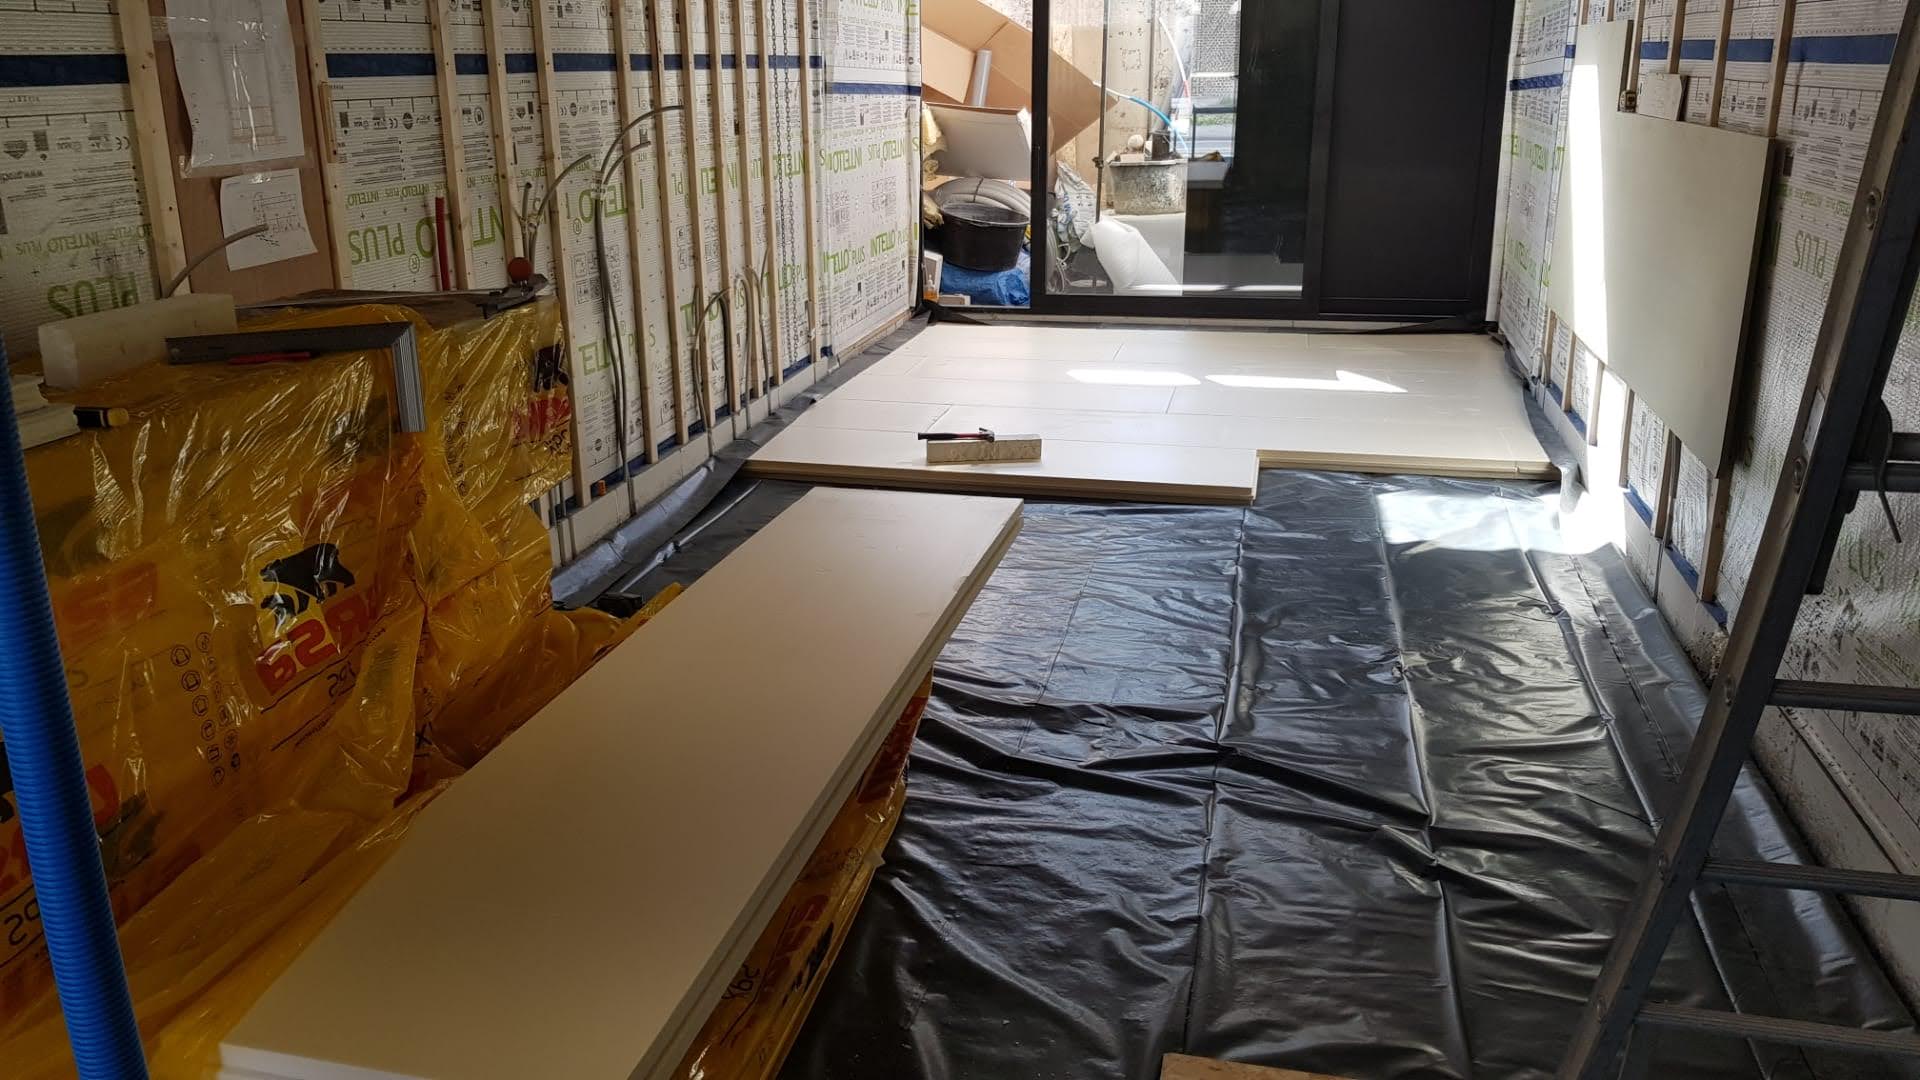
- Insulation boards in 2 staggered layers
- PE film (0.2 mm)
- Edge insulation 8 mm thick
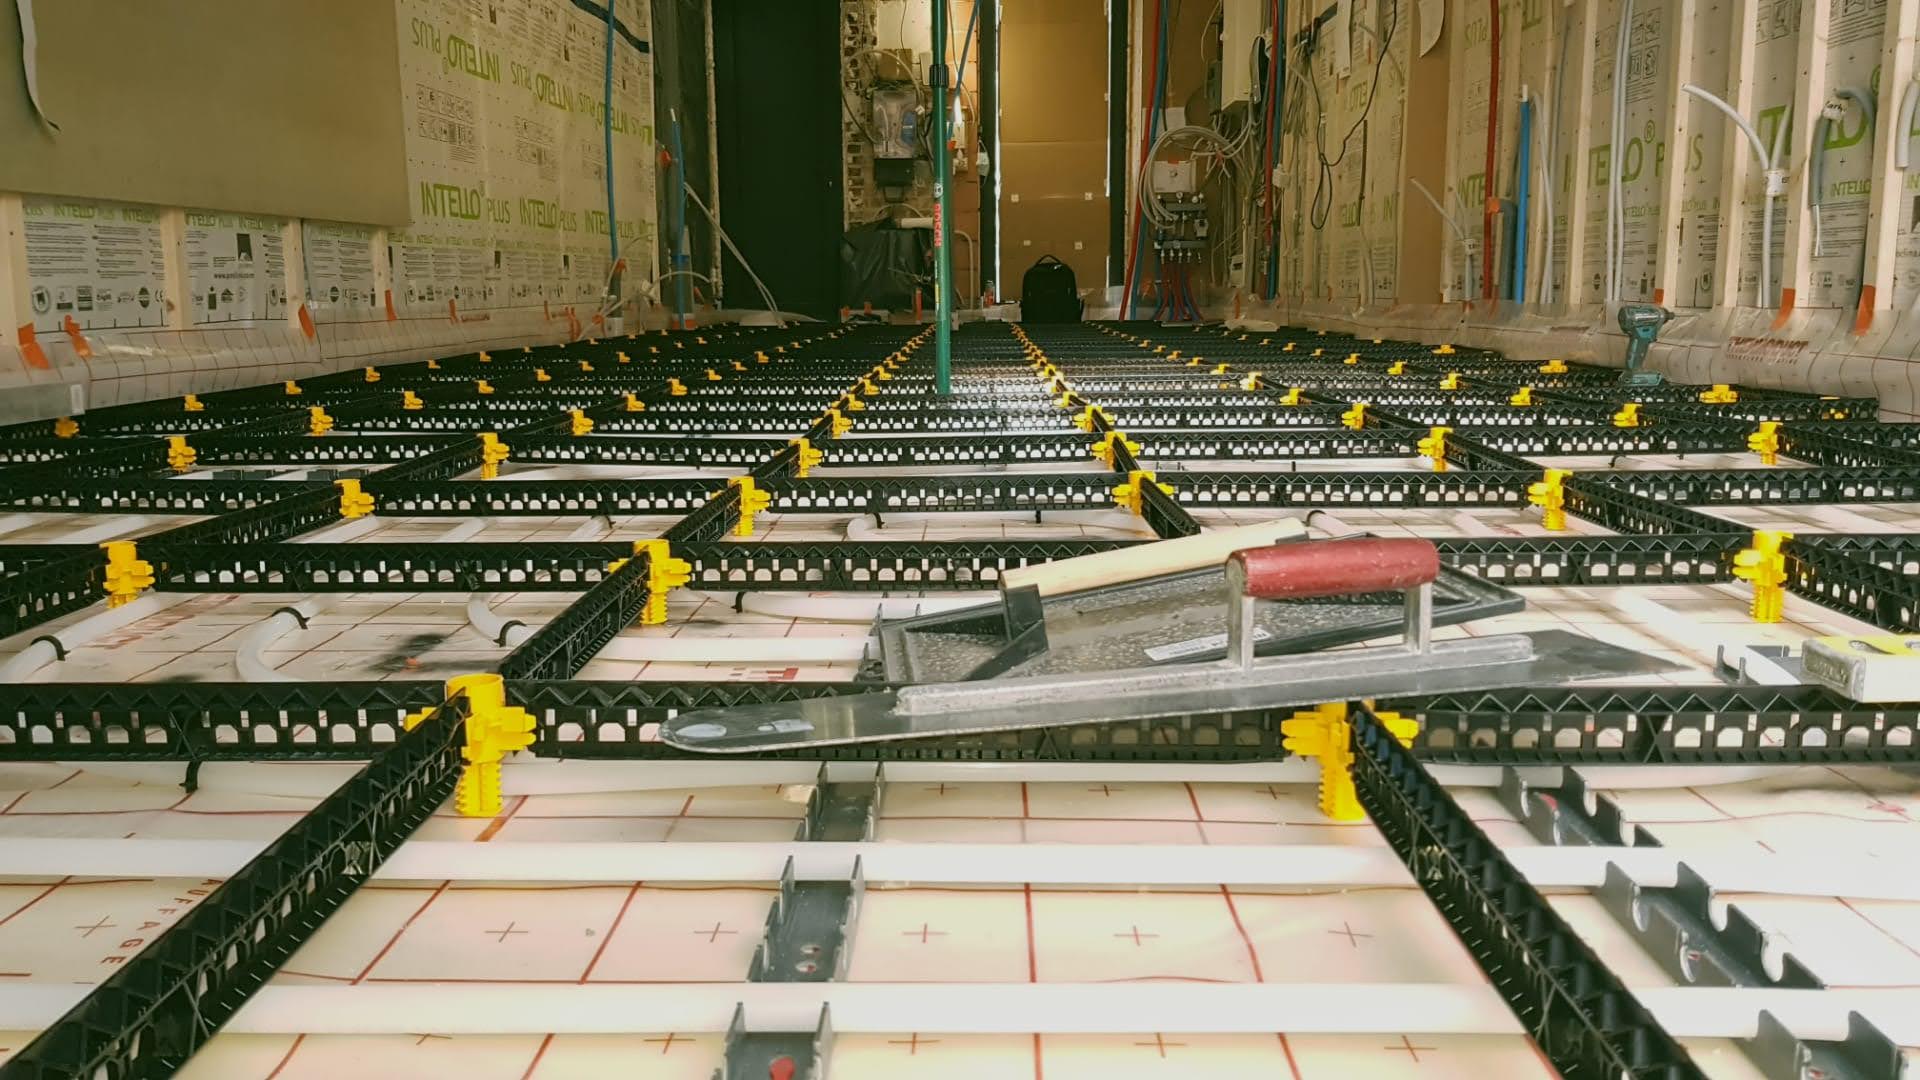
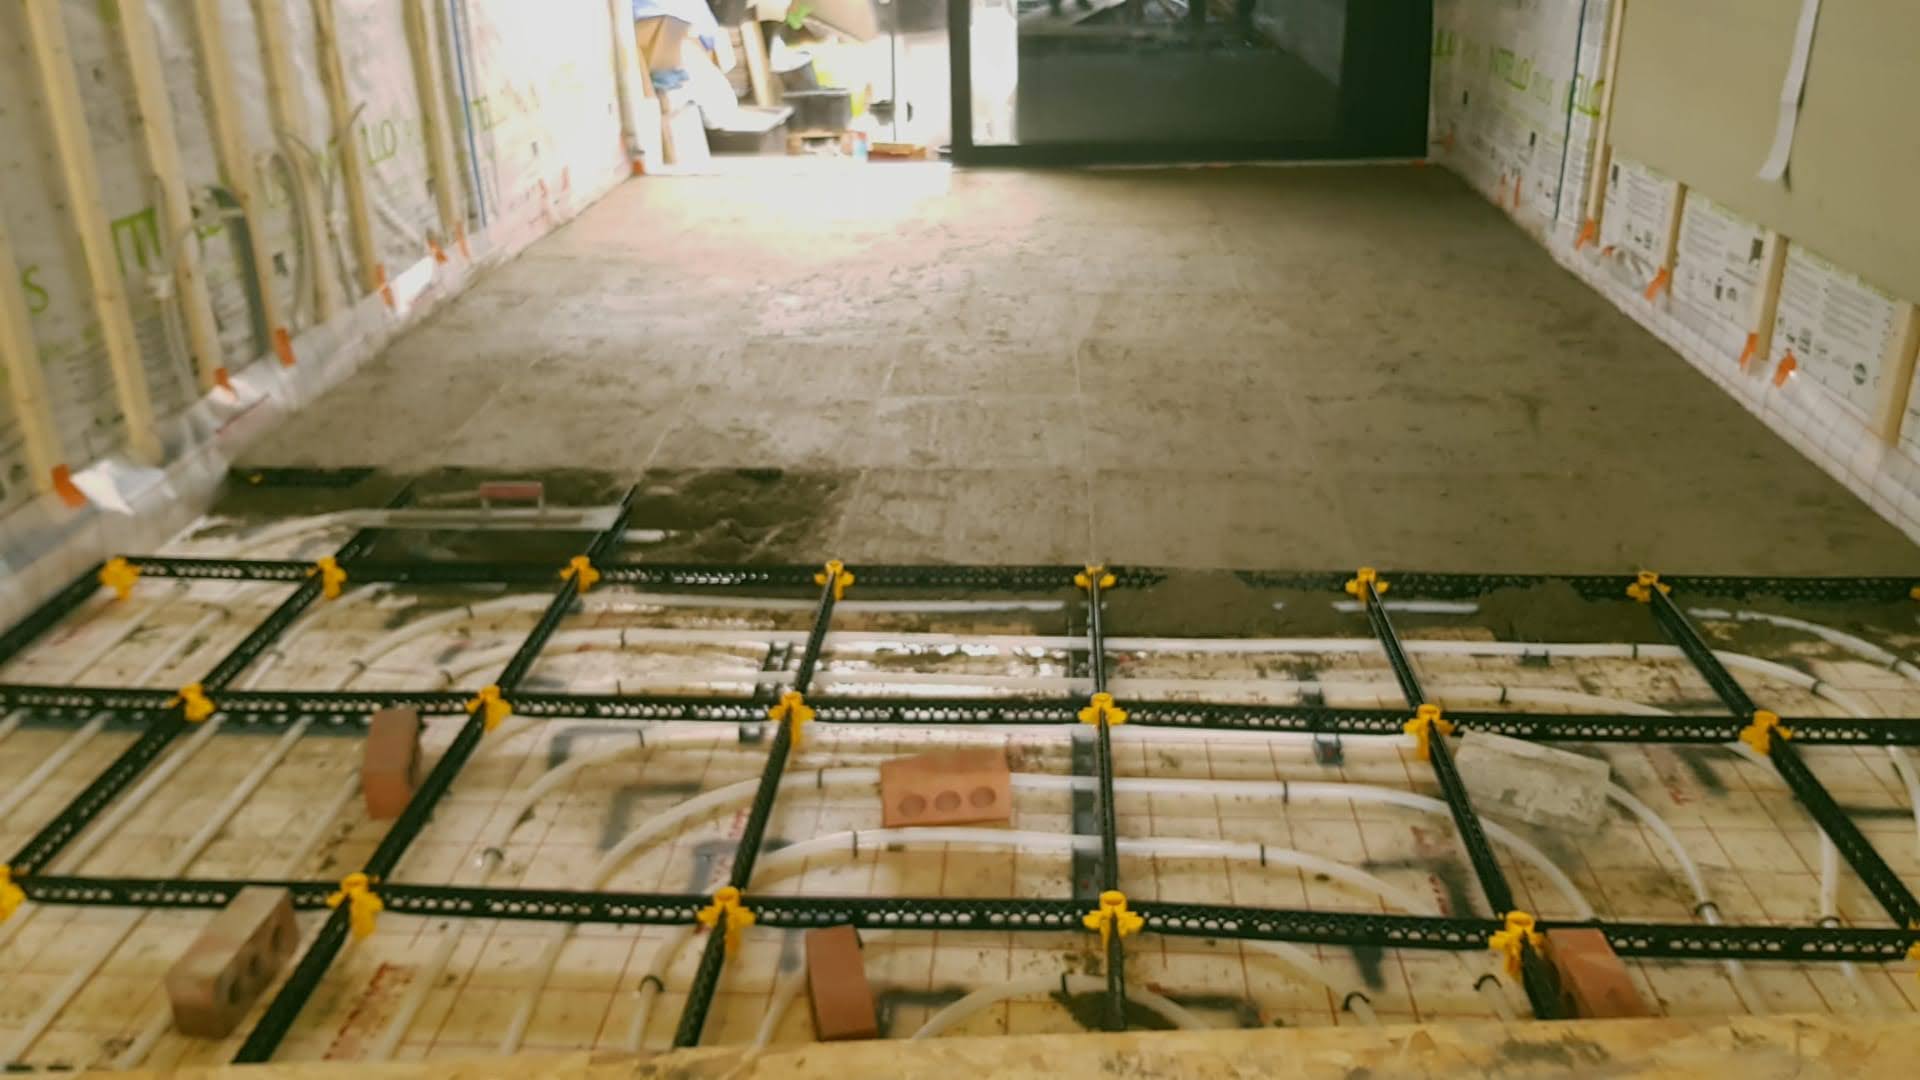
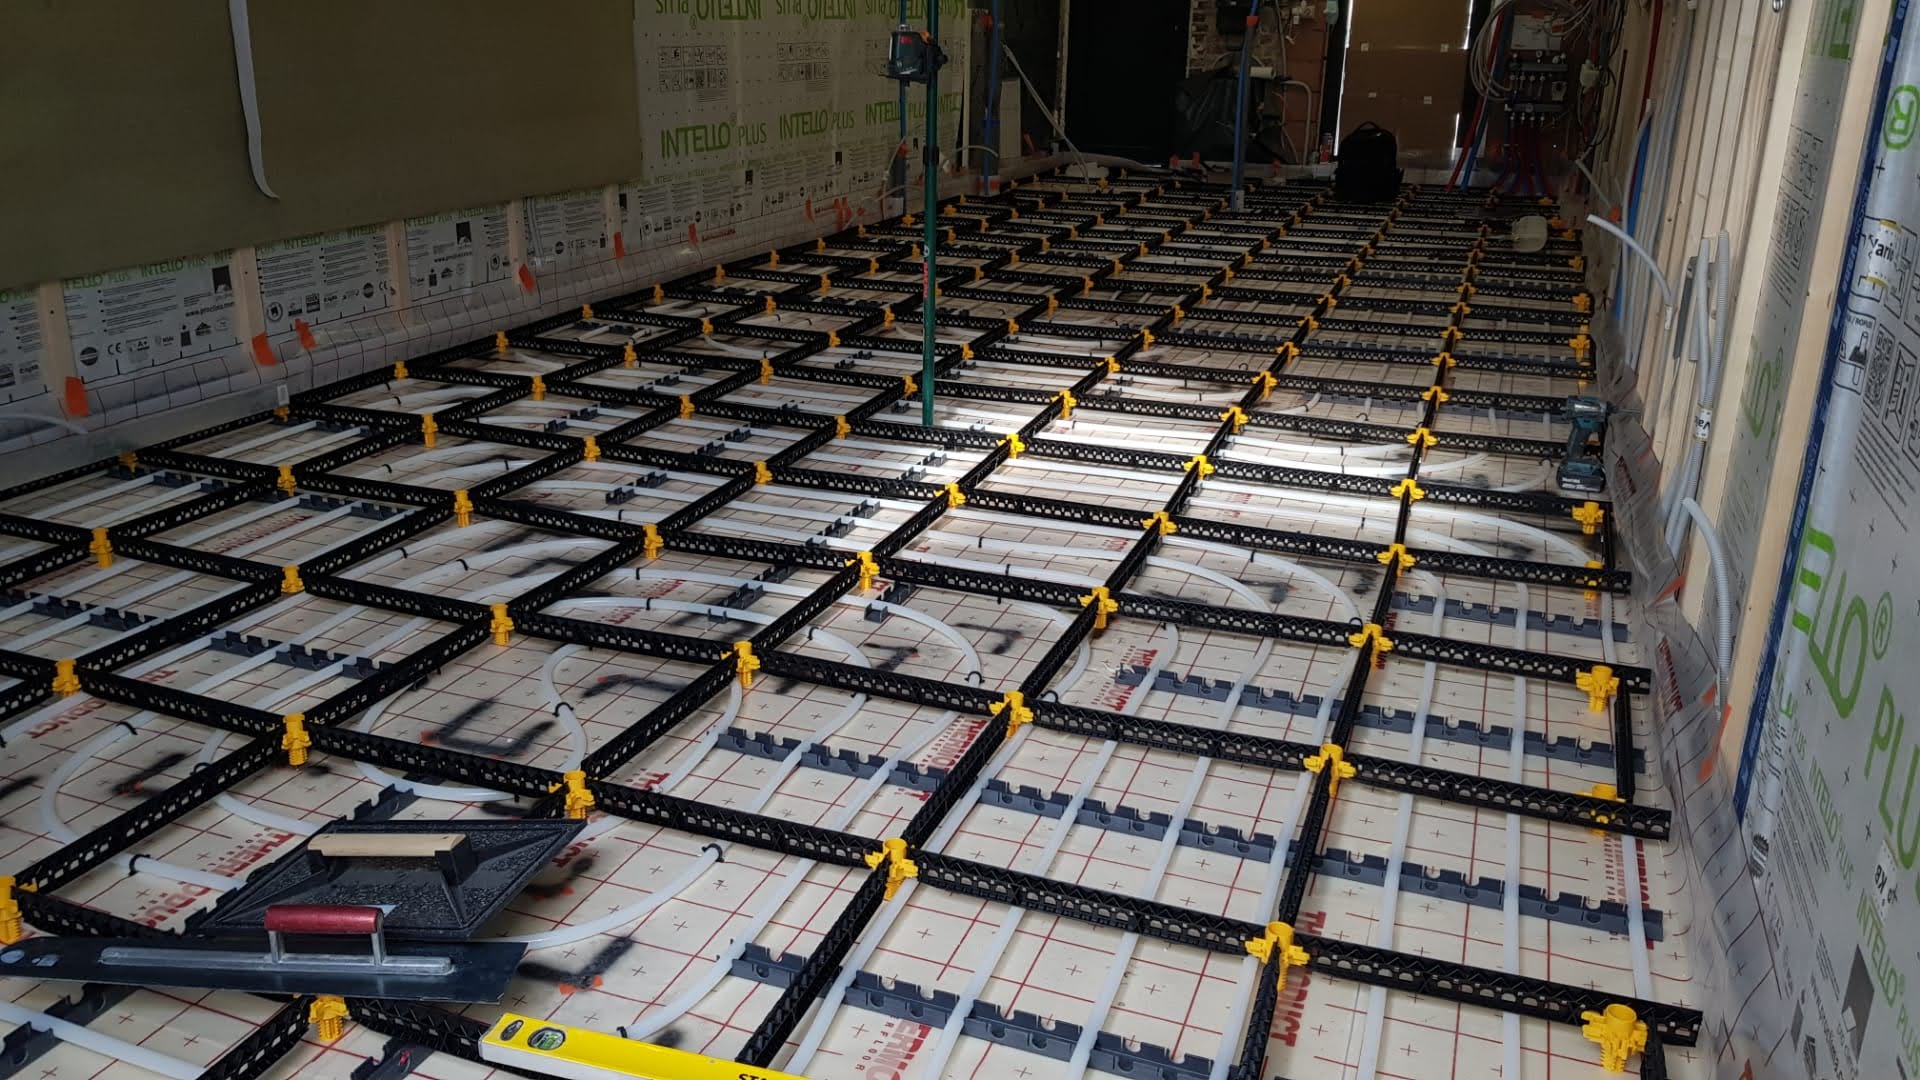
- Staenis grid (thickness from 4.5 to 9 cm)
- Screed with 250 kg/m³ cement (incl. plastic sheeting)
- Double bonding with S1 Flex Tile Adhesive
- Tile, multilayer parquet, floating floor covering
- Water-repellent, colored joint mortar
- Skirting board
- Flexible silicone
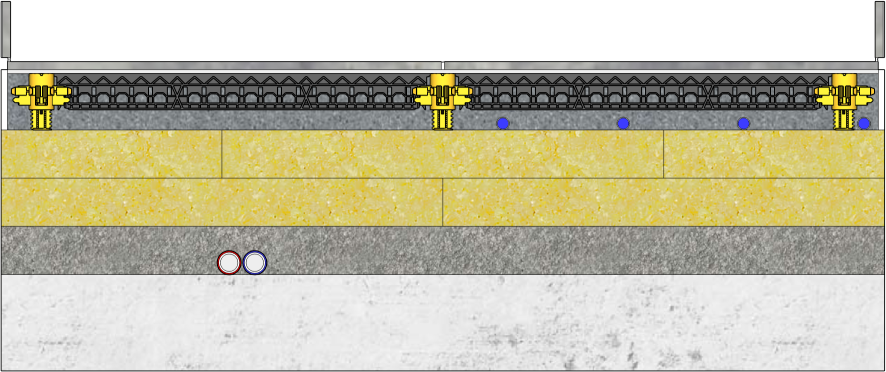
Side view of floor build-up with underfloor heating
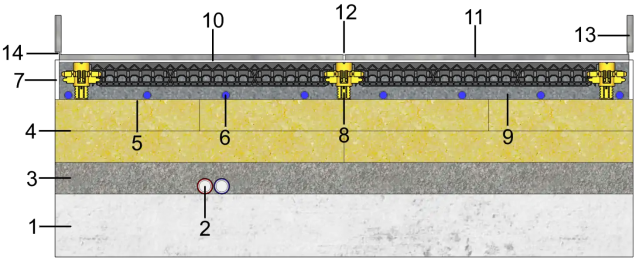
Legend
- Concrete
- Pipes (heating, electricity, drainage, etc.)
- Insulating screed fill layer
- Insulation boards in 2 staggered layers
- PE film (0.2 mm)
- Underfloor heating
- Edge insulation 8 mm thick
- Staenis grid (average thickness 8 cm)
- Screed with 250 kg/m³ cement (incl. plastic sheeting)
- Double bonding with S1 Flex Tile Adhesive
- Tile, multilayer parquet, floating floor covering
- Water-repellent, colored joint mortar
- Skirting board
- Flexible silicone
Installation video


We deliver screed in a silo to your home (only in Belgium)
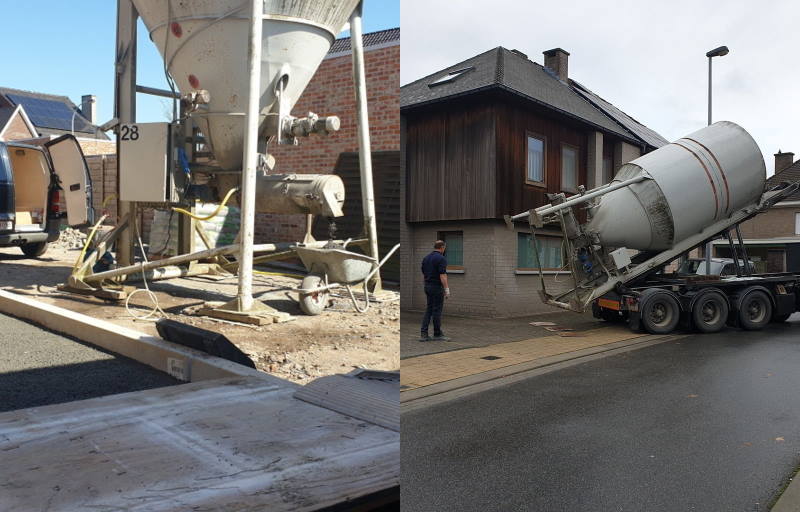
With a simple press of the button on the silo, you can produce fresh sand-cement screed at a rate of 3 m³/h, and this without time pressure to process the large quantity of sand-cement screed.
There are actually 2 separate compartments in the silo. One part is filled with sand (0/4-0/7mm) and the other part is filled with dry cement (250kg/m³). These are only mixed with water at the moment you wish.
The big advantage of this is that you can make fresh sand-cement screed at your own pace and for several weeks.
We deliver screed in bags to your home
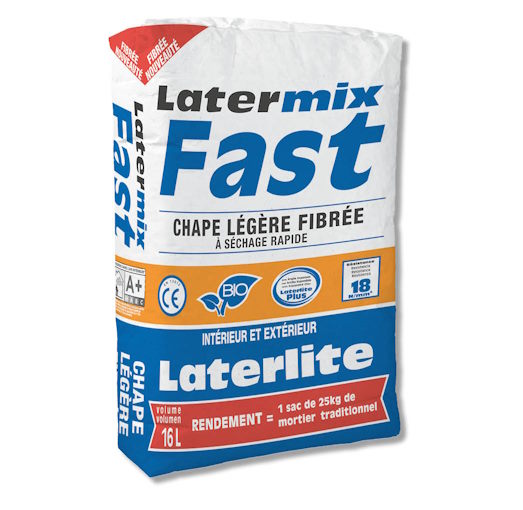
Fast: Fast-drying, fibre-reinforced screed with only 2/3 of the weight compared to traditional screed. This makes the work significantly less heavy when working with bagged material instead of traditional screed. Ideal for applying a bonded screed floor or for small spaces, both indoors and outdoors. This Fast screed is easy to spread, allowing you to achieve a flat finish more quickly.
We deliver insulation screed in bags to your home
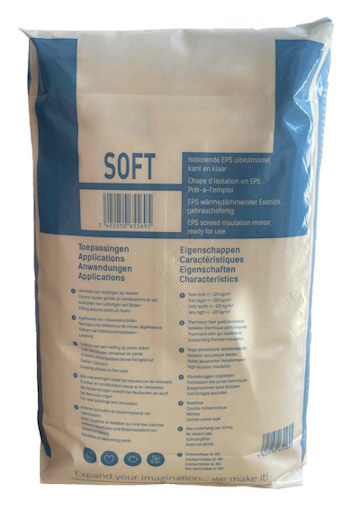
The insulation screed is pre-mixed with new EPS beads, combined with cement, water, and specific patented additives.
The EPS beads have a specially small diameter of 2mm-6mm, in order to achieve an even flatter result with the Staenis grid.
The insulation screed in bags is easy to transport and makes it possible for you to insulate your floor yourself.
This non-walkable insulation screed can be used as insulating infill in the Staenis grid, single or double layered with at least 18mm OSB. It can also be used as an insulating levelling layer, with a screed on top.