CircoFloor manual
Welcome to the manual for the CircoFloor system. In this photo guide, we will guide you step by step through the installation of the CircoFloor dry floor system, so that you can efficiently and with high quality create a durable floor.
Download brochureImportant points to consider before you start
Please read these points in full first. They determine the strength, flatness and lifespan of the floor structure.
- Place all white textured panels in the same direction. The arrows on the top and the fins on the bottom should follow the same direction.
- For each black adjusting screw and green locking screw, check whether the upper and lower white structure plates are fully engaged.
- Use the torque limiter or slip clutch of the screwdriver so that the head of the black adjusting screw or green locking screw is not damaged.
- Install the green locking screws as soon as possible after the white structure plates and black adjusting screws have been installed. Do not unnecessarily walk over parts that have not yet been secured.
- It is better to work from just a little too low up. Turning the system up a little afterwards is easier than turning everything down.
- Never rest a black adjusting screw directly on a pipe, cable or ventilation duct. Move the adjusting screw or place additional support next to the obstacle.
Preparatory works
Check the surface
The surface must be stable, load-bearing and free of loose dirt, sharp pieces and protruding parts. Check in advance where pipes, pipes, cables or ventilation ducts run.
Determine the total construction height
Take into account the height of CircoFloor, the short or long black adjusting screws, insulation filling, OSB, Durelis, Fermacell, Knauf Brio or underfloor heating plate, the final floor and all techniques under the floor.
Foil or vapour retarder
Place 0.2 mm PE film under CircoFloor in case of residual moisture, rising damp or a floor on open ground without a reliable moisture barrier. For cold surfaces, a vapour retarder on the warm side of the insulating layer may be necessary.
If you have any doubts about moisture or condensation, have the structure checked physically and avoid using two damp-proof layers.
View the foil and vapour retarder selection aidParts and names
White textured plate
The white plate from which the CircoFloor structure is built. Note the arrows at the top and the fins at the bottom to check the direction.
Black short or long adjusting screw
The black adjusting screw with which you adjust the height and pull the white structure plates towards each other. Choose short or long according to the desired build-up height.
Green locking screw
The short green locking screw with which you secure the top white structure plate, so that the structure plates can no longer click apart when walked on.
Direction of installation of the white textured panels
Place all white textured panels in the same direction. To do this, look at the arrows on the top and the fins at the bottom of the structure plate. The arrows and fins must follow the same direction.
Preferably continue working in the same direction. This way the threaded holes remain nicely aligned and the black adjusting screws and green locking screws can pull the plates together correctly.
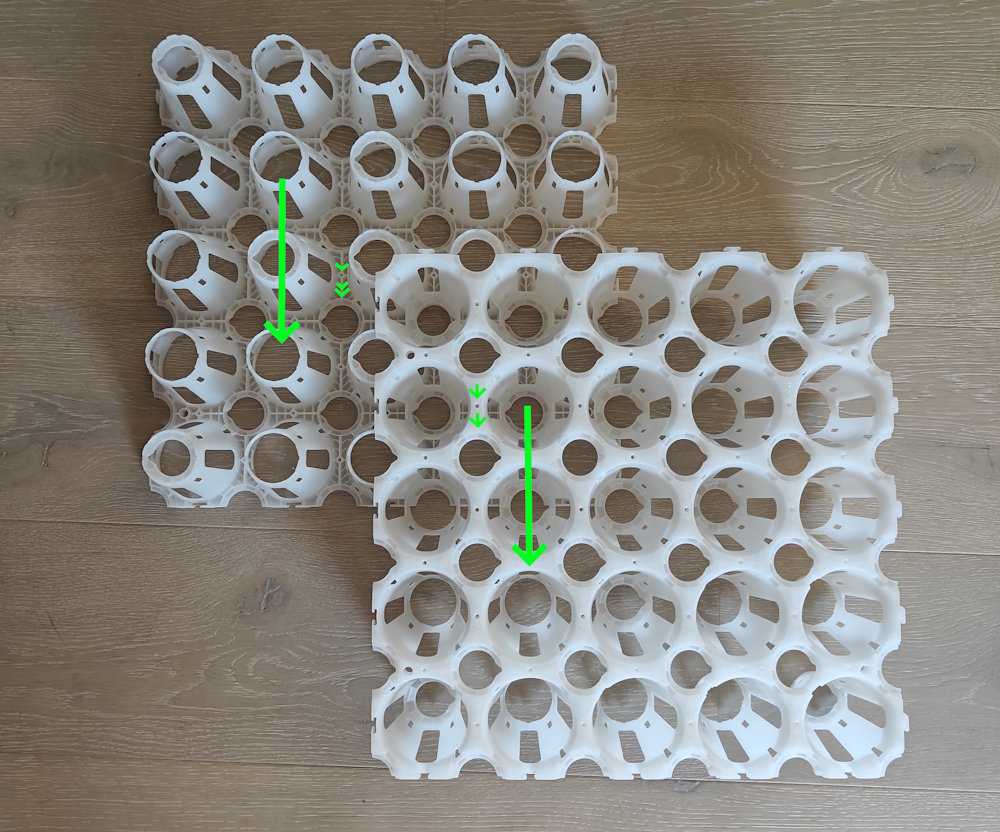
Good: top plate and bottom plate point in the same direction.
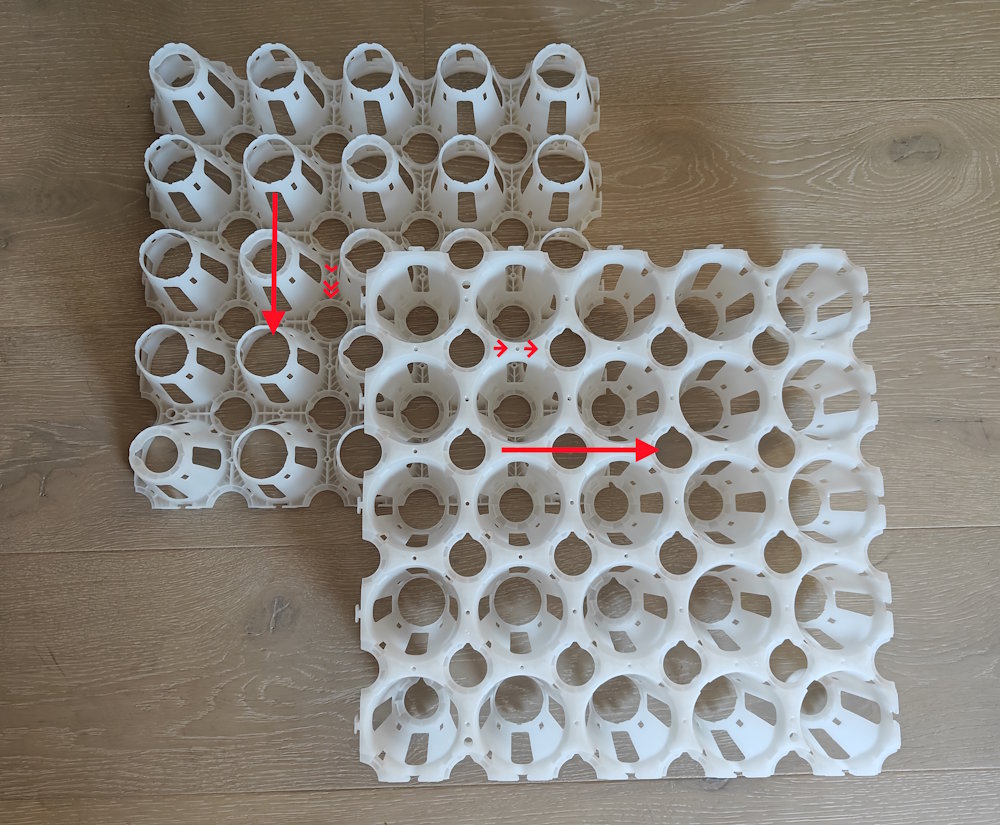
Wrong: turned a quarter turn; the screw threads will then not fit properly.
Check: if a plate does not close properly or if the screw is difficult to screw in, first check the direction. Do not force the screw.
How do you click the structural plates together correctly?
The strength of CircoFloor is because the white structural panels fully interlock. The black adjusting screw or green locking screw must not secure the plates at an angle. The screw must properly pull the upper and lower structure plates towards each other.
- First bring the white textured plates as close together as possible by hand.
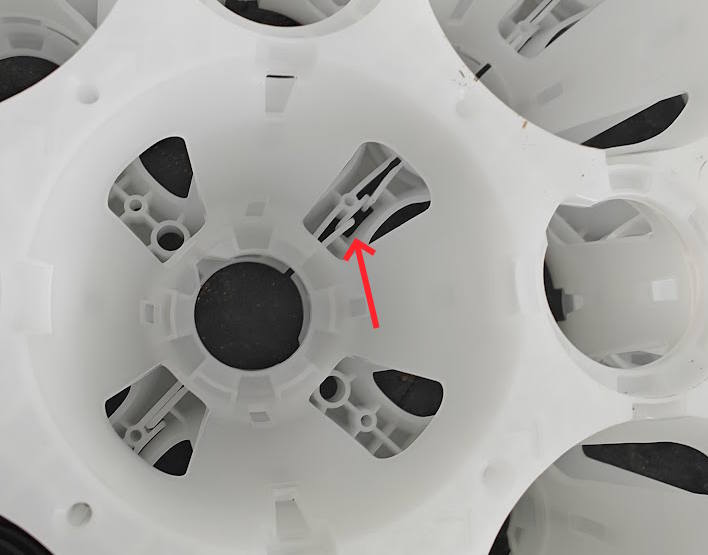
- Use the double threaded holes to pull the plates together with your finger.
- Check whether the top plate and bottom plate are in the same direction.
- Only then tighten the black adjusting screw or green locking screw.
- Let the screw pull the plates together completely and stop when everything connects.
If the plates are difficult to click together, temporarily screw a black adjusting screw into an adjacent hole and rest it on the surface. This way you can put more downward force on the structural plates.
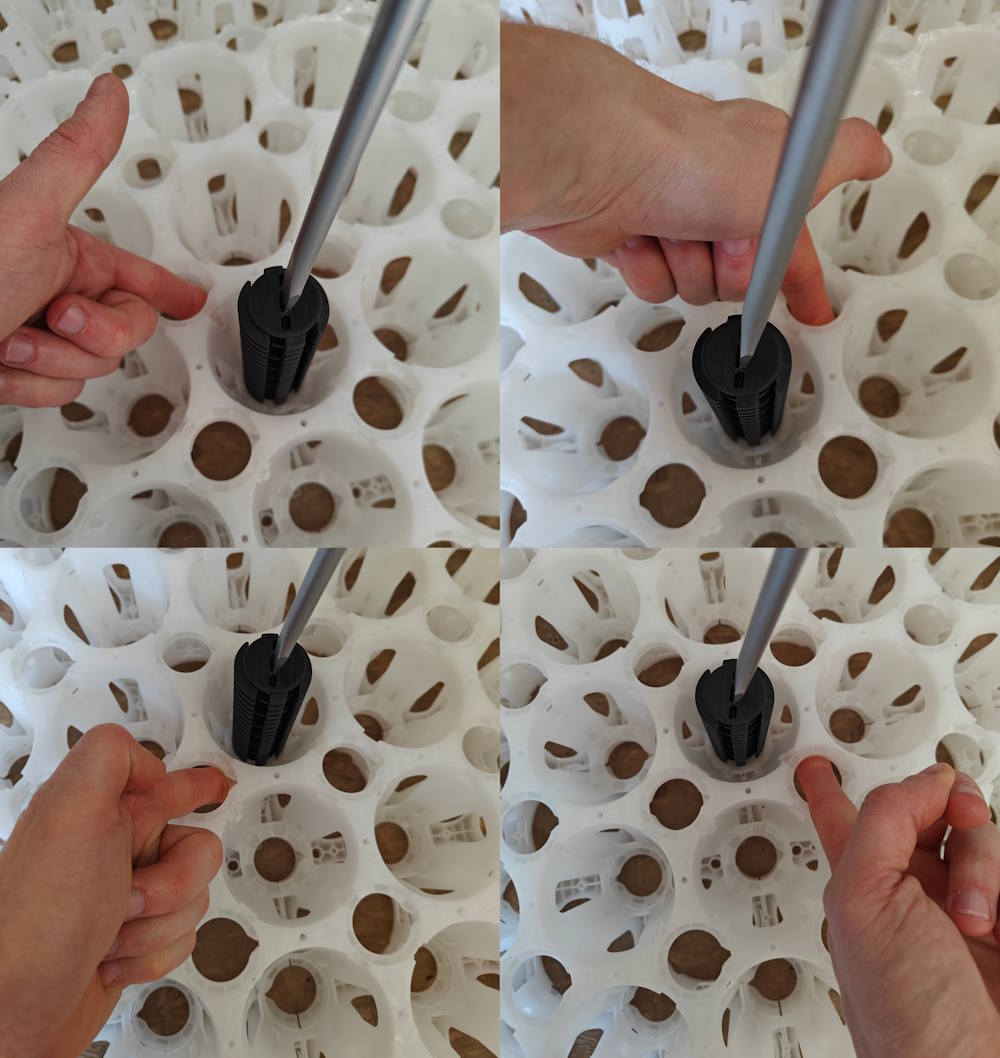
Good: thread pulls both plates completely together.
Wrong: plates are open and weakly secured.
Installing CircoFloor step by step
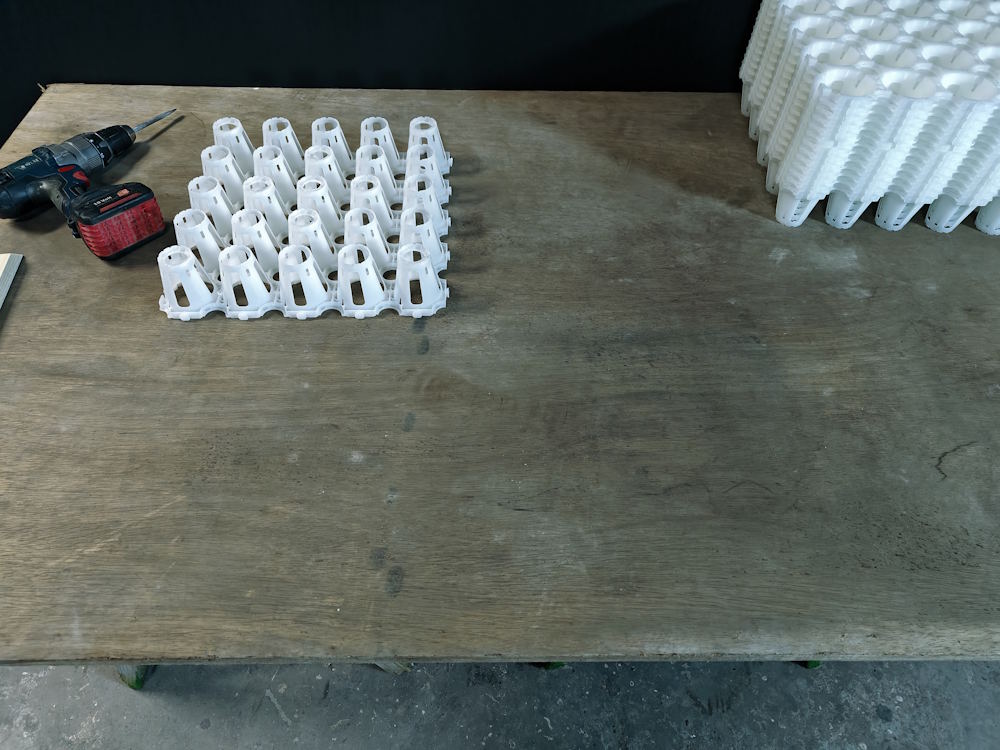
The CircoFloor system is largely assembled on a workbench, allowing you to work comfortably without straining your back.
Start by placing the first white textured plate on the table.
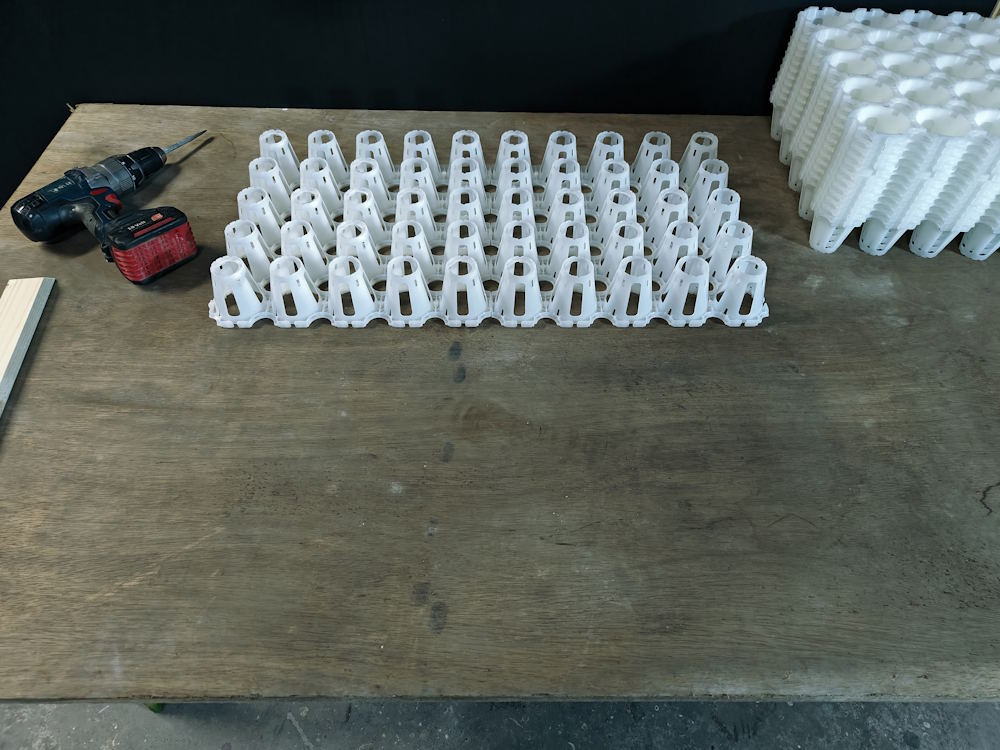
Take the second white structure plate and click it sideways into the first white structure plate, so that they are firmly connected.
Pay attention to the installation direction; make sure all white textured plates are placed in the same direction for correct installation.
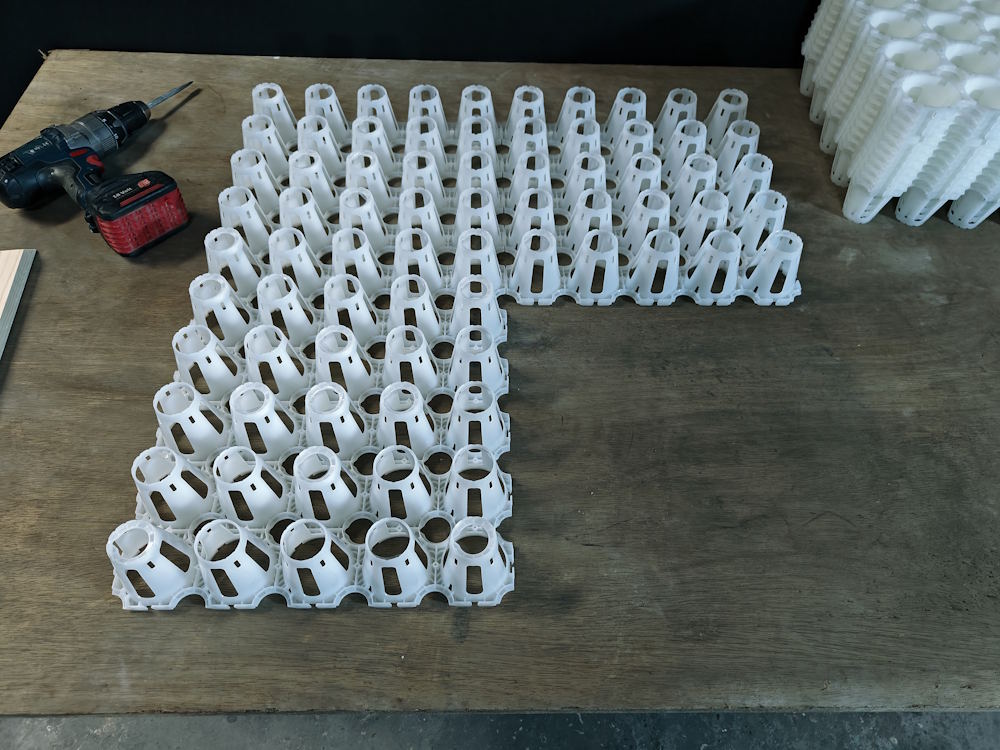
Add the third white textured plate to the whole.
Check the orientation on the inside of the structure plate; the ribs in the shape of an arrow indicate the correct installation direction.
Arrows at the top also indicate the correct direction.
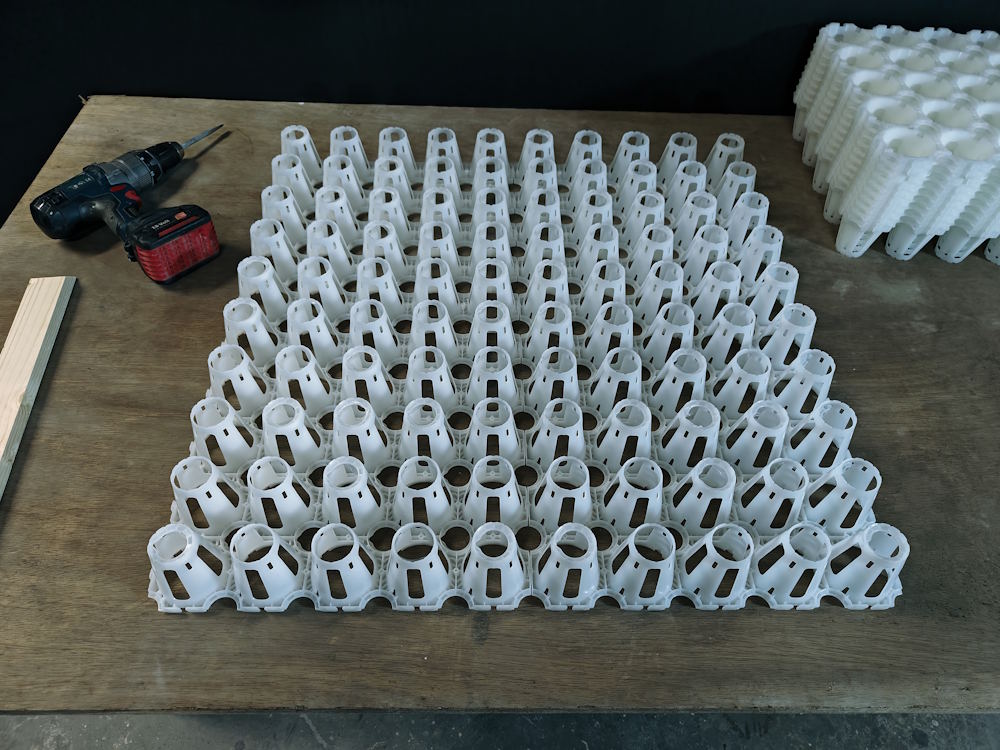
Place the fourth white structure plate on the table and connect it to the previous plates.
The correct orientation is crucial to ensure that the threads match and the black adjusting screw fits properly.
Check the direction of upper and lower white structure plate
Always follow the arrows on the top and the fins on the bottom. Both white textured panels must face exactly the same direction, for example all facing the same wall or street side.
If the upper and lower white structure plate are positioned transversely opposite each other, the screw thread is turned a quarter turn. The plates then remain open by 1 to 3 mm and never click completely together.
Check this immediately as soon as a part does not close properly or comes apart later due to tension or heating.
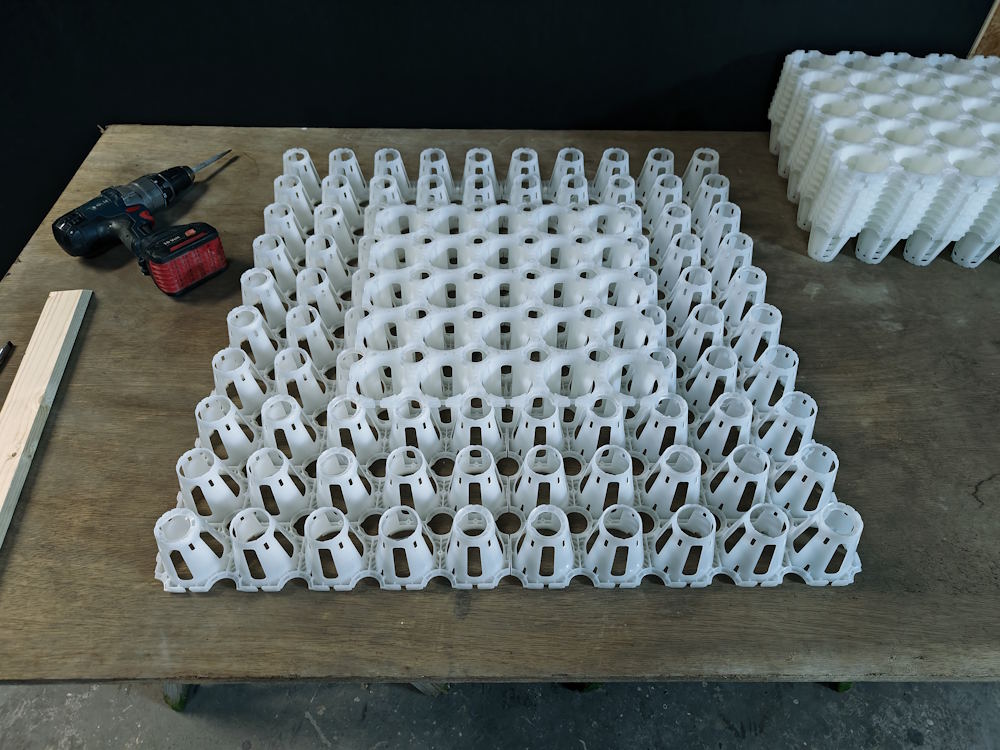
Place a white structure plate upside down and in the same direction in the middle and click it to the four surrounding white structure plates.
We call this assembled part a mushroom in this manual: four lower white structure plates, one upper white structure plate and one black adjusting screw in the middle.
Tip: to work faster and easier, assemble several mushrooms next to each other on the table.
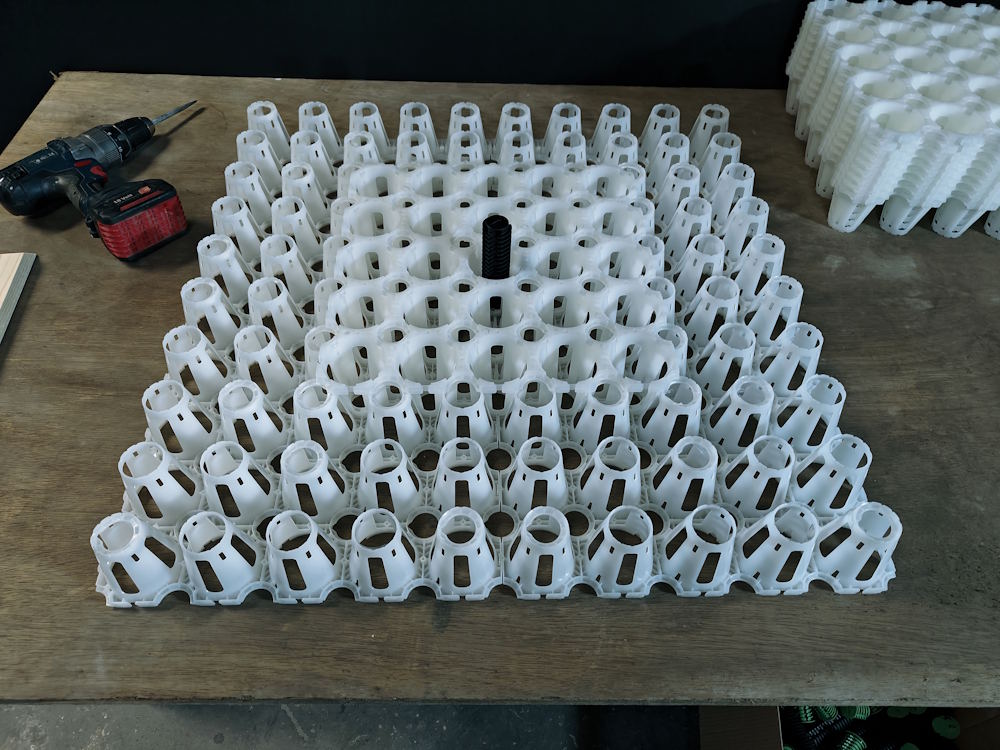
Place a black adjusting screw in the center to connect the four bottom white texture plates to the top white texture plate.
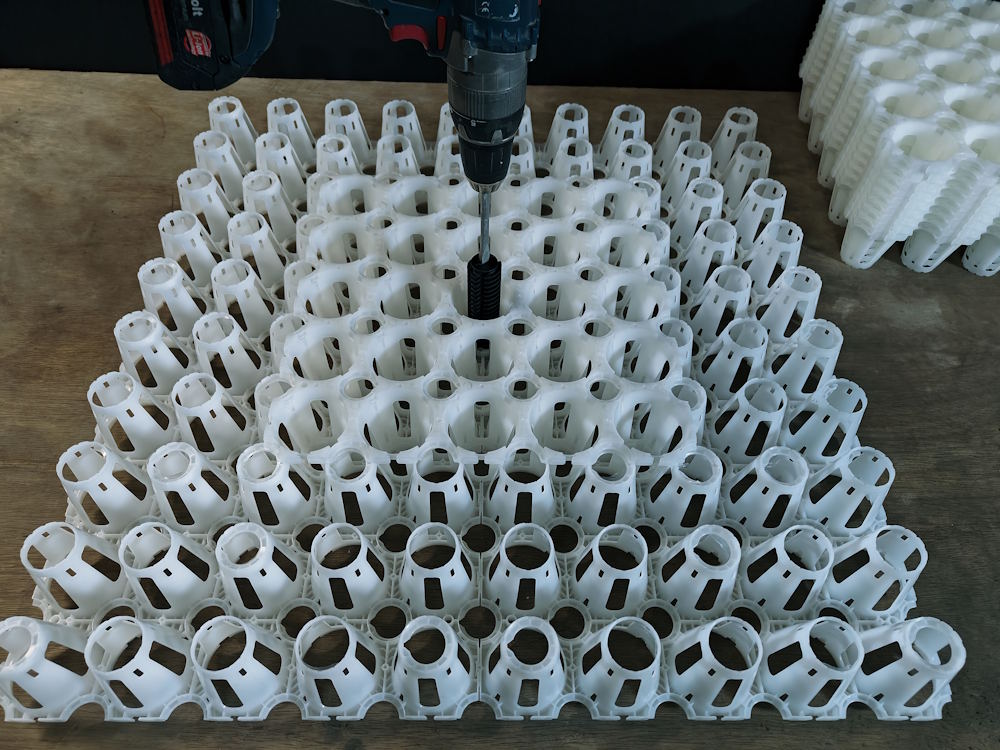
Although a flat-head screwdriver is sufficient, it is faster with a screwdriver. Always use the screwdriver with the torque limiter or slip clutch engaged, so that the head of the black adjusting screw is not damaged.
Tip: sharpen a flat screwdriver to use as a bit in the screwdriver. Preferably use a hand screwdriver for the final fine adjustment.
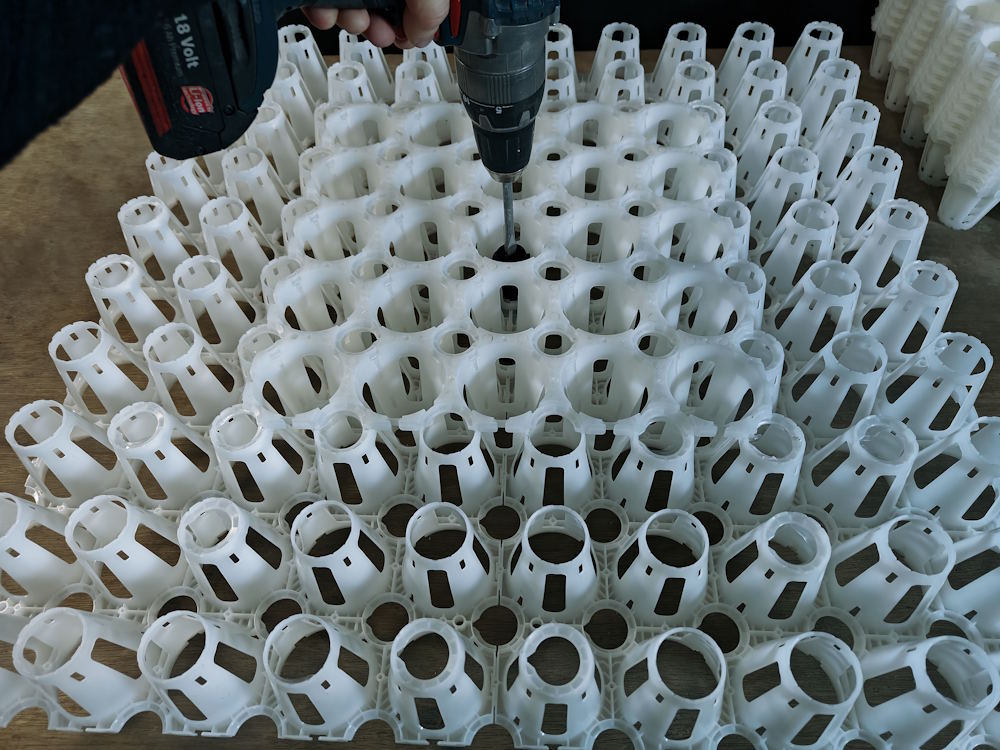
Adjust the black adjusting screw as close as possible to the desired height.
It is better to work straight away or just a little lower. Turning the system up a little afterwards is easier than turning everything down.
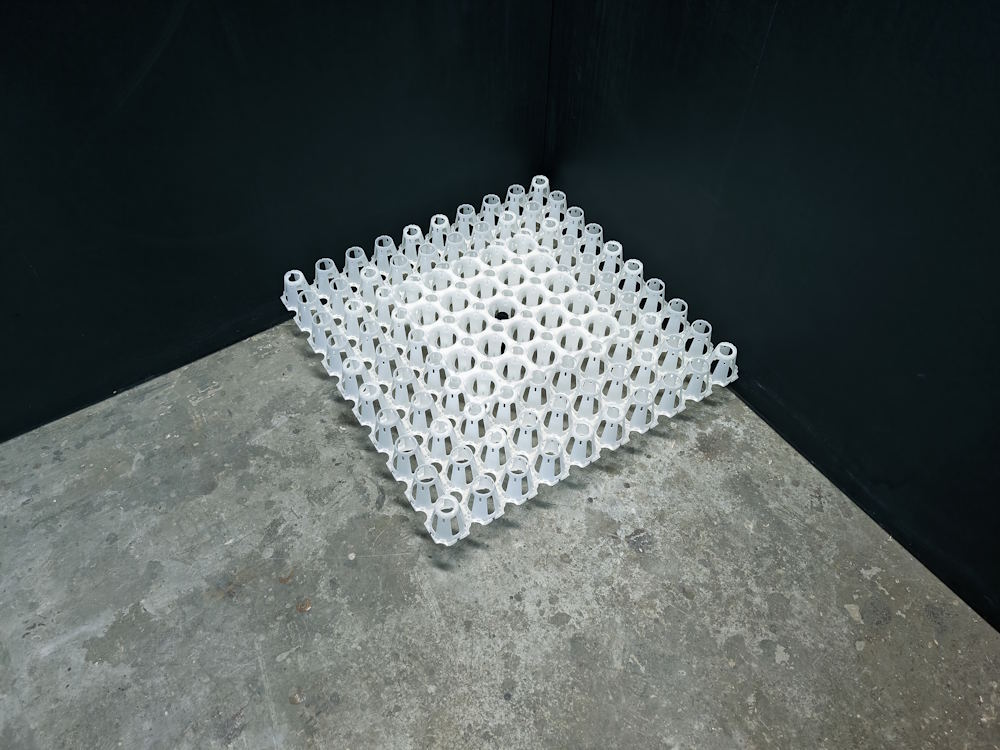
Place the first composite part on the substrate.
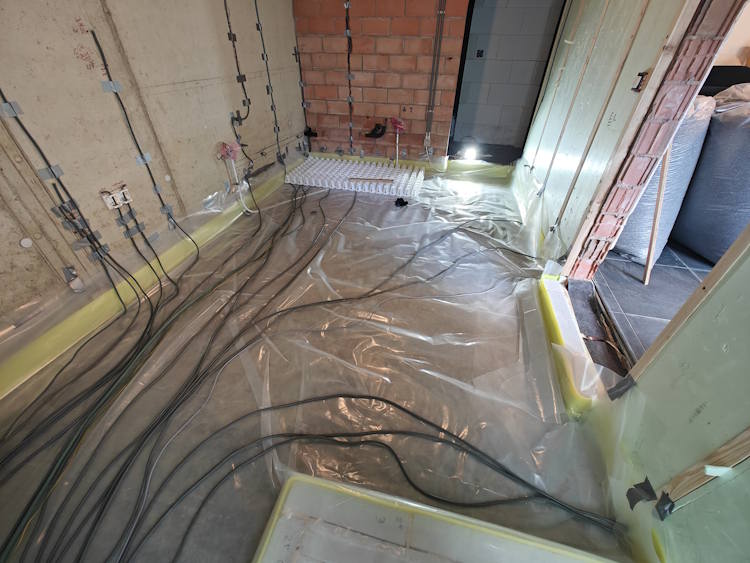
Check the foil before you continue building
If your project requires PE film or a vapour retarder, it must be installed correctly before you further expand CircoFloor. Complete preparation is at the top of this manual.
Back to preparatory work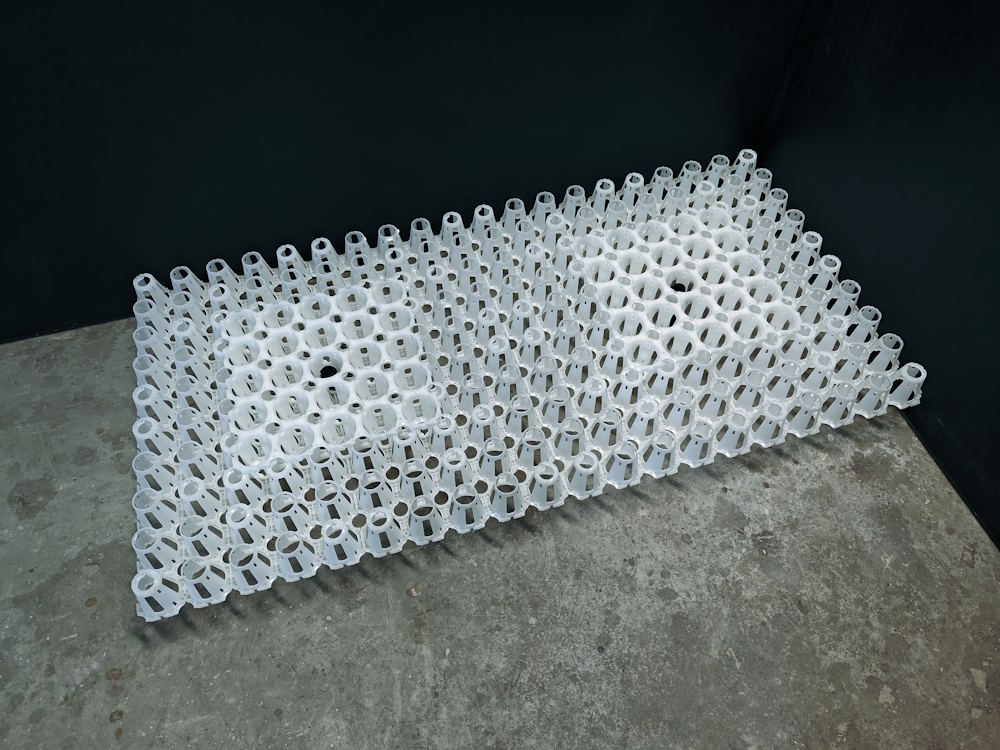
Make a second mushroom and connect it sideways to the first part.
Still pay attention to the placement direction of the white textured plates.
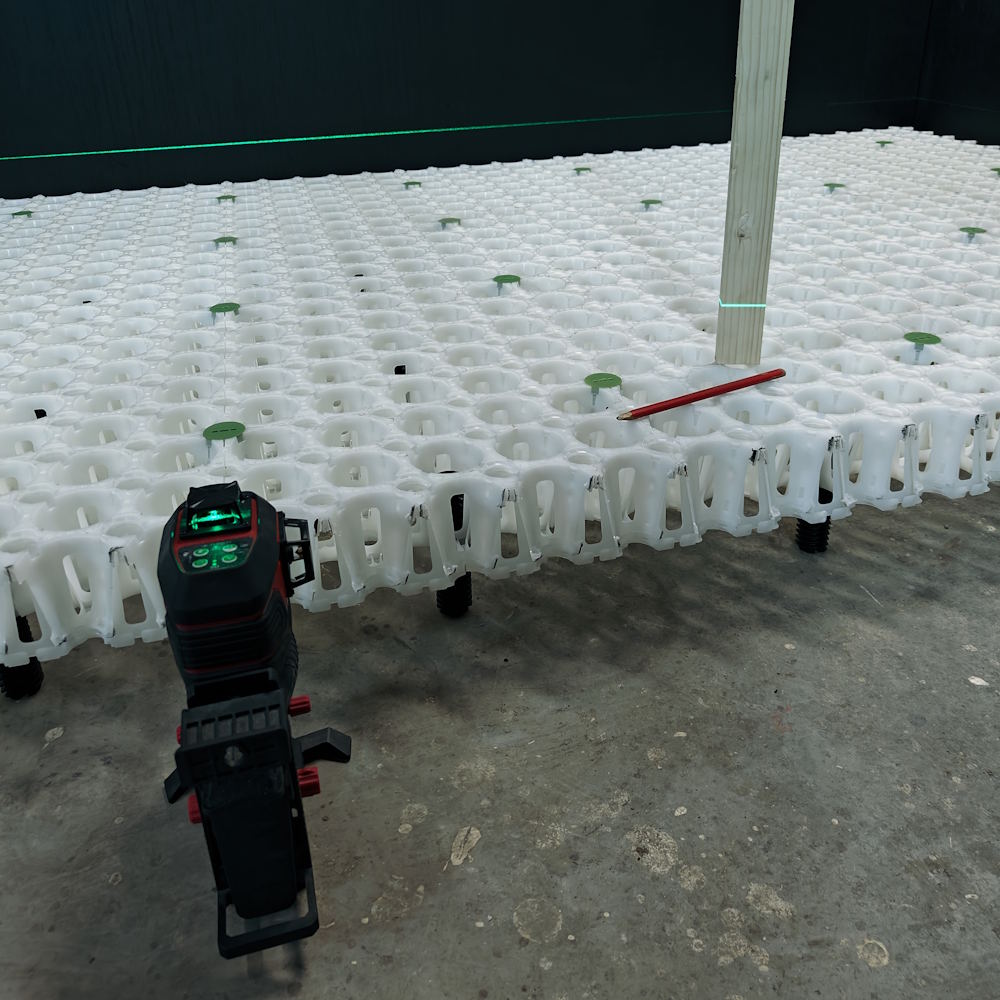
Determine the correct height of the CircoFloor system using a reference point.
Use a wooden slat with a pencil line to easily adjust the system to the correct height. Adjust the last millimeters carefully with a hand screwdriver.
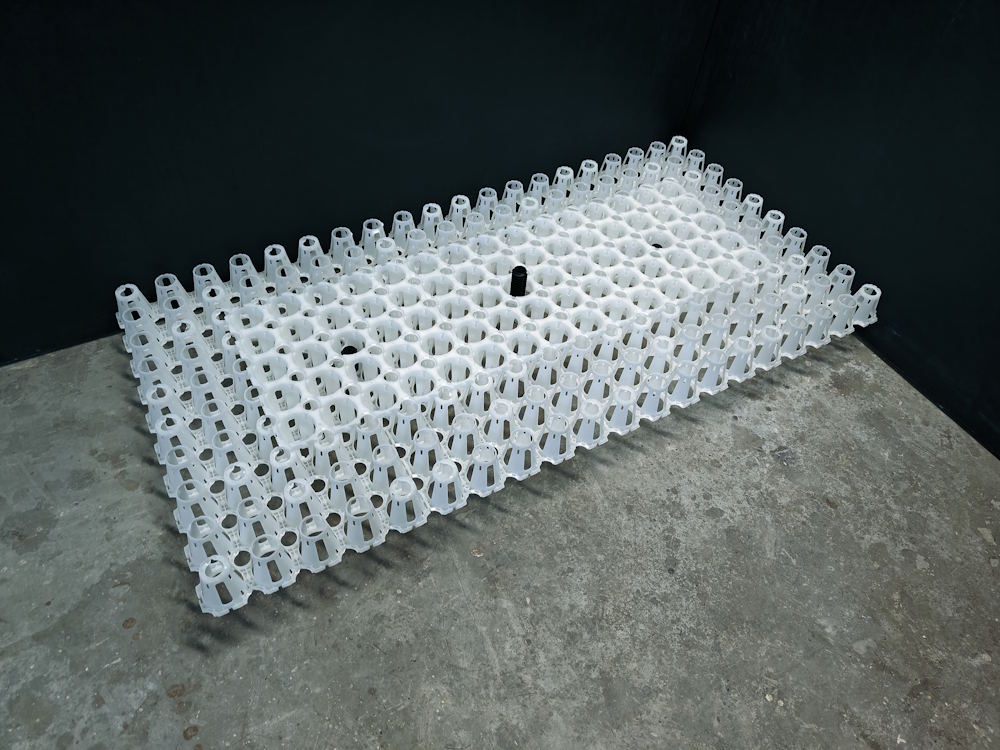
Now also make sure that both mushrooms are adjusted to the correct height.
Work row by row. First connect two mushrooms laterally with an upper white structure plate over the length of 39 cm.
Only when four mushrooms come together do you place the remaining top white structure plate centrally between those four mushrooms. This order ensures that the plates align better.
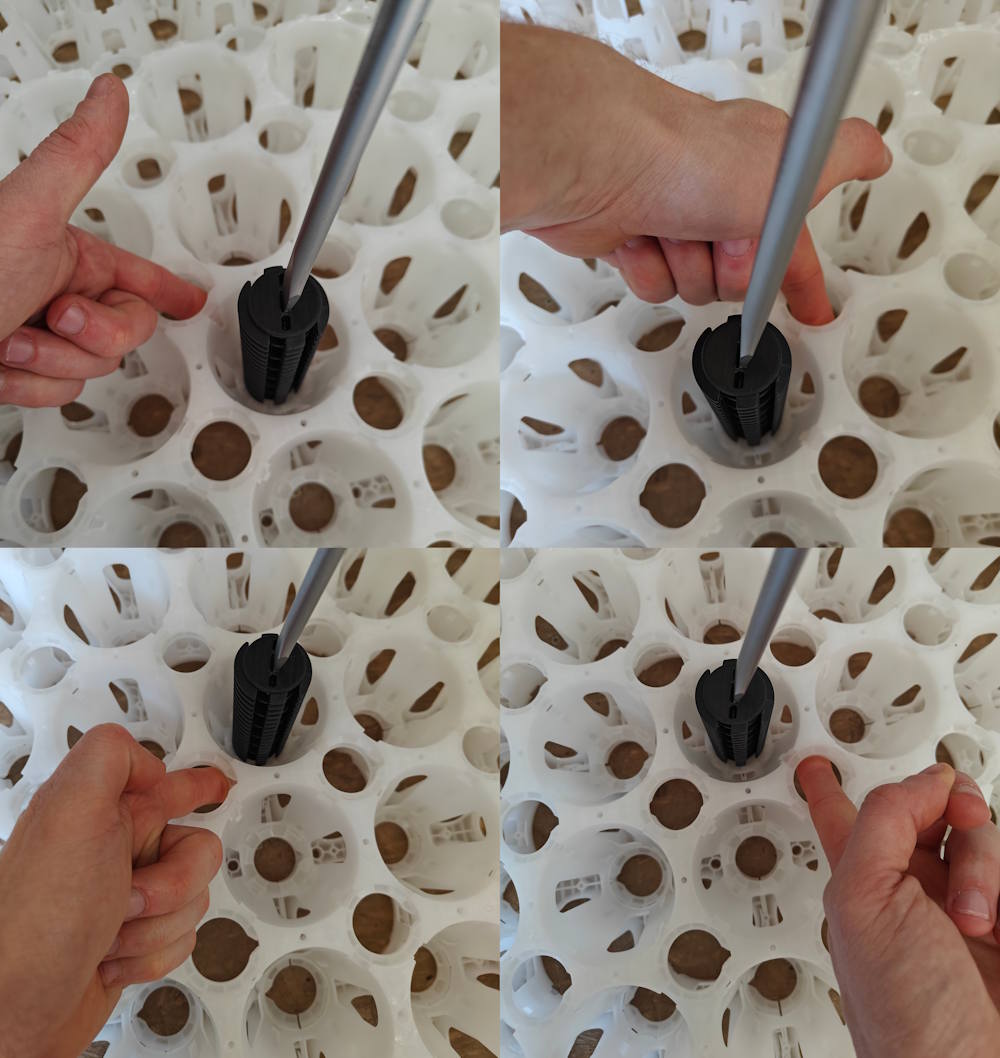
Screw the black adjusting screw into the center of the additional white texture plate, with four meeting corners at the bottom, and allow the threads to mesh the top and bottom texture plates together.
It helps to push the white textured plates together by hand while screwing through the double threaded holes.
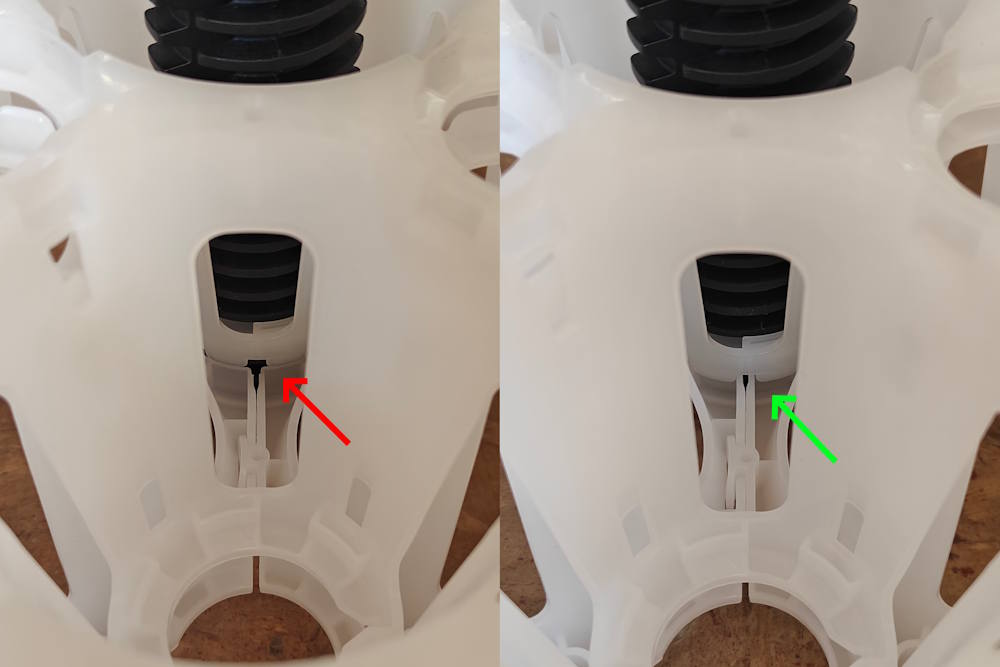
It is important that the white structural plates pull towards each other when turning the black adjusting screw. This way everything clicks together and the plates form a strong whole.
Check with each black adjusting screw that all white structure plates are properly assembled. If necessary, loosen the screw and try again.
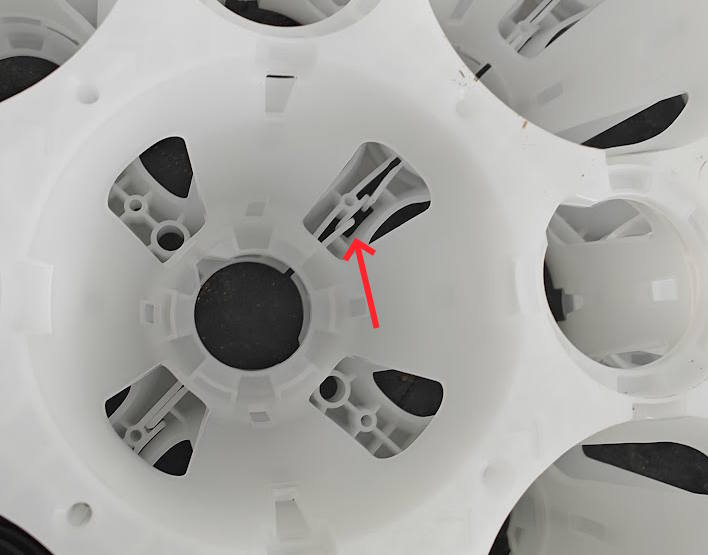
Make sure that the side click systems are always neatly put together and not as shown in the photo.
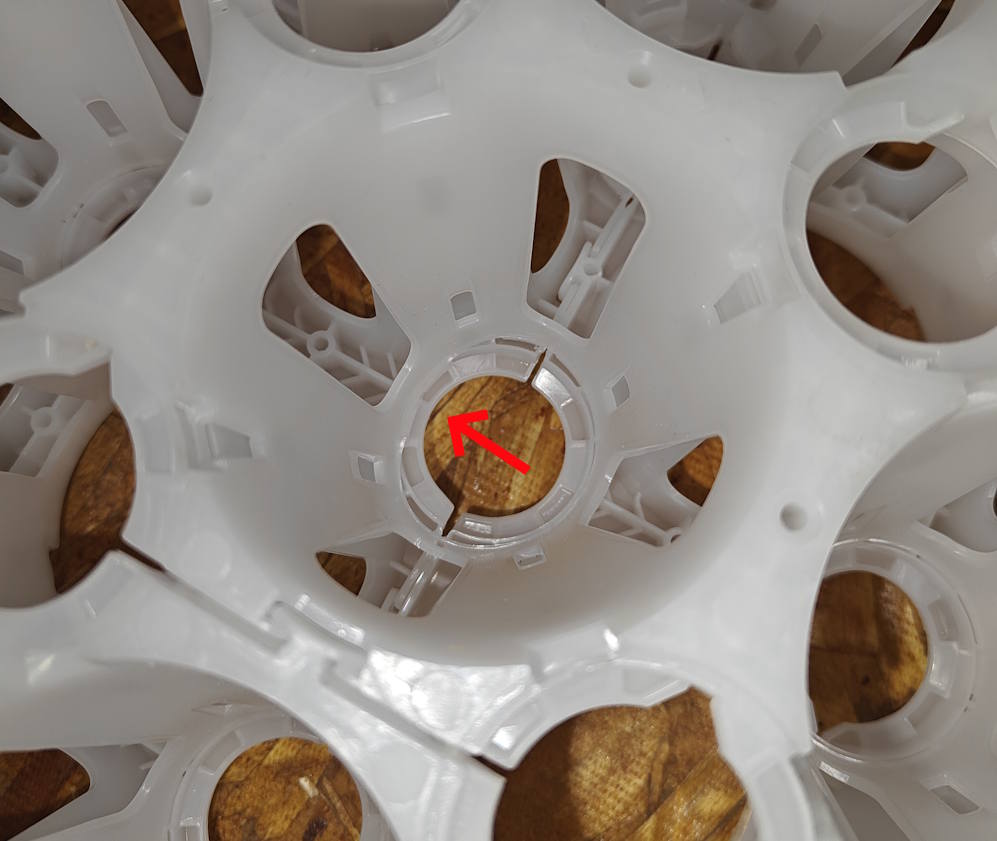
Make sure that the top and bottom white structure plates always fit neatly together and not as shown in the photo.
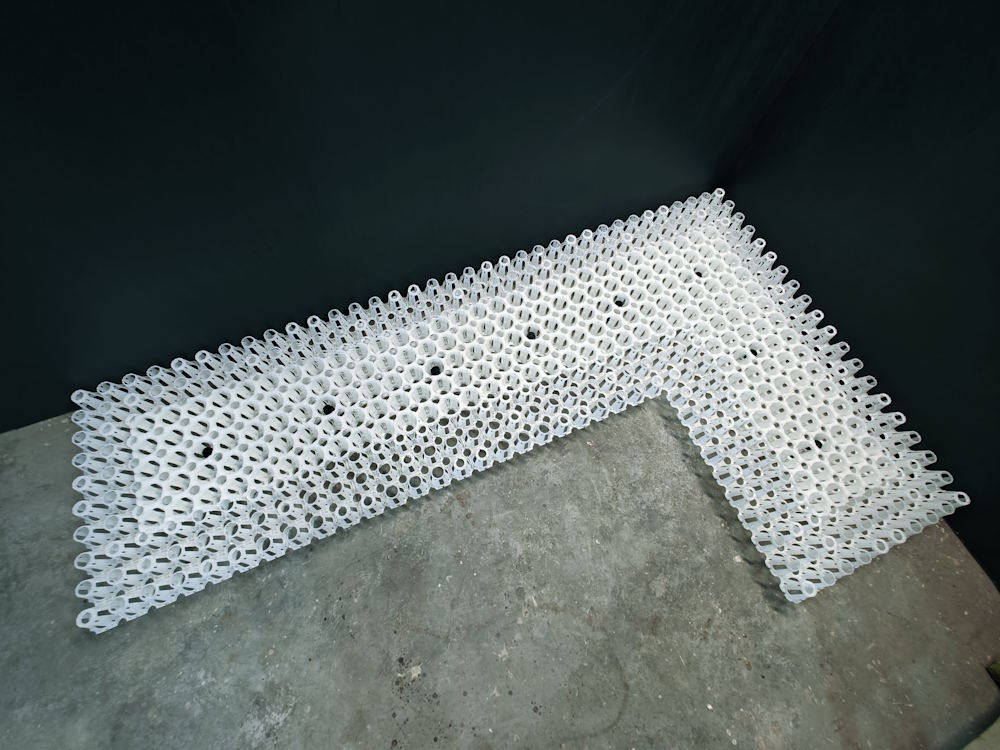
Expand the system further. As soon as an L-shape is formed, the whole becomes more stable.
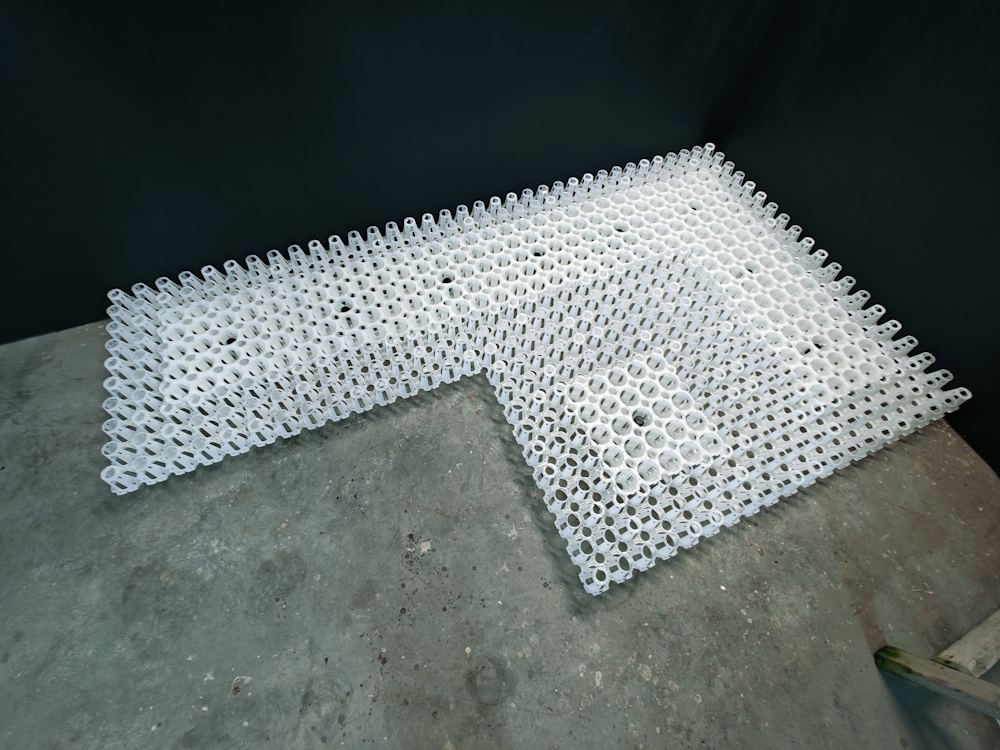
Continue building the CircoFloor system according to the area you want to cover.
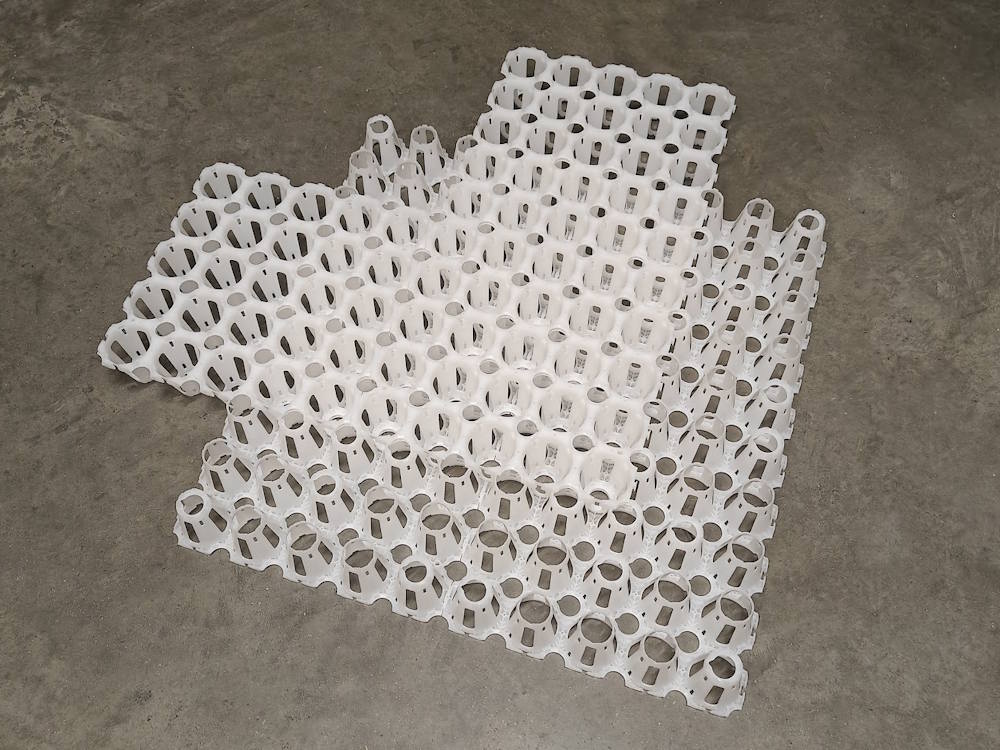
It helps to connect several white textured panels in advance.
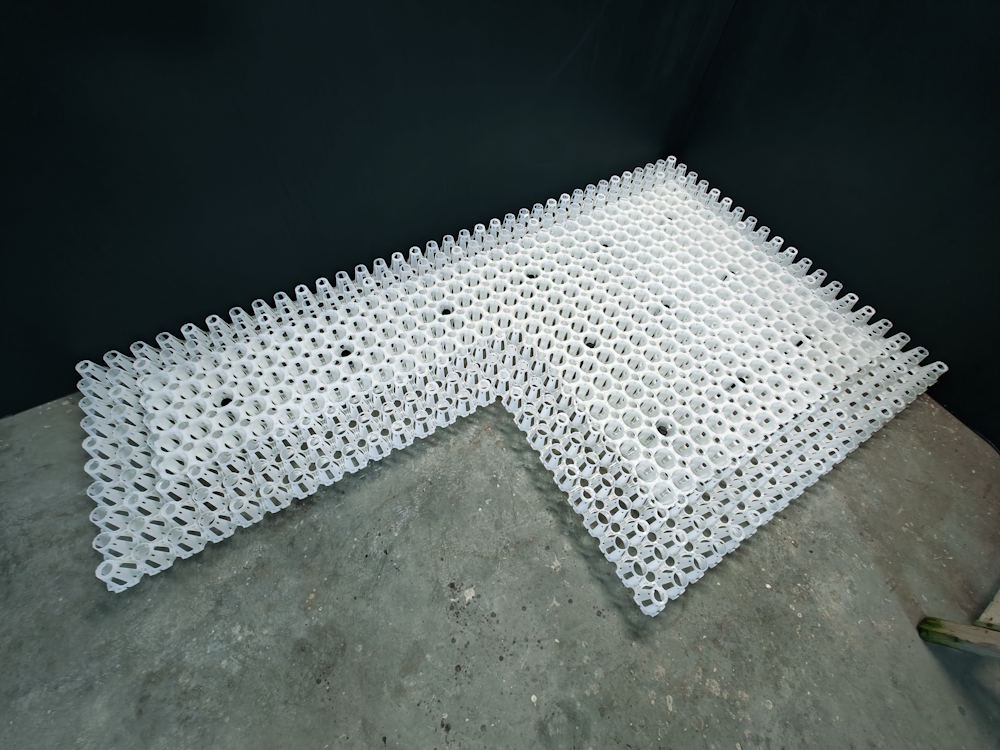
Place the white structure plates on top again and fix the whole with black adjusting screws for extra stability.
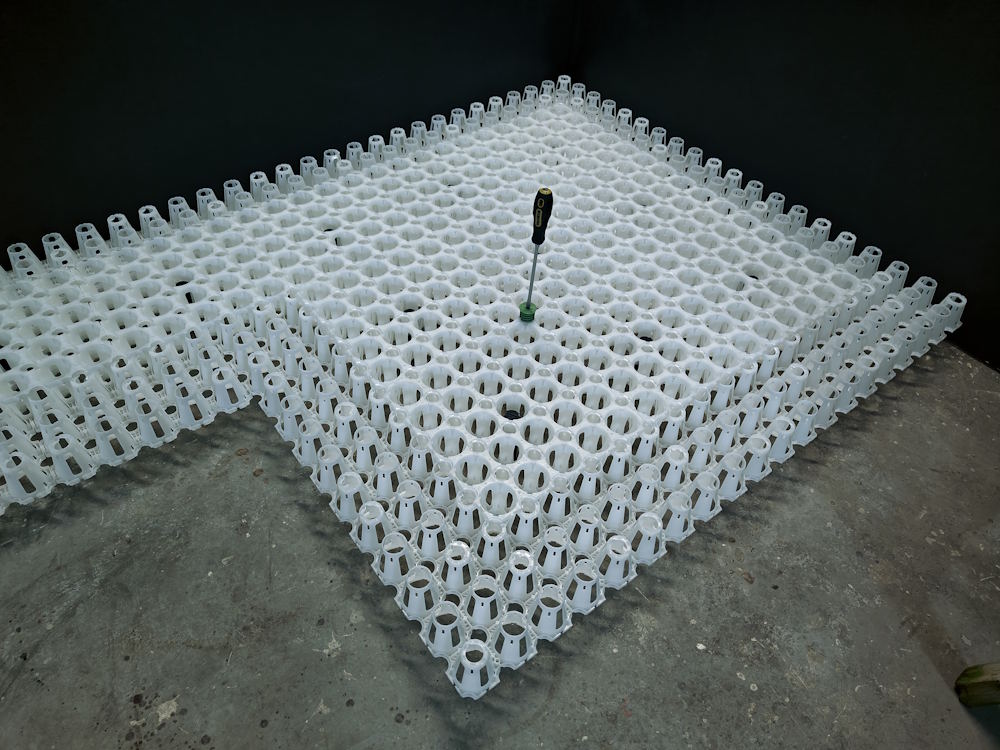
Now place the green locking screws as quickly as possible to firmly connect the top white structure plates to the underlying structure plates.
Green locking screw does not work immediately?
After the four black adjusting screws, also place the short green locking screw in the middle of the upper white structure plate.
If this does not work because the plates have sagged a bit, place an extra black adjusting screw in an adjacent hole. This lifts the structure plates so that you can lean on them, click the two white structure plates completely together and then place the green locking screw correctly.
Do not unnecessarily walk over parts that have not yet been secured with green locking screws.
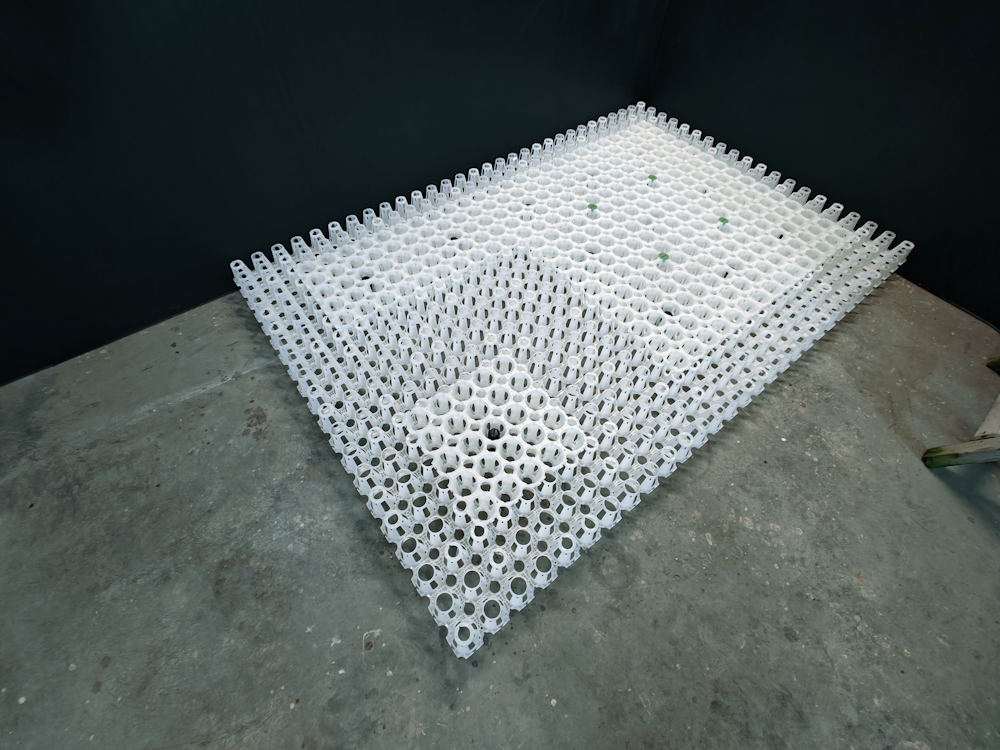
Continue building the system until the entire floor area is covered.
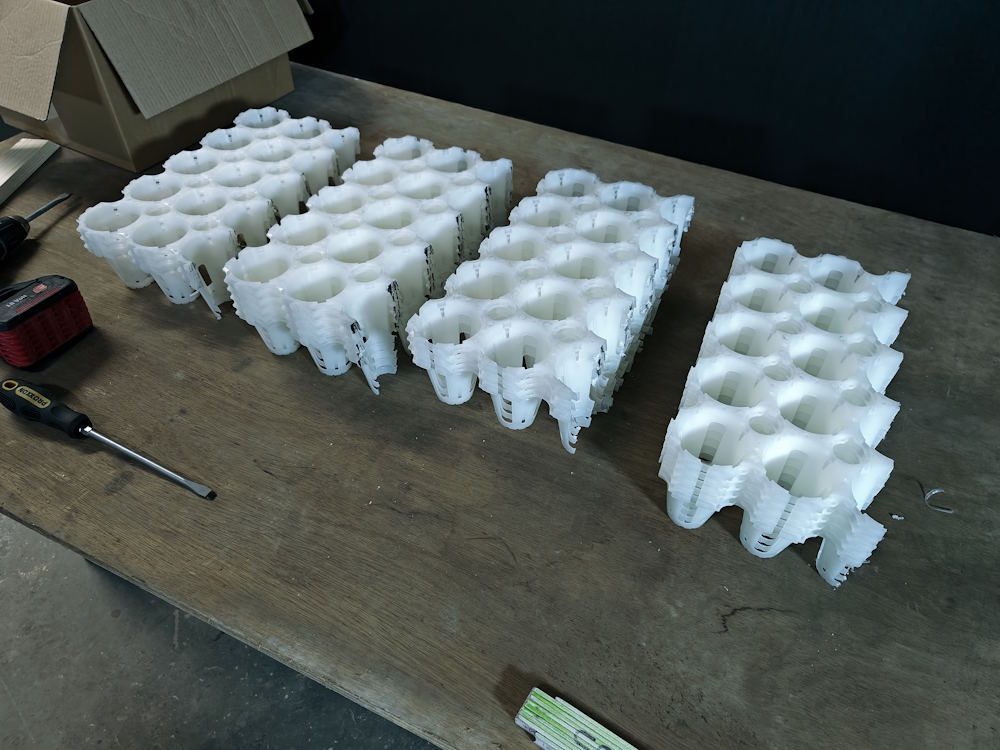
Use a grinder with a metal cutting disc to easily cut the system to size at the top and bottom.
By stacking multiple systems on top of each other and using a larger cutting disc, you can cut multiple structures to length at the same time.
Safely cut CircoFloor to size
You can easily cut CircoFloor structure plates to size with an angle grinder.
A sawing machine can also be used, but do not let it spin too fast. If the speed is too high, the plastic will melt and the saw blade can get stuck in the plate.
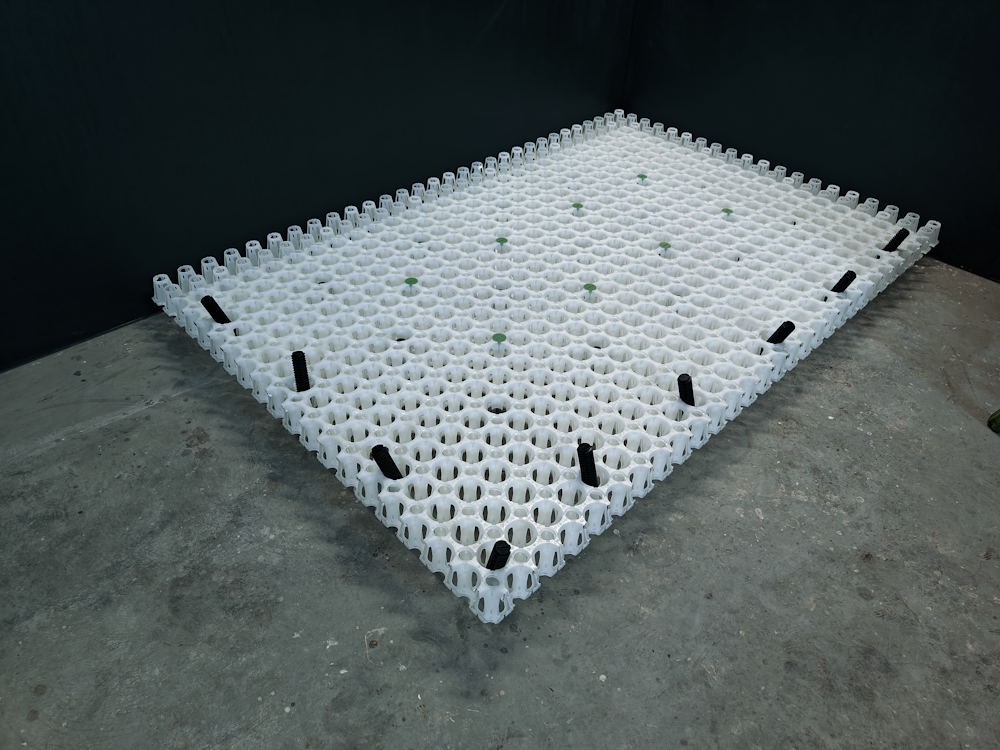
Finish the edges of the system with the custom-cut pieces.
Depending on the top layer, you can fit precisely or somewhat less precisely against the wall.
When using a thicker OSB board on the structural boards, it is acceptable to stay a few centimeters away from the edge.
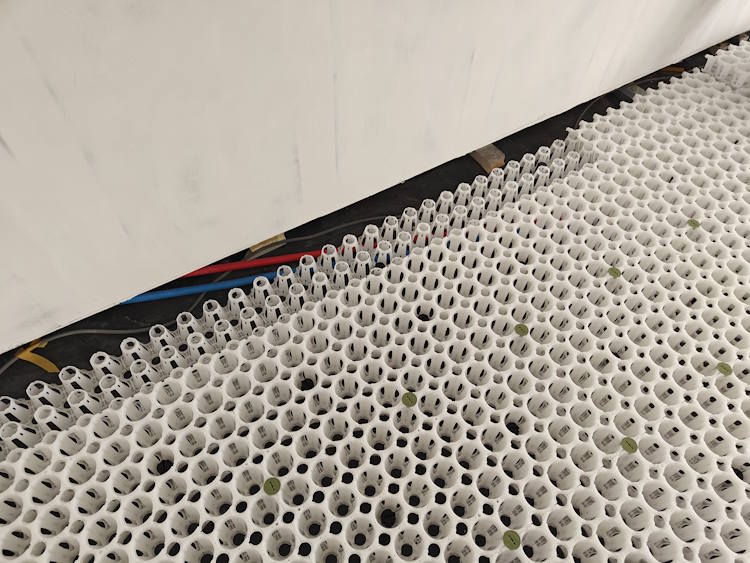
Always pay attention to the direction of the cut pieces, as this is important so that you can use the double thread afterwards.
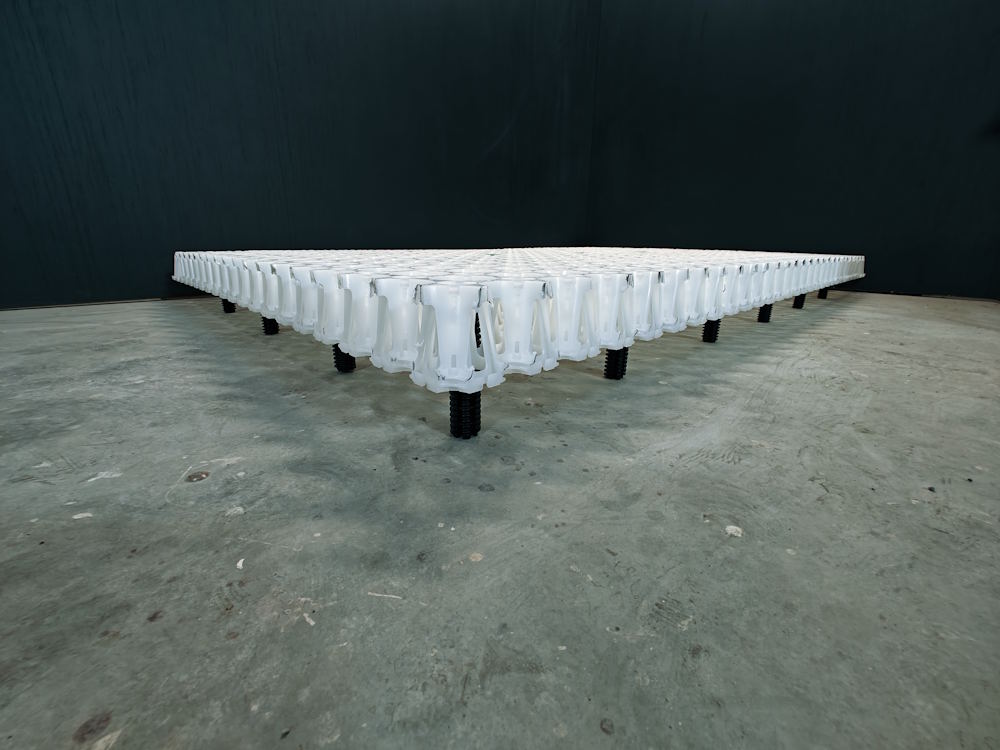
Place set screws in the threaded holes near the wall for extra support.
Preferably choose holes with double threading for extra load-bearing capacity.
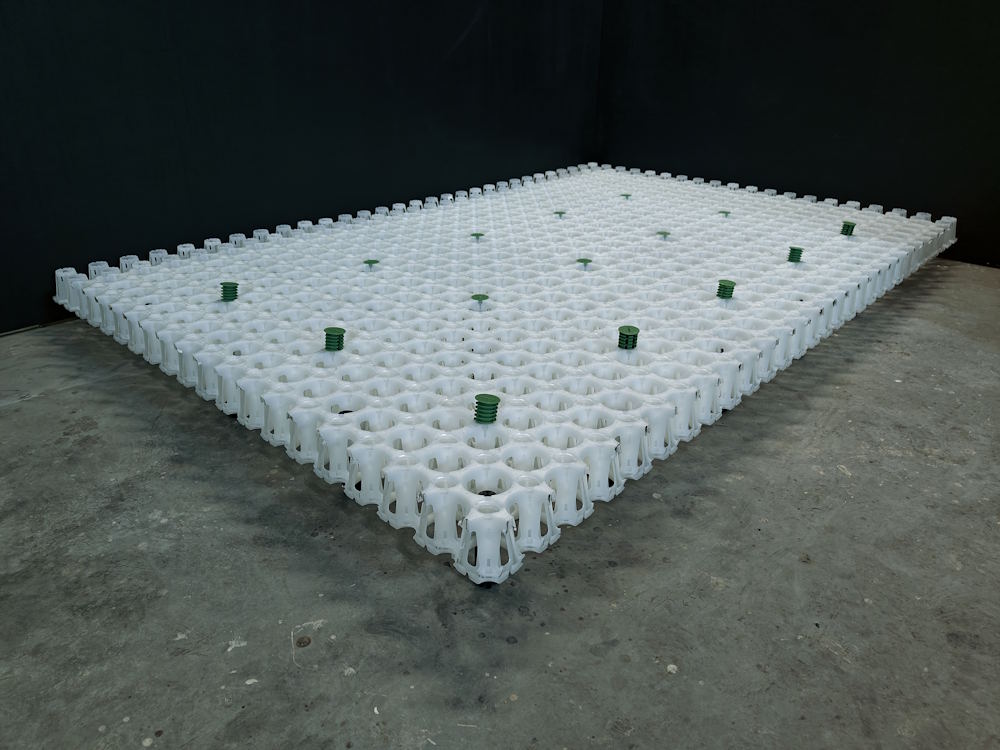
Screw the remaining green locking screws into the white structural plates for a solid connection.
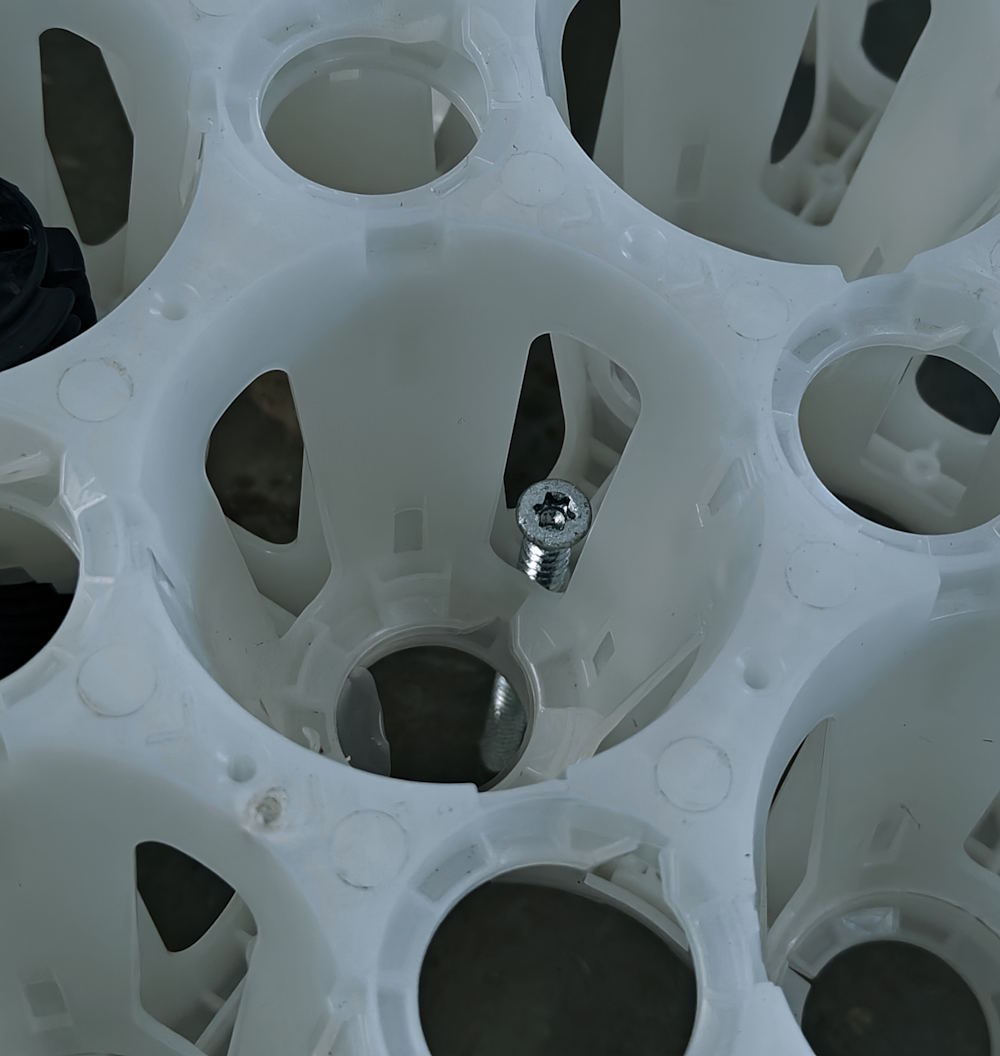
In addition to each black adjustment screw, you can attach up to four frame screws to the surface.
Wooden base: pre-drilling is not necessary. Place one frame screw every 1 m² for extra stability.
Concrete surface: first drill a hole Ø 6 mm through the existing hole in the structural plate and then screw in the frame screw. Always insert at least a few frame screws to fix the system.
Do not over-tighten the screw; once it is firmly in the substrate, the system is secured. Thanks to the thread in the structural plate, you do not have to turn the screw all the way down; once it is firmly in the substrate, the system is secured.
Multi-layer parquet can be glued to OSB 3/4 board layer, provided that the CircoFloor system is anchored to the substrate with at least four frame screws per m² and the OSB 3/4 board layer is attached to the CircoFloor system with at least 13 wood screws per m².
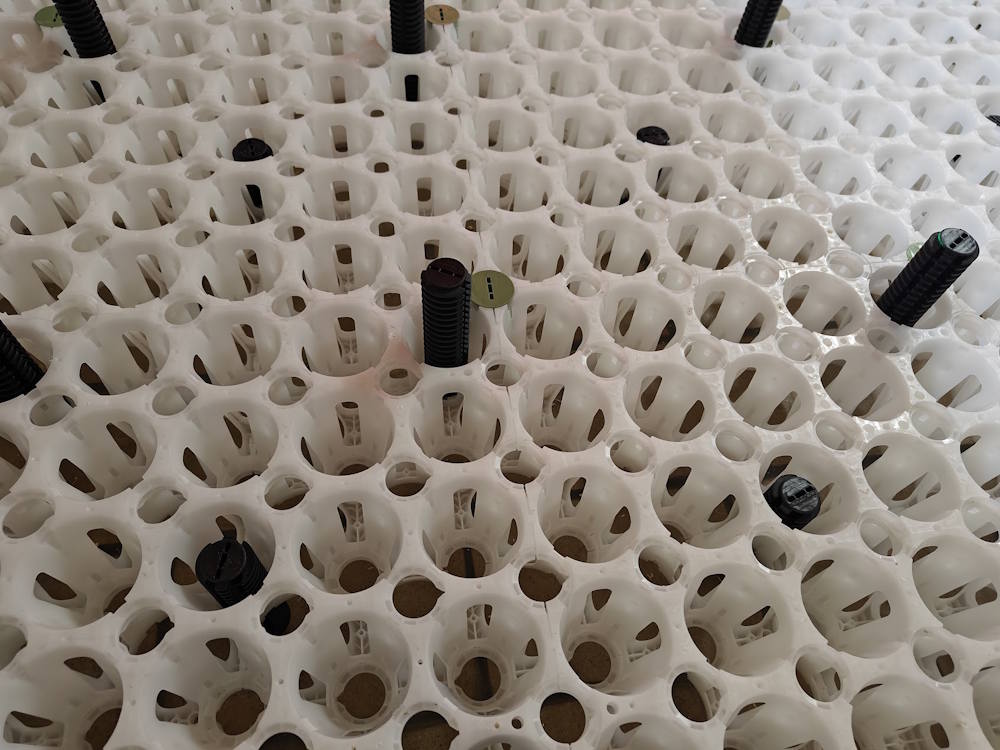
To be able to glue tiles onto CircoFloor, the surface may only deflect minimally under a certain point load.
That is why it is important, when tiling, to place one extra black adjusting screw next to each green locking screw.
Even with floating floor coverings, the additional adjustment screws limit deflection, although this is not necessary.
In future versions, the structure will be made of fibre-reinforced plastic, making these 7 additional adjustment screws unnecessary.
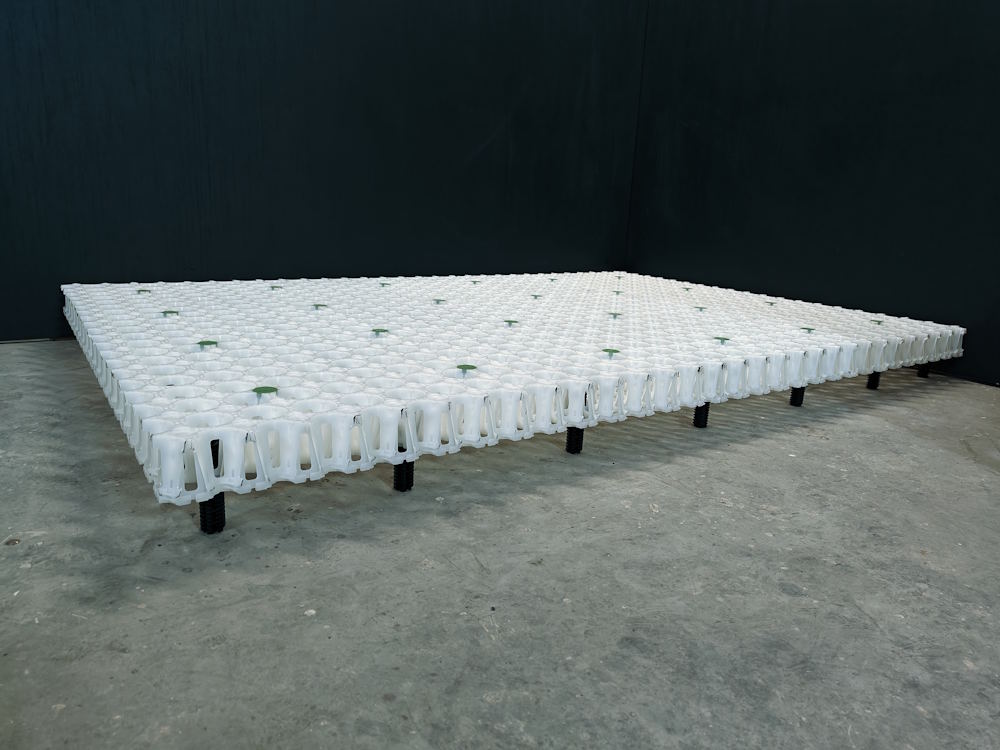
The system is now perfectly level and is firmly attached to the substrate.
Apply insulation granules
Only fill the system after the white structural plates are correctly assembled, the black adjusting screws are at the correct height and the green locking screws have been placed.
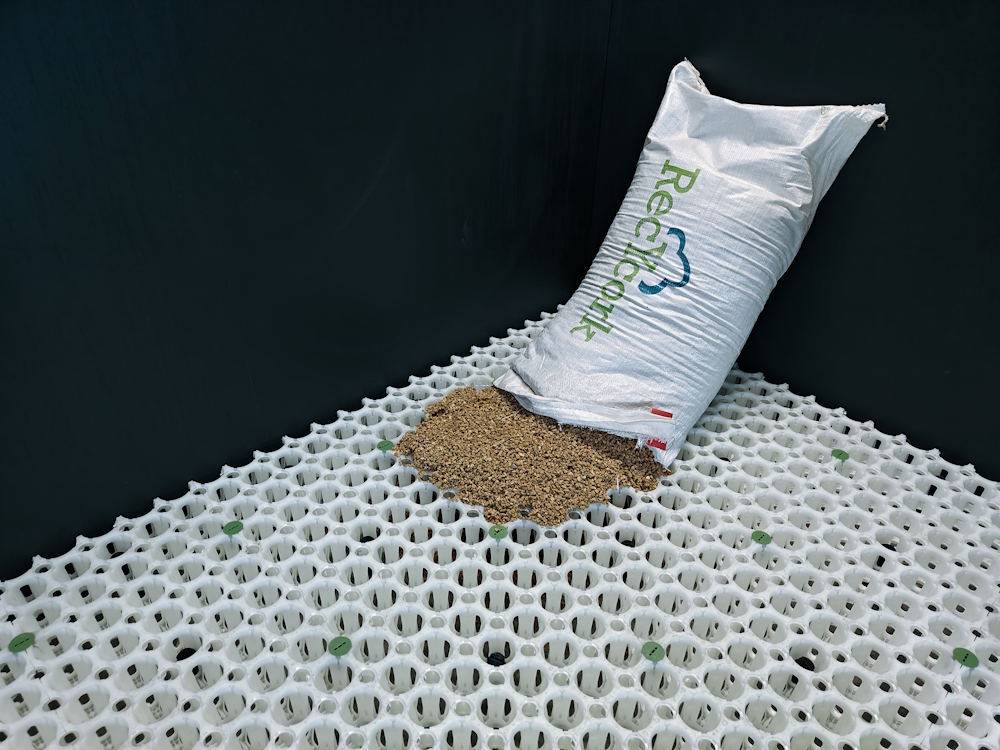
You can now fill the CircoFloor system with insulation material in the form of loose granules.
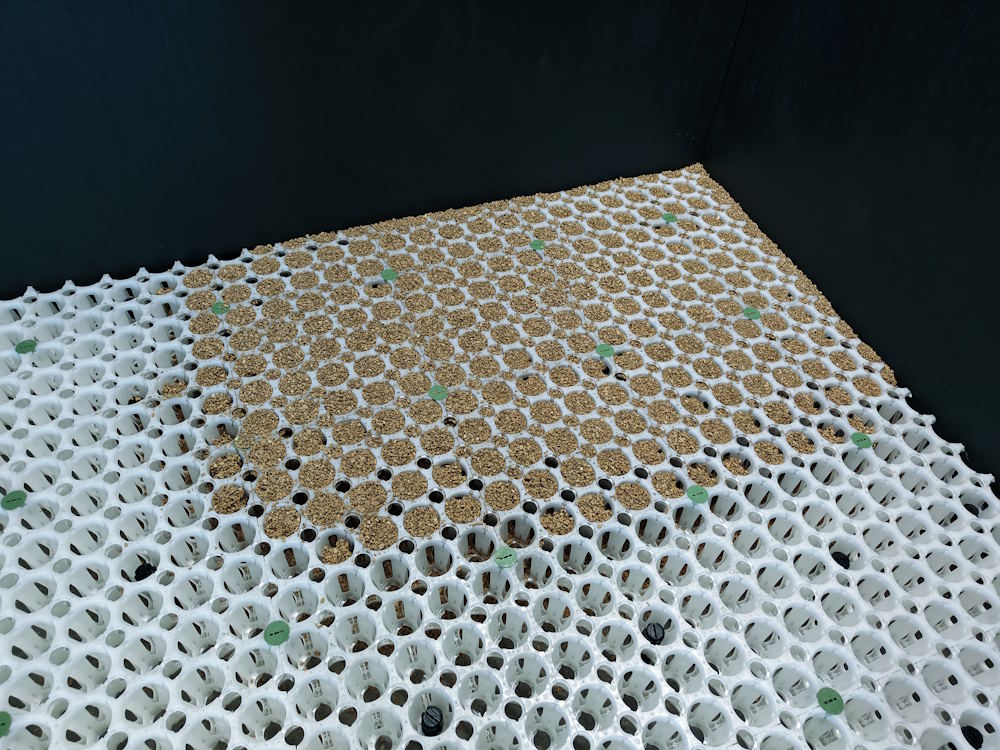
Use a brush or a slat to evenly distribute the granules until the system is completely filled, including the spaces underneath.
You will now notice that the step sound is greatly dampened and the floor feels high-quality.
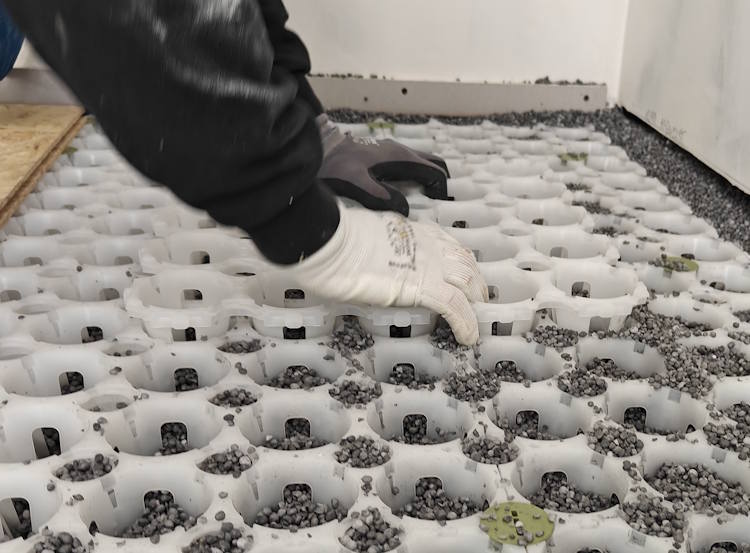
You can easily press the loose insulation with a loose white structure board.
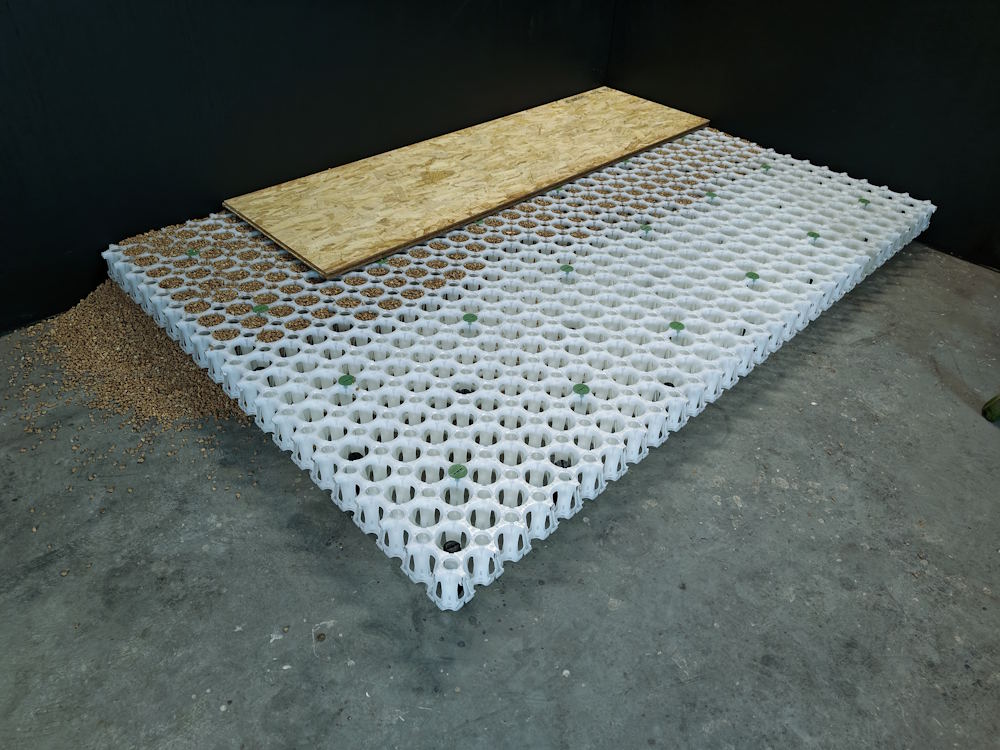
After the system is insulated, you can panel it and finish it as desired.
Install OSB, Fermacell or underfloor heating
Check on the floor construction page which top plate suits your floor finish. The chosen plate determines the stiffness, span, point load and finish.
View floor structures and finishes View dry underfloor heating
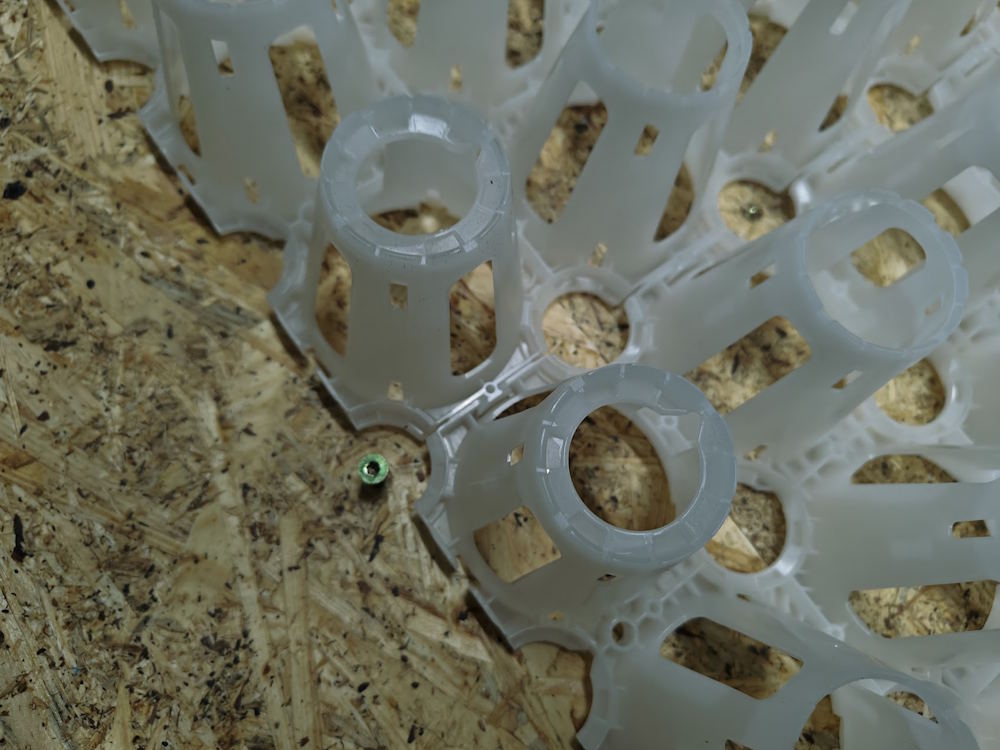
Screw OSB plates to the flat parts of the system. Use the white textured plates as a template to determine where to screw.
Always use screws with a diameter of 4.5 mm, which have a thread over the entire length, without a flat shaft, for optimum grip.
Place 3 screws across the width of the OSB plate every +- 40 cm. Placing 13 screws per m² is recommended.
One screw with a diameter of 4.5 mm has a maximum pull-out force of 40 kg.
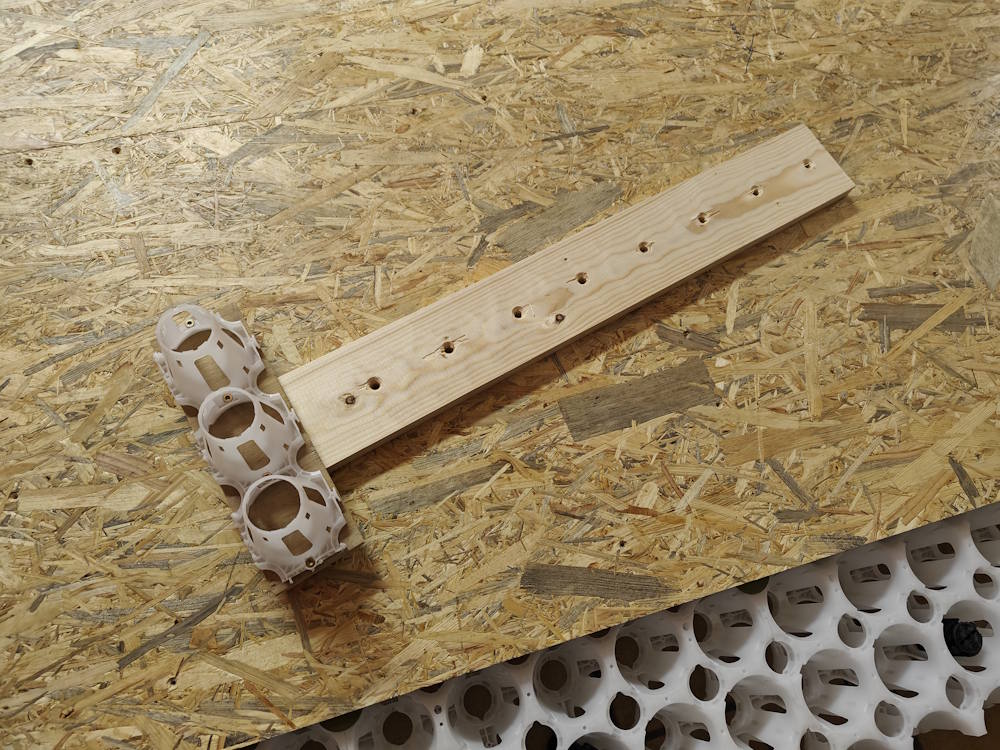
You can also create a template yourself that perfectly shows where you can screw.
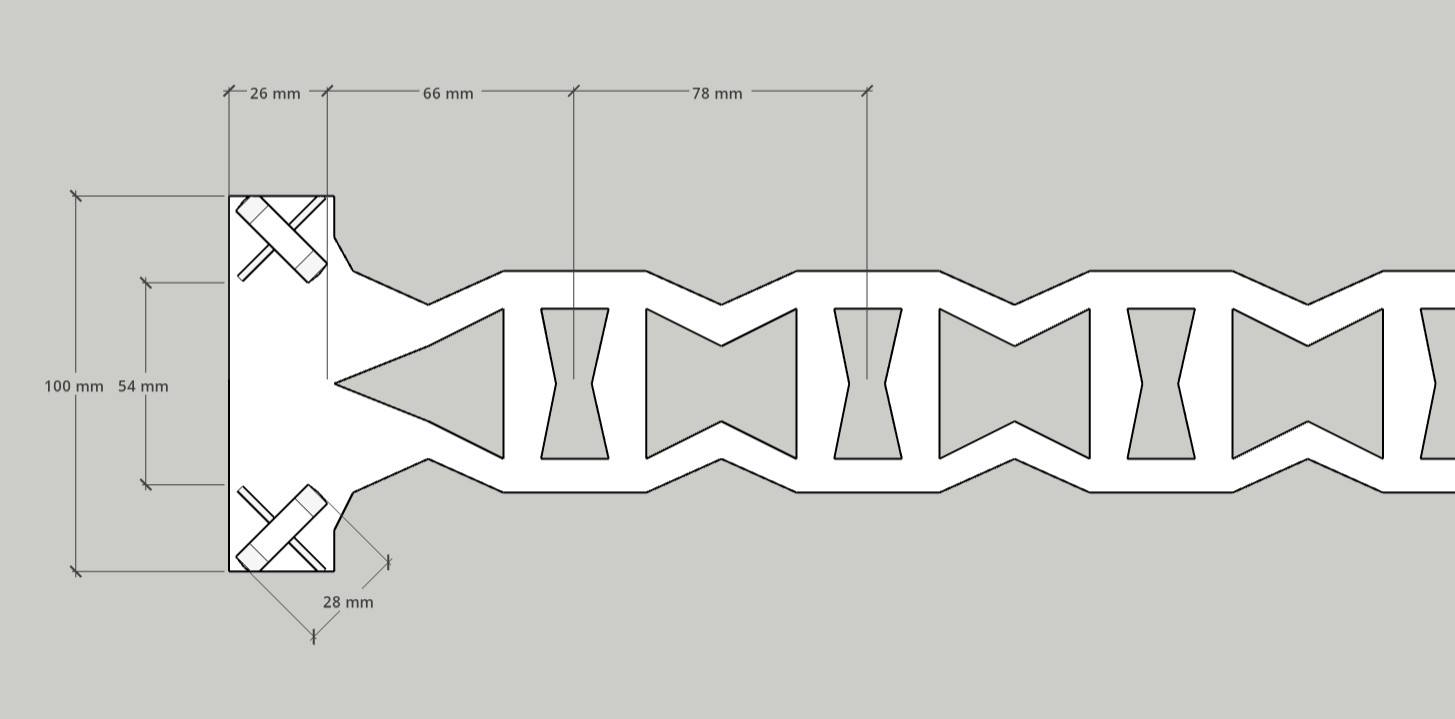
Here you can see a drawing with dimensions.
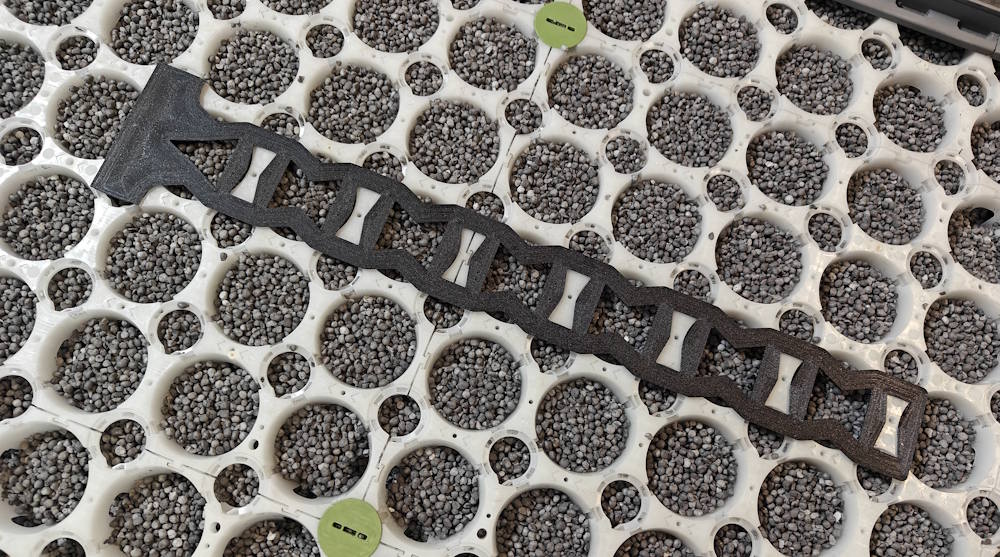
This plastic screw mold can also be purchased via our webshop with the CircoFloor products. You click the template into the white structural plates, so that you immediately see where you can safely place wood screws.
View the CircoFloor screw template in the webshop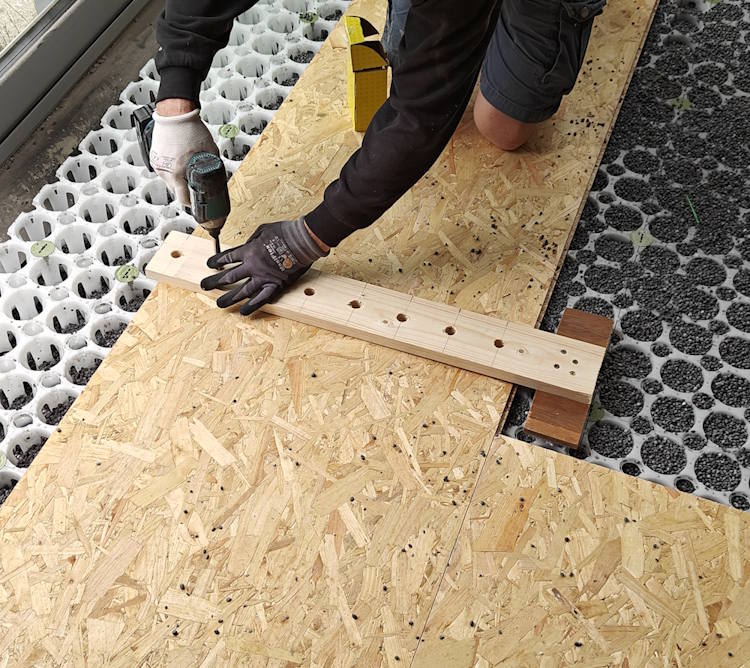
This greatly simplifies screwing the OSB to the CircoFloor system.
Working over pipes, conduits and obstacles
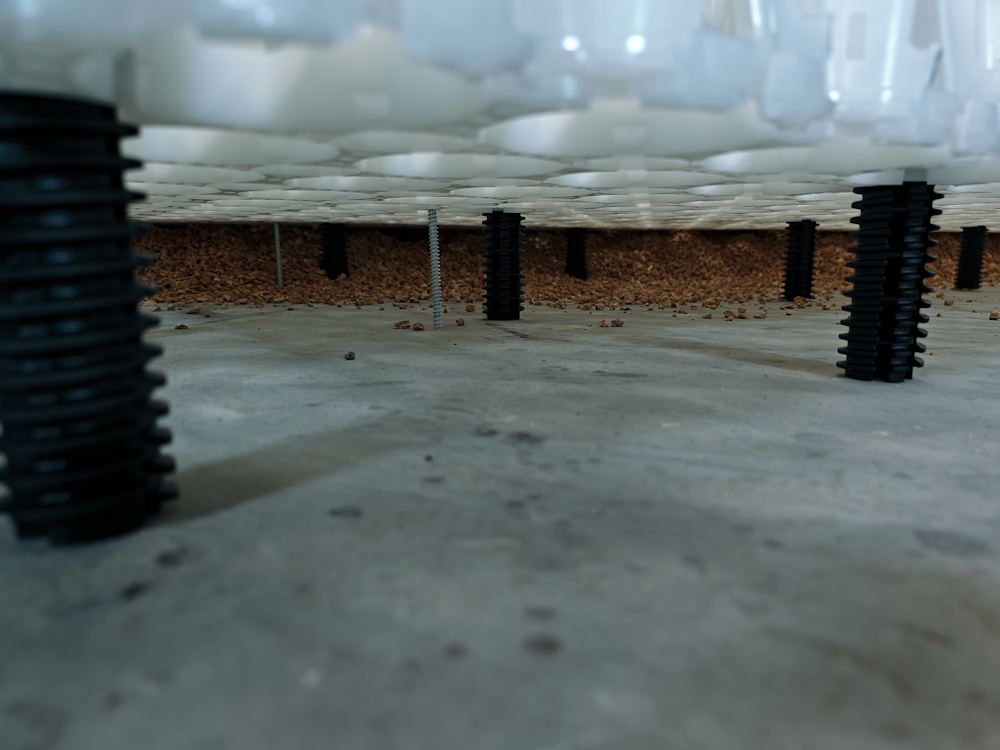
Situation 1: there is sufficient height
When there is sufficient height, place CircoFloor over the pipe or pipe. The pipe remains free under the system.
- Do not place the black adjusting screw directly on the tube.
- Move the adjusting screw to a different threaded hole.
- If necessary, place additional black adjusting screws on the left and right of the tube for extra strength.
- Make sure the tube is not compressed.
Good: black adjusting screws are next to the tube.
Wrong: a black adjusting screw loads the tube directly.
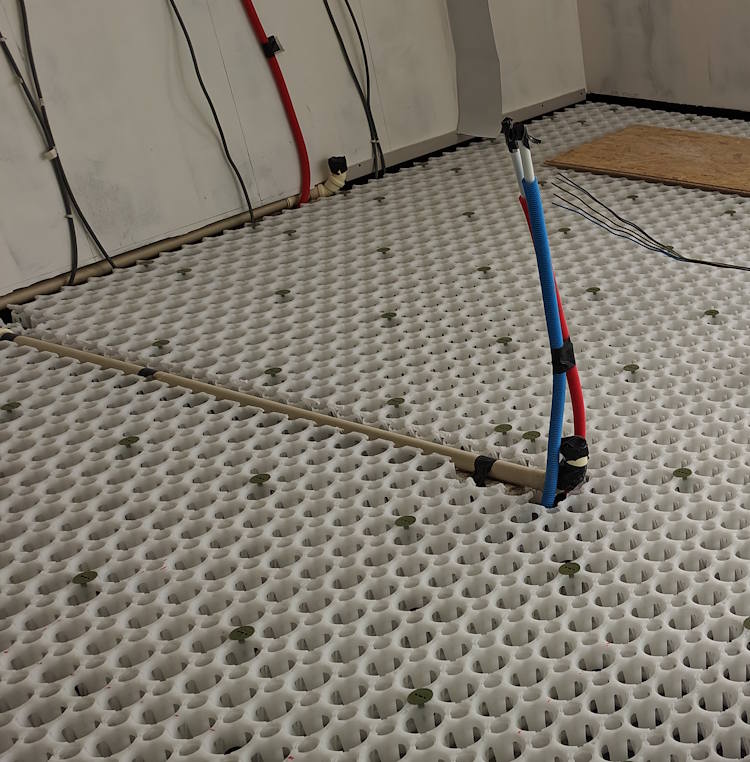
Situation 2: the pipe is too high
If the pipe is too high to place CircoFloor over it, treat the pipe as an obstacle or wall. Work with CircoFloor up to the pipe zone and then bridge with the top plate, for example OSB or a suitable gypsum fiber board.
Situation 3: ventilation duct or wide obstacle
For wider obstacles such as ventilation ducts, you work with extra support next to the duct. The span is determined by the top plate. Place additional black adjusting screws next to the obstacle so that the plate does not bend too much.
Maximum span
The standard distance between black adjusting screws is 39 cm. That is the normal module size of CircoFloor.
When you have to bridge a pipe or obstacle, the maximum span is determined by the top plate that is placed on CircoFloor. As a guideline value, a maximum of 50 cm in one direction can be used with a suitable 22 mm OSB plate, provided that additional adjusting screws are placed next to the obstacle.
When in doubt: use 39 cm or add extra support. Also consult the technical data sheet of the chosen top plate.
Resolve overhangs and edges
Sometimes CircoFloor cannot be placed completely against the wall or under an obstacle. In that case, the top plate can create a small overhang.
- Let the CircoFloor system stop slightly before the cantilever.
- Place a sturdy wooden slat or suitable edge support against the wall at the correct height.
- Screw this slat firmly into the wall or substructure.
- Allow the OSB or gypsum fiber board to extend over CircoFloor up to the lath.
- Check that the plate does not bend.
When acoustic decoupling is important, a hard connection to the wall can transmit sound. In that case, add a suitable acoustic strip or edge solution, or have the detailed structure checked.
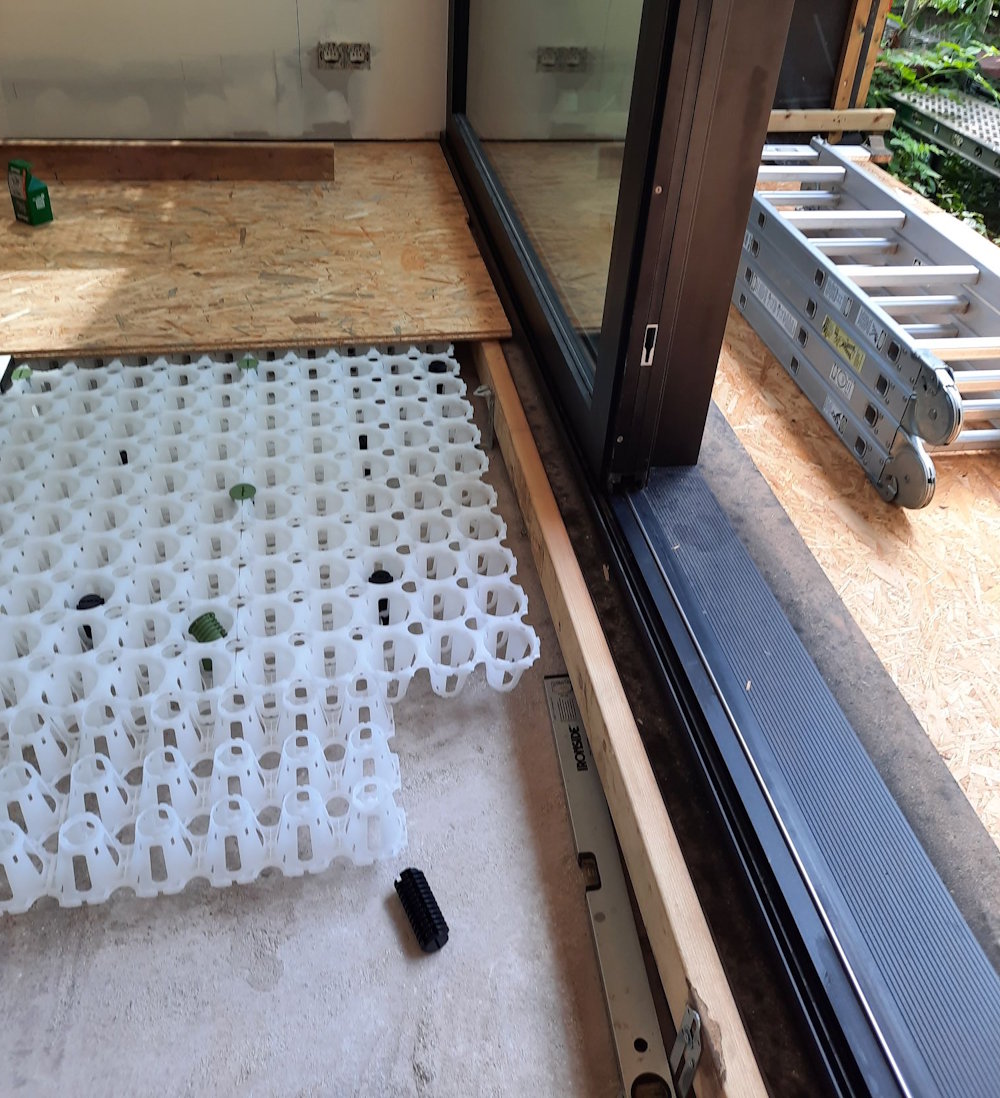
Principle: the top plate continues to a sturdy edge support against the wall.
Common mistakes
The adjusting screw is difficult to turn. What now?
First check whether the top plate and bottom plate are in the same direction and whether the threaded holes fit nicely together. Do not force the screw.
The structural plates remain open.
The plates are probably not completely aligned or the orientation is wrong. Pull the plates towards each other via the double threaded holes and tighten the screw again.
Can an adjusting screw rest on a tube?
No. Move the black adjusting screw to a different hole or place additional black adjusting screws next to the tube.
When do I install the green locking screws?
As soon as possible after the white structure plates and black adjusting screws have been installed. This means that the plates can no longer click apart when walked on.
How do I adjust the last millimeters?
Preferably use a hand screwdriver for fine adjustment. This way you can work more accurately and avoid over-tightening the screw.
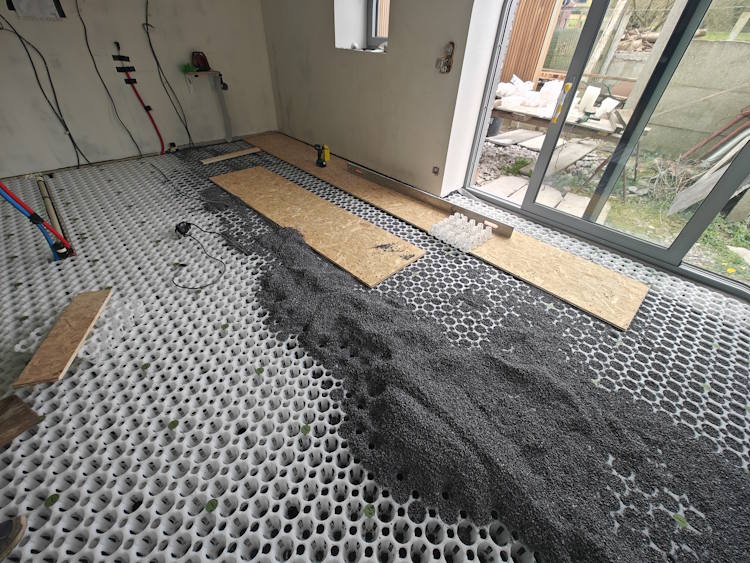
This is how to install the CircoFloor system efficiently and to a high standard.

Contact
Do you also want to make a positive impact and contribute to a more sustainable future?
Then contact us! Together we will create the perfect flooring solution for your project and make a difference.
Request a quote